Download
1 / 14
140 likes | 142 Views
Step-by-step guide on how to install the AQUA VIEW Sink Mixer SKC001 in the kitchen sink of a 2015 Berkshire 40RB motorhome. Includes instructions, photos, and helpful tips.

E N D
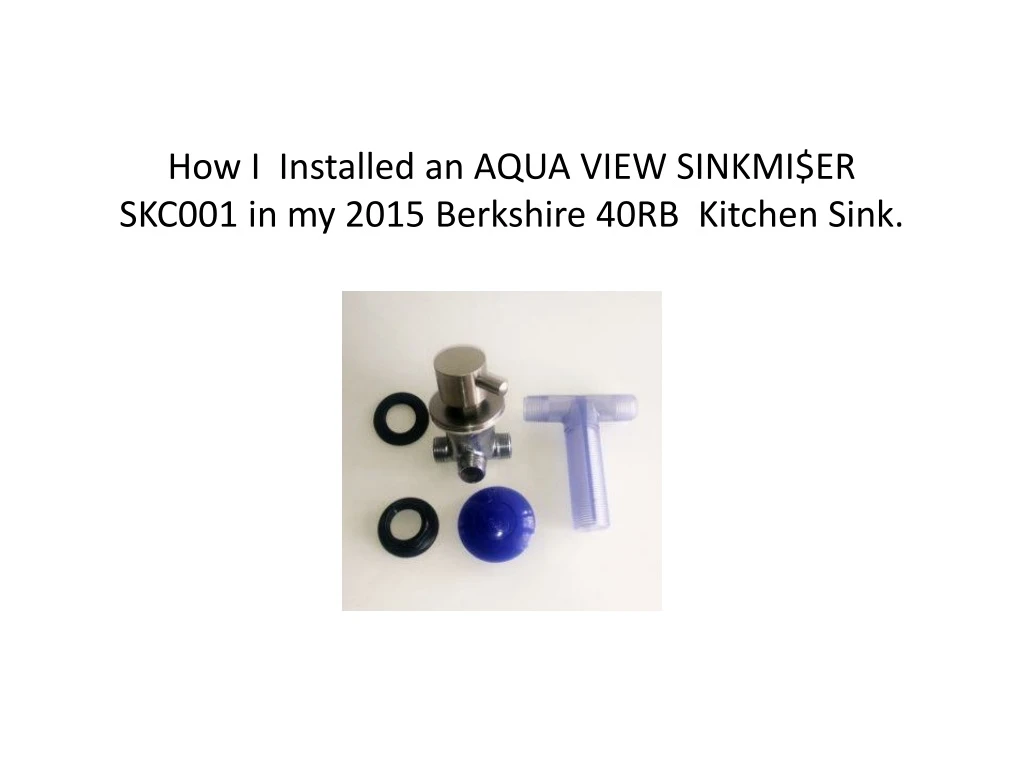
How I Installed an AQUA VIEW SINKMI$ER SKC001 in my 2015 Berkshire 40RB Kitchen Sink.
Before beginning, I suggest you turn off pump or disconnect city supply source and relieve pressure. If you are a full timer hooked up to a water source you can perform this after you reach a point when it will be inevitable but you may have to isolate or bypass the source of your water. Work begins in the wet bay where the pump, black/gray tanks and fresh water tanks are located. Remove the upper plate covering the end of the gray and black tanks. For this install I purchased ½ inch red PEX line (I selected red because it normally signifies HOT but also at least in my case water lines are white so it’s an easy visual of the recirculation line). This line needs to be run from this location in between the black and gray tanks over the beams to the other side of the motor home where the manifolds are located. I tried to use a few connectors as possible to minimize possible leaks. The installation will require some minor demo of the wall and floor panels. Do not be alarmed most of these items are put on with staples and easily reattached after the install is completed. Recirculation line from Showermi$er Black Tank Gray tank Recirculation line from Kitchen Sinkmi$er
To allow access to plumbing lines and to determine the best routing of the recirculating line remove the components (City and Tank fill, Filter and Tank flush) in the upper plate as shown. Remove the plate and mounting hardware. Remove this plate and plumbing connections
Depending on the plumbing and floor plan of the motor home the location of getting the PEX from the basement bay to the upper level will need to be determined. My location of the kitchen sink is on a slide-out next to the half bath. In my install, it was determined the easiest route was using the toilet chase shared by other plumbing for the bath and also kitchen sink. For this floor plan there were two vents located behind a small piece of paneling in the bedroom next to the wardrobe cabinet. I removed the trim and paneling exposing the area in the picture to the right. A hole was drilled large enough to allow the PEX to pass through. The area is tight with electrical ROMEX and cold and hot water lines. A hole was drilled at an angle to miss the vent line below. Because this area if very busy, I used 90 degree elbows to allow easy passage of the line. Vent Recirculation line to toilet chase way Recirculation line to basement compartment Hole to basement compartment
You do not have to remove the top of the chase as I did unless you have difficulty getting the line from the bedroom to the cabinet, if you do, carefully remove the top of the chase you will have to disconnect the toilet inlet connection. Route the PEX through the chase into the bath sink cabinet area after you remove the floor. Remember to reconnect the toilet connection before turning the water on or you will get an unpleasant surprise. Depending on your floor plan and if your kitchen sink is located on a slide or not will determine if you have to install a flex line from the PEX. This is a must to allow movement of the line during slide operation. Leave plenty of line you can always shorten it after installation if necessary. Bathroom cabinet with floor removed PEX to flex recirculation line Toilet chase way
This photo shows the kitchen sink cabinet with the floor removed and the flex line along with the drain and hot and cold lines. Those lines move during slide operation and left unrestricted. Kitchen sink cabinet floor removed Recirculation line flexible for slide operation
For making holes in the solid surface material used in motor homes I selected these two products (see photo’s below) The 1-3/8 inch hole (see Figure 1) for the magic mushroom and includes a water reservoir for cooling the blade and a template to keep the blade in one location and not roaming across the countertop. If you use other means to make the hole you will need to keep spraying water on it for cooling. The ¾ inch hole (see Figure 2) is for the Diverter valve. I did not find a reservoir so cooling was by spraying water on the bit. Also to prevent the blade from dancing across the countertop it is recommended that a template be constructed. A simple ½ inch piece of wood with a ¾ inch diameter hole, clamped to the surface will provide a professional hole. Regardless of what means you have to create the holes do not apply pressure to the drill let the weight of the drill do the work. It will not take long to complete the holes as the material is approximately ½ inch thick. For thicker installations consult Aqua View. There is one more item needed, that is a ceramic or cement 5/32” drill bit (not shown) for drilling a small retaining hole for the Diverter valve to keep it in place and not rotating. A 4 mm x 19 mm bolt (not included) is required. Refer to the location on the diverter valve. Figure 1 Figure 2
Determine the location preference for both the Diverter valve and the magic mushroom. Examine closely the cabinet/countertop construction components and adjust location before preceding. Once you start the hole you are committed. Remember the old saying measure twice cut once. Our location selected was mainly because this area of the counter was not used for anything while the area on the other side of the faucet had other uses and the valve would have been in the way. Again this is a customer preference. Diverter valve Magic Mushroom
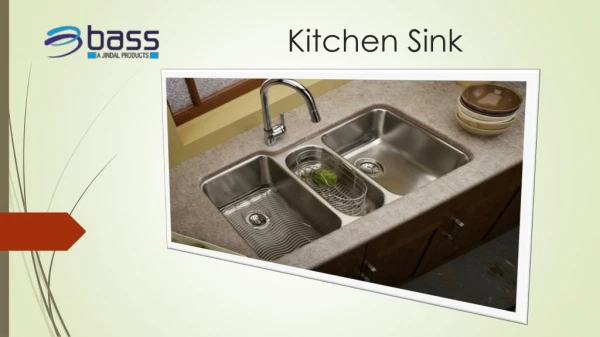
The next slide was not reduced to include this synopsis because there is a lot going on in it but instead the description of it is included here please toggle back and forth between the slides if needed. First off the magic mushroom requires a spacer because of the thickness of countertop supplied in RV’s. Such a spacer is available from Aqua View if you have not ordered your Sinkmi$er you may request one from them or you can make one from a ¼ inch piece of Luan or other materials. Just drill a 1-3/8 inch hole in the material. How and why the plumbing was done is simple. The purpose of this product is to save water but also to provide hot water to where it is needed. No one, including my wife, wants to wash dishes in cold or luke warm water and neither will sanitize. So to provide what is needed requires the hot water sent to the faucet to be plumbed to the diverter valve first and is recirculated back to the fresh water tank until the mushroom changes color indicating hot water is there. The Diverter has 3 positions, recirculation and two others. Those other two positions can be hooked up at your preference as on or off. If it is to be off you need to cap the Diverter outlet. We selected to have those connected together so when it is not on recirculation the faucet flow is on regardless if we turn the handle left or right. As for connections to the mushroom and diverter valve do not skimp on connectors as some cheaper products have been found to leak. We found product brand names “Shark” have good quality but there are other ones available. If you have concerns contact Aqua View support for assistance. Installing connectors is recommended to be done before you install the diverter valve or mushroom as there is not a lot of room to work under the sink so make sure connections are tight. The general rule is hand tight and then turn half a turn more. This is a general rule for most applications but if you need to tighten it more (I did) it will not be an issue. We used PEX in the sink area as well but you can use whatever material you wish as long as it is suited for water installations.
Diverter valve Outlet to kitchen sink valve Hot water to Inlet line Magic Mushroom Recirculation line from magic mushroom Spacer Recirculation from Diverter valve to magic mushroom Hot water to faucet
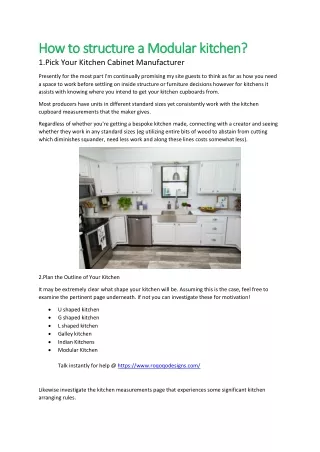
Hot water line from manifold to inlet on diverter valve Recirculation line
To faucet hot water inlet Hot water from Sinkmi$er diverter valve
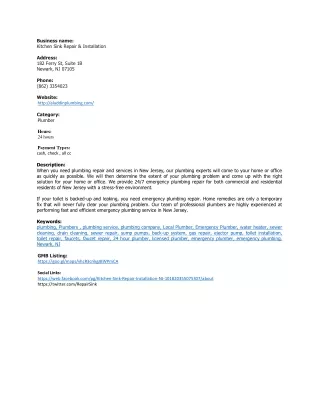
In our application I performed both the Sink and the Shower install so in this slide you will see two lines coming together. To prevent either from backing up to the other I installed check valves. The smaller picture below shows the Recirculating inlet to the fresh water tank. I believe most tanks have this unused connection (plugged). If not you can tee into the fill inlet but I would suggest you use check valve(s) as I did. Recirculation line from kitchen Sinkmi$er Check valve recommended Recirculating inlet Recirculation line from Showermi$er Recirculation line to fresh water tank
Those of us that have lived with the RV industry for years know how frugal they can be. A major percentage (expected to grow ) believe in this product and that it will save $ for us campers by providing less clean water into the gray tank while we wait for hot water. With the new model year this product will be installed at the factories on many new RV’s. Even if you do not dry camp the feature to alert those using the hot water that it has arrived at the faucet relieves the user that they don’t have to step into a cold stream of water. Give it a try you have nothing to lose and much more to gain “Safe Travels”. Light color In center means hot water