Download
1 / 100
1k likes | 1.11k Views
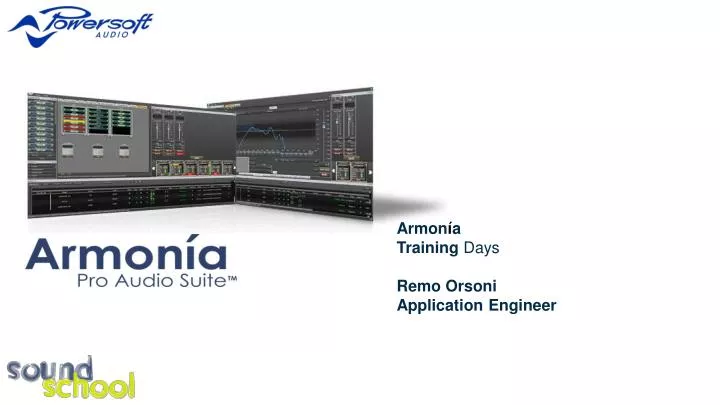
Armon í a Training Days Remo Orsoni Application Engineer. Armon í a Training Day, Program. Basic Setup >. Introducing the Armonía Pro Audio Suite environment. Total control of the system: fine tuning. Advanced Setup>. Let your virtual venue come alive. Go Live >.

E N D
Armonía Training Days Remo Orsoni Application Engineer
Armonía Training Day, Program Basic Setup > Introducing the Armonía Pro Audio Suite environment. Total control of the system: fine tuning. Advanced Setup> Let your virtual venue come alive. Go Live > Armonía: your first partner at the sound check! Sound Check > On air! Exercise > Maintenance > Ready for the next show.
Basic Setup: Designing the system from scratch> Add background images Drag and drop the item image (from the ribbon menu) into the workspace. Load an image.
Basic Setup: Designing the system from scratch> Add devices Drag and drop all the devices on the workspace.
Basic Setup: Designing the system from scratch> Add other items Adding racks and speakers to the workspace.
Basic Setup: Designing the system from scratch> The final draw The system is designed on screen!
Basic Setup: Grouping the system> System Subdivison Starting system view.
Basic Setup: Grouping the system> System Subdivison Select the group , then drag & drop it into the workspace.
Basic Setup: Grouping the system> System Subdivison Place the group into the workspace.
Basic Setup: Grouping the system> System Subdivison Associate a channel to a group by clicking: 1 – Assign 2 - Click on the channel rectangle.
Basic Setup: Grouping the system> System Subdivison View of the system.
Basic Setup: Grouping the system> System Subdivison The basic group ALL is selected, note the belonging channel.
Basic Setup: Grouping the system> System Subdivison The SUB group is selected.
Basic Setup: Grouping the system> Sub array steering subdivison Basic system, with an horizontal sub array with a 80° main lobe width.
Basic Setup: Grouping the system> Sub array steering subdivison Group overview with the system steering. note the different delay values applied on every channel.
Basic Setup: Grouping the system> Array shaping subdivison Complete system with sub control and array shaping.
Basic Setup: Grouping the system> Group Overview Basic system and its advanced groups.
Basic Setup: Events Handle> Activate events 1 - Choose “View” tab from Armonía main ribbon. 2 - Click on “Events”. 3- Click on “Events Console”.
Basic Setup: Events Handle> Monitoring overview 1 - Switch from “Registry” (monitor) and “Notify” (config). 2 - “Registry” shows the history of the events occurred. 3 - “Events Console” filters section: decide which type of real time events you would like to monitor. 4 - “Events Console” shows actual events that are occurring.
Basic Setup: Events> Configuration and setup 1 - Change mailing and modem configuration..
Basic Setup: Events Handle>Configuration and setup 2 - “Events” configuration, choose which monitor and which and how send them.
Basic Setup: Events Handle> Configuration and setup 3 – Managing contacts.
Basic Setup: Events Handle> Configuration and setup 4 – Active contact list.
Basic Setup: Events Handle> Events on Living Workspace 1 - Amplifiers “active background” will turn to red. 2 - Amplifiers tooltip will show the reasons of red background.
Basic Setup: Events Handle> Special events setup: GPO 1 - Amplifiers overview alarms led will turn on and his tooltip will show the reasons. 2 - Gpo has an amplifier details tab that allows to set up all thresholds.
Basic Setup: Saving system file Save the paw: 1 – Click the ribbon. 2 – Select save.
Advanced Setup Total control of the system: fine tuningAdvanced tools: how to edit all system features quickly
Advanced Setup> Source Selection The device tab will appears . Goes into tab general and click on the input routing button.
Advanced Setup> Source Selection Clicking on the source you can find all the possible option for that device.
Advanced Setup> Analog Backup 1 – Select the analog backup mode. 2 – Select the trim gain.
Advanced Setup> AESOP routing A typical Data plus Audio connection.In green the signal path, in red the audio path.
Advanced Setup> AESOP routing Select the KAESOP routing.
Advanced Setup> Routing selection> K Series Clicking on the source you can find all the possible routing for that device.
Advanced Setup> Routing selection> M Series Goes in the preset tab.
Advanced Setup> Routing selection> M Series Select the layout in the combo box.
Advanced Setup> Routing selection> M Series Press the mono mix button to activate the mono mix.
Advanced Setup> Routing selection> Ottocanali Series Double click on the device from workspace, The device tabs will appears. Goes into tab scheme and click on the input routing button.
Advanced Setup> Routing selection> Ottocanali Series Clicking on the source you can find all the possible routing for that device.
Advanced Setup> Output processing 1 – Output eq. 2 – Damping. 3 – Limiters.
Advanced Setup> Eq 1 – Enable/disable the filter. 2 – Set filter type. 3 – Set frequency. 4 – Set Q. 5- Set gain.
Advanced Setup> Eq 1 – Enable/disable the xover. 2 – Set xover type. 3 – Set Frequency. 4 – Set polarity. 5 - Set output Gain.
Advanced Setup> Eq 1 – Import the .csv file. 2 – Select the FIR filter 3 – Send the filter to the device memory. 4 – Enable/disable the filter. 5 – Edit the taps with a spreadsheet. 6 – Refresh the curve and the taps on the device (ie after an editing.) 7 - Remove the curve (a flat Eq will be applied.)
Advanced Setup> Damping 1 – Enable/disable the damping. 2 – Set the resistance to add. 3 – Conversion tool, to calculate the cable lenght.
Advanced Setup> Limiter 1 – Enable/disable the limiter. 2 – Set the trheshold Voltage. 3 – Set the attack time 4 - Set the release time.
Advanced Setup> Limiter> K Series 1 – Enable/disable the limiter 2 – Select the limiter type. 3 – Select the threshold in W. 4 – Set the attack time. 5 - Set the release time. 6 – Enable/diasble the soft knee. 7 – Actual GR and GR history.
Advanced Setup> Limiter> M Series 1 – Enable/disable the limiter 2 – Enable/disable the frequency shaping. 3 – Select the threshold in W. 4 – Set the attack time. 5 - Set the hold time. 6 – Set the release time. 7 – Enable/disable frequency shaping. 8 – Filters for the frequency shaping.
Advanced Setup> Editing the system> Device - Clipboard 1 – Right-click on amplifier icon to access main menu and choose “Device” sub-menu. 2 – Copy amplifier settings in the clipboard. 3 – Paste amplifier settings from the clipboard.
Advanced Setup> Editing the system> Device - *.pam 1 – Right-click on amplifier icon to access main menu and choose “Preset” sub-menu. 2 – Save amplifier settings on a pam file.. 3 – Load amplifier settings from a pam file.