Download
1 / 30
300 likes | 367 Views
Adding pictures to your website Week 8. Displaying “images” on web pages. How to Display “images” on web pages. What to Display…. How to create, change, modify images. How to Display “images” on web pages. Here is a simple rule of thumb:. Solid colors and sharp lines. “ GIF ”.

E N D
Adding pictures to your website Week 8
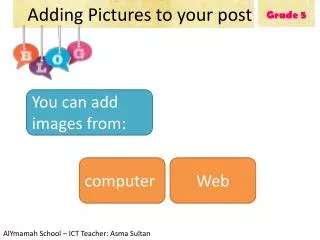
Displaying “images” on web pages How to Display “images” on web pages What to Display…. How to create, change, modify images.
How to Display “images” on web pages Here is a simple rule of thumb: Solid colors and sharp lines “ GIF ” Lots of colors “ JPG ”
Solid colors and sharp lines “ GIF ”
Lots of colors “ JPG ”
Resolution = 72 DPI Size to fit “ JPG ” 19 X Larger Low Resolution High Resolution 57K bytes 1,079K bytes
How to Display “images” on web pages Image Tag <img src =“file.gif ”>
How to Display “images” on web pages Image Tag < img src alt=“alt text” =“file.gif ” >
How to Display “images” on web pages Image Tag < img src alt=“alt text” =“file.gif ” > Border Options: Border = “0” Border = “1”
How to Display “images” on web pages Image Tag <img src=“horse.gif” alt=“My Horse” border=“1”>
This is an example of an image that is aligned to the right of the text. This is an example of an image that is aligned to the left of the text. If more text is displayed than the size of the picture it will wrap around the picture like this. Options: Border = “ # ” Align = left, right, top, middle, bottom
This is top This is middle Options: Border = “ # ” Align = left, right, top, middle, bottom
Options: Border = “ # ” Align = left, right, top, middle, bottom This is bottom
Options: Border = “ # ” Align = left, right, top, middle, bottom Width = “pixels” Height = “pixels” Width OR Height <img src=“horse.gif” alt=“My Horse”> Height = 125 Width = 125
Options: Border = “ # ” Align = left, right, top, middle, bottom Width = “pixels” Height = “pixels” Width OR Height <img src=“horse.gif” alt=“My Horse”> Height = 125 Width = 125
Displayed size 200 pixels Actual size 125 pixels Options: Border = “ # ” Align = left, right, top, middle, bottom Width = “pixels” Height = “pixels” Width OR Height <img src=“horse.gif” alt=“My Horse” > Width = “200”
Options: Border = “ # ” Align = left, right, top, middle, bottom Width = “pixels” Height = “pixels” Width OR Height <img src=“horse.gif” alt=“My Horse” width=“200 height=“100” >
Options: Border = “ # ” Align = left, right, top, middle, bottom Width = “pixels” Height = “pixels” Title = “My Dog Fido” <img src=“horse.gif” alt=“My Horse” width=“200” title=“My Dog Fido”>
My Web Page Here is a picture of my horse
My Web Page Here is a picture of my horse
Background Image Used in <BODY> tag <body> <body background=“back.gif”> <body background=“back.gif” bgproperties=“fixed”>
A review! .gif = Solid colors and sharp lines = Clipart .jpg = Lots of colors = Pictures Resolution = 72 DPI - Size to fit Image Tag: <img src=“filname.gif” > alt=“ A picture of my horse ” > Options: Align = left, right, top, middle, bottom Width or Height = “pixels ” Border = “pixels” Title = “My Dog” Background Image < body background = “ bg.gif ”> Option: bgproperties = “fixed”
spacer.gif Width Height Border Color = “1” pixel = “1” pixel = “0” = “transparent” Eat: Fruits & Veggies Eat: Fruits & Veggies Eat: Fruits & Veggies
spacer.gif Eat: <img src=“spacer.gif” width=“25” height=“1” > Fruits & Veggies Eat: Fruits & Veggies Eat: Fruits & Veggies Eat: Fruits & Veggies Eat: Fruits & Veggies
Wake up class! It’s time to get to work!
Class Web site: udel.edu/~cordeicf
Download: Sample pictures
pict1.gif pict2.gif pet4.gif pet1.gif pet2.gif pet3.gif Lorem ipsum dolor sit amet, consectetuer adipiscing elit. Curabitur gravida. Fusce non orci. Proin lacinia pellentesque ante. Donec dictum molestie elit. Pellentesque pede tortor, congue in, suscipit id, lacinia ac, nisl. Phasellus eleifend lorem et est. Lorem ipsum dolor sit amet, consectetuer adipiscing elit. Phasellus lacinia ligula nec sapien. Maecenas libero felis, molestie in, placerat a, vulputate quis, ligula. Ut convallis. Aliquam erat volutpat. Phasellus egestas. Vestibulum vel est tempus eros faucibus interdum. Sed eget mi vel quam semper placerat. Donec sed justo non odio dignissim lobortis. Praesent nec elit vel lacus consectetuer aliquet. Vivamus tincidunt placerat ipsum. Duis justo. lipsom.txt bg1.gif, bg2.gif, bg3.gif, bg4.gif, bg5.gif
Lesson 10 - EXAMPLES ex01.html - basic image tag ex02.html - border range from 0 through 100 ex03.html - Image in various sizes using Height and/or Width ex04.html - Image aligned to LEFT of text ex05.html - Image aligned to RIGHT of text ex06.html - TOP, MIDDLE & BOTTOM align ex07.html - TOP align ( with more than one line ) ex08.html - Multiple images w/ various aligning ex09.html - Background 1 ex10.html - Background 2 ( too busy ) ex11.html - Background 3 ( use of a Table #1) ex12.html - Background 4 ( use of a Table #2) ex13.html - Same background as "ex10.html" with table & bgproperties="fixed"