Download
1 / 8
80 likes | 90 Views
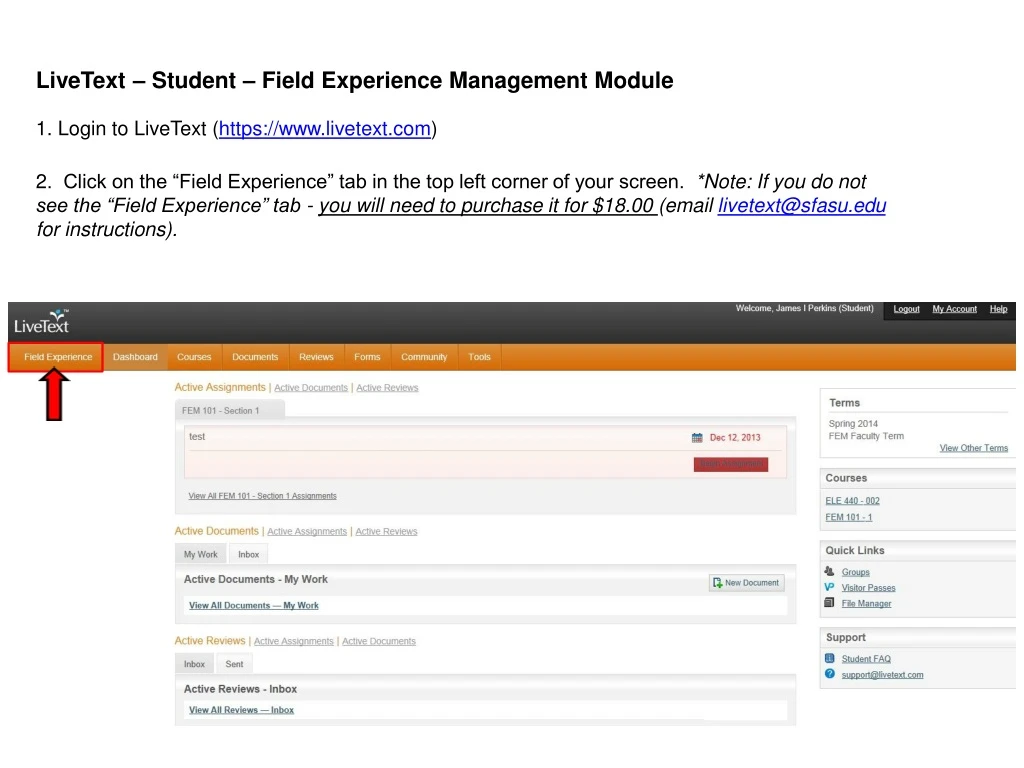
1. L ogin to LiveText ( https://www.livetext.com ). 2 . Click on the “Field Experience” tab in the top left corner of your screen. *Note: If you do not see the “Field Experience” tab - you will need to purchase it for $18.00 (email livetext@sfasu.edu for instructions).

E N D
1. Login to LiveText (https://www.livetext.com) 2. Click on the “Field Experience” tab in the top left corner of your screen. *Note: If you do not see the “Field Experience” tab - you will need to purchase it for $18.00 (email livetext@sfasu.edu for instructions). LiveText – Student – Field Experience Management Module
3. You will see a new page containing some of your placement information. *Note: Your placement information will be different, but the process is the same. 4. Click on “View Placement” on the far right of your screen.
5. You will see a series of boxes: -Box 1: Contains your placement details (Field Supervisor(faculty), Mentor(Site Supervisor), Site, etc.) -Box 2: Contains all assessments associated with your placement. Box 1 Box 2
6. You will see a series of boxes: (continued) -Box 3: Contains a time log where you will need to log all your hours and activities. These entries will need to be approved within FEM by your mentor teacher. Click on “+Add Hours” to enter the date and number of hours of the log entry. Under “Activity” enter the time frame it occurred (1:00-2:00). Under “Category” select which activity from the dropdown you are entering (absence, first day on campus, etc.). Box 3 -Box 4: Contains a “+ Add Attachments” option. This is where you will need to attach any required assignments. 7. Click on “+ Add Attachments” in Box 4. Box 4
8. You will see a pop-up window stating “Add Attachment”. You have 2 options for attaching a file: - LiveText Documents: you would use this option if you created your lesson plans in LiveText. - Add Attachments: you would use this option if you are uploading your lesson plans from another source (your computer, usb, etc.) 9. For the purposes of this demonstration we are going to use the “Add Attachments” option. Click on “Add Attachments”
10. Click on “+ Upload New File”. 11. Click on “Browse…”. Find the file(s) that you wish to upload. 12. Once LiveText has successfully uploaded your file it will state “Completed” to the right of your file name. 13. Click “Close” in the bottom right corner of the pop-up window.
14. You will now see your attached item listed under “Attachments”.
LiveText – Stephen F. Austin State University – Contact Information Room 212, McKibben Education Building livetext@sfasu.edu