Download

1 / 42
420 likes | 485 Views
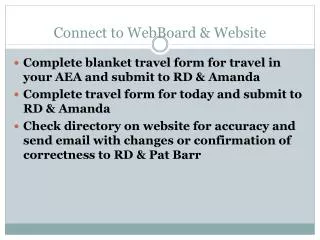
Introduction to the WebBoard. Terry Dennis. The WebBoard - Our Connection. The WebBoard URL is www.courses.dsu.edu:8080/~infs601. The WebBoard Log In Screen. WebBoard Main Screen. WebBoard Communications. Conferences Allows us to post announcements, explanations, questions, etc.

E N D
Introduction to the WebBoard Terry Dennis
The WebBoard -Our Connection The WebBoard URL is www.courses.dsu.edu:8080/~infs601
WebBoard Communications • Conferences • Allows us to post announcements, explanations, questions, etc. • Each Conference may have several different Topics and each Topic may have several different messages
Conferences This WebBoard currently has five conferences. The first three each have topics posted in them – a shown by both the plus sign (+) and the number in parentheses. To open a conference, simply click on the conference name (Assignments will be used as an example).
Topics within Conferences As you can see, clicking on the Assignment conference opened it and show the two topics currently in it. Topics are listed in reverse chronological order – that is, the most recent (last) topics are listed at the top (first).
Opening a Topic Opening a topic is identical to opening a conference. Simply click on it. The Example Assignment topic will be opened.
Topic/Message Display The topic is opened on the right-hand-side of the screen. The menu above the topic shows possible actions. The first line contains editing and response items; the second line contains movement (browsing) choices.
When deciding what you want to view, you can choose to view all topics (messages) or only new messages by clicking on All Messages or ?New (? is the number of new messages – 1 here). You can change this selection at any time. Note that if you click on New, the title changes to New Messages and only those conferences containing new messages are shown.
Reading a Message In summary - clicking on the conference, then on the posted topic opens the topic/message on the right-hand-side of the screen
Replying to a Message • You can Post a new topic or Reply to add to the current topic. Always use Reply to continue the current topic.
Replying to a Message • Clicking on Reply opens the message window. Type your reply in the lower (larger) box, then click the Post button. • Type reply here
Replying to a Message • Clicking the Post button does NOT post the message. It opens a Message Preview screen and runs spell check. If the message is OK, click the Post button on this screen.
If there are spelling errors in the message preview, WebBoard will let you know.To correct, click on the misspelled word (in red).
To accept the spelling offered, click the radio button “on” and click the “Done” button.
Spelling errors are corrected one-at-a-time. Repeat the process if there are additional errors. If not, click Post to post the message.
Error Correction If you see other errors, use the back-arrow at the top of the screen to go back to the previous screen and correct the error.
Reply Completed Once you have clicked Post from the preview screen, your reply is added to the topic
Attaching a File to a Message or Reply When you make your entry, be sure to click the “Attach file” box. After you click Post and then Post again, you can specify the file to be attached.
Use Browse to Select the File to Attach When you have selected the file, click Upload Now. The attachment will be attached to your message.
You can also click on the radio button that identifies the type of file being posted before uploading. • When you are attaching files, if you want to attach more than one, make sure the Yes button is clicked for “Upload another?” BEFORE you click on the “Upload Now” button. Attaching Files
Attaching Files When you are attaching files, if you want to attach more than one, make sure the Yes button is clicked for “Upload another?” BEFORE you click on the “Upload Now” button. You can also click on the radio button that identifies the type of file being posted before uploading.
Opening an Attachment To open an attachment, double click on it. You will be asked to save it. Do so, then use the appropriate application (Word, PowerPoint, Excel) to open it. Attachment
Deleting a Message If you have created a message, you can later delete it. You cannot delete messages that you have not authored. Simply open the message and click Delete on the message actions menu.
Deleting a Message When you click Delete, the following verification message appears, requestion confirmation (Yes) or (No). No cancels the Delete. It is generally a good idea to NOT delete messages relating to questions or problems, because others may want to go back and review them if they encounter a similar problem.
Printing Topics/Messages • To print a topic, click on the right side of the screen (to make sure that frame is active), then click the browser print button (or File/Print from the menu). Click here
WebBoard Main Menu Menu • Post – post to a conference (which must be open) • Refresh – update the screen • Search – find a particular topic • Chat (when available)– enter the chat room • Page – page another person on web board • More – Opens an additional menu • Help • Logoff
More – Additional Options Clicking on More opens the More Options menu. One of those options isMark All Read
Mark All Read Option • Mark All Read – when you click this option, it will mark all New messages as having been read by you. Once you do this, they will not show up as new any longer. You cannot select messages to mark – it marks them all as read, whether you have actually read them or not.
Current Users Option Clicking on the Current Users Option opens a list of users currently logged onto the WebBoard.
Paging Clicking on the bell icon next to the name of a current user opens an editor and allows you to type a message to them.
Page Editor Note that you are limited to 150 characters in your page message.
Page Example Once sent, the message pops up on the recipient's screen (shown below):
Modifying a User Profile Select More on the menu, then select Edit Your Profile under More Options. This will open the User Profile editor. (Since the profile is long, segments are shown over three slides.) Items with a red dot must have an entry.
Modifying a User Profile You can also use the radio buttons to make selections, although the defaults are normally recommended. When you have completed the modifications, click the Save button.
Questions? • If you have a questions about something related to the course, post it on the WebBoard. That way the entire class can benefit from the question and answer. • If you see a questions posted and know the answer, please use Reply to answer it. • If you have a personal question, send me an e-mail.
This concludes the introduction to the WebBoard. Play with it – experiment. You have the “rights” to delete anything you create. So post a message, see what it looks like, and then delete it (so we don’t clutter the board with practice messages).