Download
1 / 23
230 likes | 352 Views
Introduction to Blackboard 7. Roberta Sibulkin Staff Associate Training & Technical Support IT Helpdesk, LRC-310 http://it.worcester.edu 508.929.8856. Blackboard 7 Overview. eLearning software Use Internet Explorer 4.0+

E N D
Introduction to Blackboard 7 Roberta Sibulkin Staff Associate Training & Technical Support IT Helpdesk,LRC-310 http://it.worcester.edu508.929.8856
Blackboard 7 Overview eLearning software Use Internet Explorer 4.0+ May not work using AOL. Can log into AOL and minimize window. Then, use IE on the desktop to go to https://community.worcester.edu . Usefulness: Course Documents available online Links to sites
Benefits to Online Learning Course materials available 24 hours/day Enhanced methods of communication Such as Discussion boards, e-mail Student-centered Can “mix and match” instructional modes (on-line, traditional etc.)
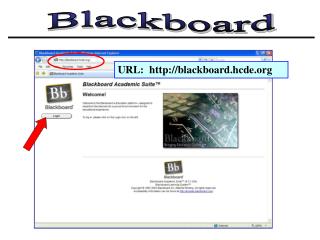
Blackboard 7 Login Open Internet Explorer and go to https://community.worcester.edu. This should redirect you to the Worcester State College Community System Login page. Under Login Here, type your WSC Network Username and Password then click the Login button. Under My Courses, click the link for the Blackboard course you wish to view or modify.
Blackboard 7 Main Screen Announcements Tabs Navigation Bar • Buttons, Graphics, and tabs make navigation easy and intuitive.
Control Panel Used to administer site and add course content Only available to: Instructors Teaching Assistants Graders System Administrators
Control Panel Open the Control Panel for a Course. Under My Courses on the FacStaff Central screen, click the link for the course you wish to modify. In the Navigation bar, click Control Panel. The Control Panel is divided into sections. Students use the Navigation Bar to move to various areas within a course shell, but do not have access to the Control Panel. Navigation Bar
Content Areas Provides tools necessary to add course information, documents, assignments, and external links Create assignments, handouts, and presentations in standard Microsoft Office applications. Save in native format (Word/PP etc.) for future revising, handouts, etc. Can save a second time as .pdf (Adobe Portable Document format ), HTML, mht, or mhtml format for use in Blackboard*mht format is not recognized by Macintoshes Continued Next Slide
Content Areas Documents for multiple sections of the same course can be stored in the My Website area of the Community System if anonymous access is activated or into specific document libraries if appropriate access rights are provided.Refer to the Using Your Sharepoint Personal sites documentation on http://it.worcester.edu (Beside Community System) or attend an upcoming workshop. External links to the documents can be createdin Blackboard .
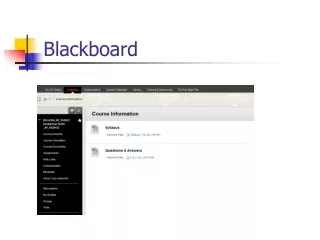
Content AreaCourse Information Course Information-Contains descriptive material about course Examples: Syllabus Course objectives Attendance Policies
Adding Content Information can be added to content areas in one of two ways: Click the Add Item button.Or… Select a document type from the Select drop-down menu and click OK.
Add a SyllabusUsing the Select menu. Choose Syllabus from the Select menu and click Go (Or click the + Item button). Under Content Area in the Control Panel, click Course Information.
Add a SyllabusUsing the Select menu (Continued) Beside 1 Syllabus Name, enter the name for the syllabus. Beside 2 Syllabus, choose eitherCreate New Syllabus or click Use existing file and browse to locate and select the file. Click Submit.
Create a Sample Syllabus Create a sample syllabus. Type thedocument in MS Word or other originating application. Save the document a second time as .pdf (portable document format-Read by Adobe Acrobat or Adobe Reader available at http://www.adobe.com), or htm or mht format (not readable on Macintoshes ) for use in Blackboard. Under Content Area in the Control Panel, click link for Course Information Click the Item button. Continued Next Slide
Create a Sample Syllabus Beside Name, enter the desired syllabus name. Under Content, click in box beside Attach local file and browse to locate the desired syllabus document. Click the Open button Choose other desired options and click the Submit button. Click OK.
Course Tools Contains various communication tools Examples: Announcements Calendar Staff Information Photo - 150 pixels x 150 pixels recommended Discussion Boards E-mail
Create an Announcement Create an Announcement. Announcements are used to post timely or critical information pertaining to the course. Assignments, Exams, Course Changes Can be typed directly into Blackboard or attached from an existing document. Under Course Tools in Control Panel, click link titled Announcements Click Add Announcement button Type directly into Blackboard or browse to locate an existing file Continued Next Slide
Create an Announcement Under Announcement Information, type a Subject and Announcement messageOr… browse to locate an existing file. Choose additional options and click the Submit button. Click OK.
Student Enrollment Students are automatically enrolled into Blackboard course shells that correspond with the courses in which they enrolled through the Registrar’s office or Graduate & Continuing Education, in Colleague/Datatel.
User Management This area provides tools for managing users and student enrollment. List Users enrolled in your course. Under User Management in the Control Panel, click on List/Modify Users. Click on the List All tab. Click on the List All button. Click OK.
Class Roster View a class roster. On the Navigation bar, click on Communication. Click on Roster On the Search tab type the last name or username of a specific person you wish to locate. Click Search Or… Click the List All tab followed by the List All button to display a list containing all students and instructors associated with the course.
Communication Center Send and receive e-mail May be rejected as “Junk” by some ISP mail clients. Uses WSC e-mail address Send message and request response during first or second week to determineaccount status and student’s knowledge of e-mail.
Helpful Information Help Guides Go to the IT Web Site http://it.worcester.edu Under Blackboard see Additional Guides Click on desired link under the Blackboard heading.