Download
1 / 32
320 likes | 486 Views
Lecture 1 Introduction to Graphical Rendering & Game Programming. What's different about computer graphical rendering & animation... ...compared to other types of drawing and animation?. http://www.justdisney.com/animation/animation.html

E N D
Lecture 1 Introduction to Graphical Rendering & Game Programming
What's different about computer graphical rendering & animation... ...compared to other types of drawing and animation? http://www.justdisney.com/animation/animation.html http://en.synesthesia.domanski.pro/theory/synchronization/
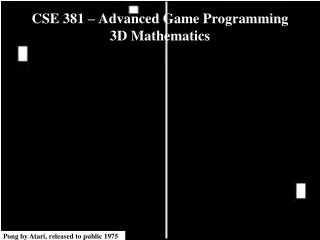
What's different about game programming... ...compared to other types of programming? The XNA Game Loop
Software Tools Visual Studio 2010 with XNA 4.0 POV-Ray Persistence of Vision Raytracing Program OpenGL and GLUT
CSC 275/575 Option 1 Microsoft Visual Studio 2010 http://www.microsoft.com/visualstudio/eng/downloads#d-2010-express XNA 4.0 http://www.microsoft.com/en-us/download/details.aspx?id=23714 R B Whittaker XNA Game Development http://rbwhitaker.wikidot.com/xna-tutorials
CSC 275/575 Option 2 Unity Game Engine http://unity3d.com/ Indie DB Review of Game Engines http://www.indiedb.com/engines Unity Cookie Game Engine Tutorials and Resources http://cgcookie.com/unity/
CSC 275/575 Option 3 OpenGL Main Website http://www.opengl.org/ GLUT OpenGL Utility Toolkit http://www.opengl.org/resources/libraries/glut/ POV-Ray Persistence of Vision Raytracer http://povray.org/ Instructor's Notes on Intro to POV-Ray
Laboratory Activities Spend some time becoming familiar with the software tools and other resources recommended for your course option. Option 1 - Download and Install software (Visual Studio 2010 & XNA 4.0) Create an XNA 4.0 bouncing ball (or other) simple demo Option 2 - Download and install Unity Game Engine Review Crash Course (or similar) tutorial overview Option 3 - Download and Install POV-Ray and/or Visual Studio & OpenGL/GLUT Option 4 - Coordinate with Instructor
Introduction to POV-Ray excerpts from Help on POV-Ray The Persistence of Vision(tm) Ray-Tracer creates three-dimensional, photo-realistic images using a rendering technique called ray-tracing. It reads in a text file containing information describing the objects and lighting in a scene and generates an image of that scene from the view point of a camera also described in the text file. Ray-tracing is not a fast process by any means, but it produces very high quality images with realistic reflections, shading, perspective and other effects.
Understanding POV-Ray's Coordinate System First, we have to tell POV-Ray where our camera is and where it is looking. To do this, we use 3D coordinates. The usual coordinate system for POV-Ray has the positive y-axis pointing up, the positive x-axis pointing to the right, and the positive z-axis pointing into the screen as follows:
This kind of coordinate system is called a left-handed coordinate system. If we use our left hand's fingers we can easily see why it is called left-handed. We just point our thumb in the direction of the positive x-axis, the index finger in the direction of the positive y-axis and the middle finger in the positive z-axis direction. We can only do this with our left hand. If we had used our right hand we would not have been able to point the middle finger in the correct direction. The left hand can also be used to determine rotation directions. To do this we must perform the famous Computer Graphics Aerobics exercise. We hold up our left hand and point our thumb in the positive direction of the axis of rotation. Our fingers will curl in the positive direction of rotation. Similarly if we point our thumb in the negative direction of the axis our fingers will curl in the negative direction of rotation.
A First POV-Ray Program camera { location <0,2,-2> look_at <0,1,2> } sphere { <0,1,2>,1 texture { pigment { color red 1 green 1 blue 2} } }
camera { location <0,2,-2> look_at <0,1,2> } light_source { <3,5,-3> color red 1 green 1 blue 1 } sphere { <0,1,2>,1 texture { pigment { color red 1 green 1 blue 2} } }
camera { location <0,2,-2> look_at <0,1,2> } light_source { <3,5,-3> color red 1 green 1 blue 1 } sphere { <0,1,2>,1 texture { pigment { color red 1 green 1 blue 2} finish { phong 1} } }
camera { location <0,2,-2> look_at <0,1,2> } light_source { <3,5,-3> color red 1 green 1 blue 1 } plane { <0,1,0>,0 texture { pigment { color green 1} } } sphere { <0,1,2>,1 texture { pigment { color red 1 green 1 blue 2} finish { phong 1} } }
Simple Shapes Box #include "colors.inc" #include "shapes.inc" #include "textures.inc" #include "stones.inc" camera { location <0,4,-5> look_at <0,0,2> } light_source { <3,5,-3> color red 1 green 1 blue 1 } light_source { <-10,5,3> White} box { <-1, 0, -1>, // Near lower left corner < 1, 0.5, 3> // Far upper right corner texture { T_Stone25 // Pre-defined from stones.inc scale 4 // Scale by the same amount in all // directions } rotate y*20 // Equivalent to "rotate <0,20,0>" }
Cone camera { location <0,4,-5> look_at <0,0,2> } light_source { <3,5,-3> color red 1 green 1 blue 1 } light_source { <-10,5,3> color red 1 green 1 blue 1 } cone { <0, 1, 0>, 0.3 // Center and radius of one end <1, 2, 3>, 1.0 // Center and radius of other end texture { pigment { color red 1 green 0 blue 1} finish { phong 1} rotate y*60 rotate z*30 } }
Cylinder camera { location <0,4,-5> look_at <0,0,2> } light_source { <3,5,-3> color red 1 green 1 blue 1 } light_source { <-10,5,3> color red 1 green 1 blue 1 } cylinder { <0, 1, 0>, // Center of one end <1, 2, 3>, // Center of other end 0.5 // Radius open // Remove end caps texture { pigment { color red .5 green 1 blue .5} finish { phong 1} rotate y*60 rotate z*30 } }
Plane #include "colors.inc" camera { location <0,4,-5> look_at <0,0,2> } light_source { <3,5,-3> color red 1 green 1 blue 1 } light_source { <-10,5,3> color red 1 green 1 blue 1 } plane { <0, 1, 0>, -1 pigment { checker color Red, color Blue } }
Textures #include "colors.inc" #include "shapes.inc" #include "textures.inc" #include "stones.inc" : sphere { <-1,1,3>,1 texture { T_Stone1 } } sphere { <1,1,3>,1 texture { pigment { Jade } } } sphere { <0,1,2>,1 texture { pigment { color red 3 green 0 blue 1} finish { Metal} } } sphere { <0,1,4>,1 texture { pigment { color red 1 green 1 blue 2} finish { Metal} } } sphere { <-2,1,4>,1 texture { Rosewood} } sphere { <2,1,4>,1 texture { pigment { Blue_Sky} finish { Metal} } }
/ Persistence Of Vision raytracer version 3.0 sample file. // File by Dieter Bayer // Perspective camera example #version 3.0 global_settings { assumed_gamma 2.2 } #include "colors.inc" // camera used for perspective projection (POV-Ray standard) // looking at the center of the cage camera { perspective location <-20, 30, -40> right <4/3, 0, 0> up <0, 1, 0> direction <0, 0, 1> look_at <0, 10, 0> angle 70 } background { color red 0.078 green 0.361 blue 0.753 } light_source { <100, 100, -100> color Gray60 } light_source { <-100, 100, -100> color Gray60 } #declare My_Texture_1 = texture { pigment { color red 1 green 0.75 blue 0.33 } finish { diffuse 1 phong 0 phong_size 0 reflection 0 refraction 0 ior 0 } } triangle { <50, -4, 50> <-50, -4, 50> <-50, -4, -50> texture { My_Texture_1 } } triangle { <50, -4, 50> <-50, -4, -50> <50, -4, -50> texture { My_Texture_1 } } #declare My_Texture_2 = texture { pigment { color red 1 green 0.9 blue 0.7 } finish { diffuse 0.5 phong 0.5 phong_size 3 reflection 0.5 refraction 0 ior 0 } } /* red */ #declare My_Texture_3 = texture { pigment { color red 1 green 0 blue 0 } finish { diffuse 0.5 phong 0.5 phong_size 3 reflection 0.5 refraction 0 ior 0 } }
/* yellow */ #declare My_Texture_6 = texture { pigment { color red 1 green 1 blue 0 } finish { diffuse 0.5 phong 0.5 phong_size 3 reflection 0.5 refraction 0 ior 0 } } sphere { <+10, 0, +10>, 4 texture { My_Texture_3 } } sphere { <-10, 0, -10>, 4 texture { My_Texture_6 } } sphere { <+10, 0, -10>, 4 texture { My_Texture_5 } } sphere { <-10, 0, +10>, 4 texture { My_Texture_4 } } sphere { <-10, 20, -10>, 4 texture { My_Texture_6 } } sphere { <+10, 20, -10>, 4 texture { My_Texture_6 } } sphere { <-10, 20, +10>, 4 texture { My_Texture_6 } } sphere { <+10, 20, +10>, 4 texture { My_Texture_6 } } cylinder { <-10, 0, -10>, <+10, 0, -10>, 2 texture { My_Texture_2 } } cylinder { <+10, 0, -10>, <+10, 0, +10>, 2 texture { My_Texture_2 } } cylinder { <+10, 0, +10>, <-10, 0, +10>, 2 texture { My_Texture_2 } } cylinder { <-10, 0, +10>, <-10, 0, -10>, 2 texture { My_Texture_2 } } cylinder { <-10, 20, -10>, <+10, 20, -10>, 2 texture { My_Texture_2 } } cylinder { <+10, 20, -10>, <+10, 20, +10>, 2 texture { My_Texture_2 } } cylinder { <+10, 20, +10>, <-10, 20, +10>, 2 texture { My_Texture_2 } } cylinder { <-10, 20, +10>, <-10, 20, -10>, 2 texture { My_Texture_2 } } cylinder { <-10, 0, -10>, <-10, 20, -10>, 2 texture { My_Texture_2 } } cylinder { <-10, 0, +10>, <-10, 20, +10>, 2 texture { My_Texture_2 } } cylinder { <+10, 0, +10>, <+10, 20, +10>, 2 texture { My_Texture_2 } } cylinder { <+10, 0, -10>, <+10, 20, -10>, 2 texture { My_Texture_2 } } /* green */ #declare My_Texture_4 = texture { pigment { color red 0 green 1 blue 0 } finish { diffuse 0.5 phong 0.5 phong_size 3 reflection 0.5 refraction 0 ior 0 } } /* blue */ #declare My_Texture_5 = texture { pigment { color red 0 green 0 blue 1 } finish { diffuse 0.5 phong 0.5 phong_size 3 reflection 0.5 refraction 0 ior 0 } }
Blobs Blobs are an interesting and flexible object type. Mathematically they are iso-surfaces of scalar fields, i. e. their surface is defined by the strength of the field in each point. If this strength is equal to a threshold value you're on the surface otherwise you're not. Picture each blob component as an object floating in space. This object is filled with a field that has its maximum at the center of the object and drops off to zero at the object's surface. The field strength of all those components are added together to form the field of the blob. Now POV-Ray looks for points where this field has a given value, the threshold value. All these points form the surface of the blob object. Points with a greater field value than the threshold value are considered to be inside while points with a smaller field value are outside. #include "colors.inc" camera { angle 15 location <0,2,-10> look_at <0,0,0> } light_source { <10, 20, -10> color White } light_source { <-10, 10, 10> color White } light_source { <0, -20, -10> color White } blob { threshold 0.6 sphere { <.5,0,0>, .8, 1 pigment {Blue} } sphere { <-.5,0,0>,.8, 1 pigment {Pink} } finish { phong 1 } } In the example code below we will change the threshold value between 0.01 and 0.9.
#include "colors.inc" camera { angle 20 location<0,2,-10> look_at<0,0,0> } light_source { <10, 20, -10> color White } light_source { <-10, 20, 10> color White } blob { threshold .65 sphere { <-.23,-.32,0>,.43, 1 scale <1.95,1.05,.8> } //palm sphere { <+.12,-.41,0>,.43, 1 scale <1.95,1.075,.8> } //palm sphere { <-.23,-.63,0>, .45, .75 scale <1.78, 1.3,1> } //midhand sphere { <+.19,-.63,0>, .45, .75 scale <1.78, 1.3,1> } //midhand sphere { <-.22,-.73,0>, .45, .85 scale <1.4, 1.25,1> } //heel sphere { <+.19,-.73,0>, .45, .85 scale <1.4, 1.25,1> } //heel sphere { <-.65,.28,-.05>, .26, -1 } //counteract pinky knuckle bulge sphere { <-.65,-.28,0>, .26, -1 } //counteract pinky palm bulge sphere { <-.3,.44,-.05>, .26, -1 } //counteract ring knuckle bulge sphere { <-.3,-.28,0>, .26, -1 } //counteract ring palm bulge sphere { <.05,.49,-.05>, .26, -1 } //counteract middle knuckle bulge sphere { <.05,-.28,0>, .26, -1 } //counteract middle palm bulge sphere { <.4,.512,-.05>, .26, -1 } //counteract index knuckle bulge sphere { <.4,-.4,0>, .26, -1 } //counteract index palm bulge sphere { <.85,-.68,-.05>, .25, -1 } //counteract thumb knuckle bulge sphere { <.41,-.7,0>, .25, -.89 } //counteract thumb heel bulge cylinder { <-.65,-.28,0>, <-.65,.28,-.05>, .26, 1 } //lower pinky cylinder { <-.65,.28,-.05>, <-.65, .68,-.2>, .26, 1 } //upper pinky cylinder { <-.3,-.28,0>, <-.3,.44,-.05>, .26, 1 } //lower ring cylinder { <-.3,.44,-.05>, <-.3, .9,-.2>, .26, 1 } //upper ring cylinder { <.05,-.28,0>, <.05, .49,-.05>, .26, 1 } //lower middle cylinder { <.05,.49,-.05>, <.05, .95,-.2>, .26, 1 } //upper middle cylinder { <.4,-.4,0>, <.4, .512, -.05>, .26, 1 } //lower index cylinder { <.4,.512,-.05>, <.4, .85, -.2>, .26, 1 } //upper index cylinder { <.41, -.95,0>, <.85, -.68, -.05>, .25, 1 } //lower thumb cylinder { <.85,-.68,-.05>, <1.2, -.4, -.2>, .25, 1 } //upper thumb pigment { White } }