Download
1 / 26
260 likes | 374 Views
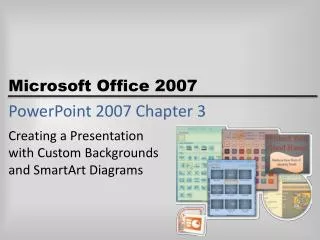
PowerPoint Presentation to Accompany GO! with Microsoft ® Excel 2007 Comprehensive 1e Chapter 6 Using Named Ranges, Templates, Lookup Values, and 3-D References. Objectives. Create Formulas Using Named Ranges Utilize Lookup Lists Customize and Use Microsoft-Created Templates

E N D
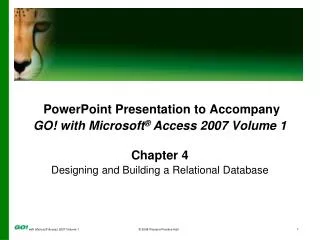
PowerPoint Presentation to Accompany GO! with Microsoft® Excel 2007 Comprehensive 1e Chapter 6 Using Named Ranges, Templates, Lookup Values, and 3-D References
Objectives • Create Formulas Using Named Ranges • Utilize Lookup Lists • Customize and Use Microsoft-Created Templates • Transpose Data in a Worksheet and Apply Cell Styles
Objectives • Use 3-D References to Link Data in Worksheets and Workbooks and Create a Workspace • Create Hyperlinks
Create Formulas Using Named Ranges • A named range identifies a group of cells that can be used in a formula, rather than the cell references. • A named cell is identified by a name rather than the cell reference. • Using a name in a formula makes it easier to understand.
Create Formulas Using Named Ranges • Reviewing a formula using names makes the formula easier to understand: • =SUM(FirstQuarterSales) • rather than • =SUM(C20:C30) • You can define a name for a cell range. • By default, names are absolute cell references.
Create Formulas Using Named Ranges Name box with defined name Named cell is active.
Utilize Lookup Lists • Data in Excel can be retrieved quickly from another worksheet or workbook using a lookup function. • The first step in a lookup function is to create a table array—also called a lookup list.
Utilize Lookup Lists • To retrieve values in a vertically arranged table, use the VLOOKUP function. • The HLOOKUPfunction (horizontal) searches the value in the top row of a table.
Utilize Lookup Lists VLOOKUP Function Arguments dialog box Required arguments Definition of Lookup_Value
Customize and UseMicrosoft-Created Templates • A template is a workbook that has the structure already determined. • Formats and formulas are completed. • Excel provides a library of templates. • You can download a prebuilt template, personalize it, and save it for future use.
Customize and UseMicrosoft-Created Templates • Click the Office menu and click New. • A list of available templates appears. • Options include: agendas, budgets, invoices, schedules, and more.
Customize and UseMicrosoft-Created Templates • Excel workbooks are generally saved as Excel files. • They can be saved in other formats. • The Save As drop-down list displays those other format styles. • The default directory for saving a template is the Templates directory, which Excel displays.
Customize and UseMicrosoft-Created Templates Templates directory List of choices Save as type
Transpose Data in a Worksheet and Apply Cell Styles • Data in columns and rows on a worksheet can be rearranged without retyping them. • When you transpose a block of data, you shift the vertical and horizontal orientation of the data.
Transpose Data in a Worksheet and Apply Cell Styles On the Home tab, in the Clipboard group, click the Paste button arrow, click Paste Special. Paste Special dialog box In the second column in the last row, click Transpose.
Transpose Data in a Worksheet and Apply Cell Styles • Cell styles: • A defined set of formatting characteristics, such as fonts and font sizes, cell borders, and cell shading.
Transpose Data in a Worksheet and Apply Cell Styles • To apply cell styles: • First, select the range. • From the Home tab, In the Styles group, click the Cell Styles button. • The Cell Styles gallery displays a palette of styles that can be applied to selected cells or ranges.
Transpose Data in a Worksheet and Apply Cell Styles Cell Styles button Cell Styles gallery
Use 3-D References to Link Data in Worksheets and Workbooks and Create a Workspace • Data in a worksheet can be linked. • Linking helps ensure accuracy. • Changes made in one workbook are also made in all linked workbooks.
Use 3-D References to Link Data in Worksheets and Workbooks and Create a Workspace • 3-D reference: A reference that refers to the same cell or range of cells on multiple sheets.
Use 3-D References to Link Data in Worksheets and Workbooks and Create a Workspace • Workspace: A group of worksheets saved together with a file name that can open all of the files simultaneously. • In order for the workspace to work, all related documents must be located on the computer.
Use 3-D References to Link Data in Worksheets and Workbooks and Create a Workspace Save Workspace button Save Workspace dialog box Save as type: Workspace
Create Hyperlinks • Moving between worksheets is accomplished by clicking the worksheet tab. • A hyperlink is text in a cell that you click to go to another location in a worksheet or workbook or web page. • To create: Click the Insert tab and in the Links group, click the Hyperlink button.
Create Hyperlinks Insert Hyperlink dialog box Look in area Link to area
Covered Objectives • Create Formulas Using Named Ranges • Utilize Lookup Lists • Customize and Use Microsoft-Created Templates • Transpose Data in a Worksheet and Apply Cell Styles
Covered Objectives • Use 3-D References to Link Data in Worksheets and Workbooks and Create a Workspace • Create Hyperlinks