Download
1 / 16
160 likes | 258 Views
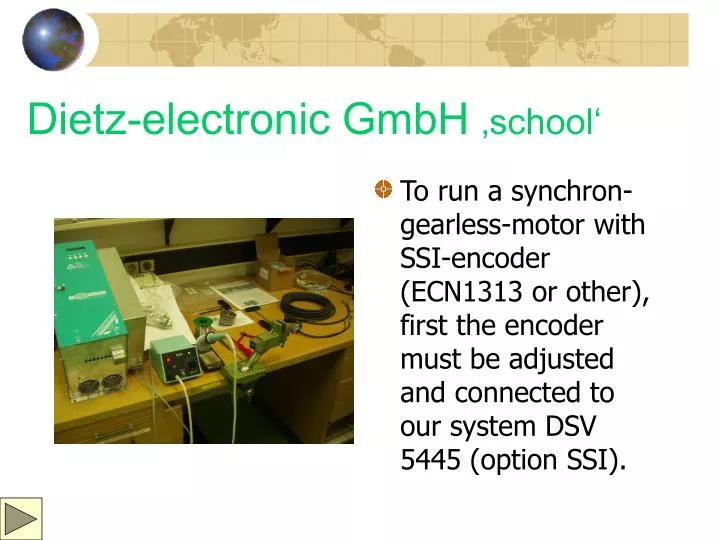
Dietz-electronic GmbH ‚school‘. To run a synchron-gearless-motor with SSI-encoder (ECN1313 or other), first the encoder must be adjusted and connected to our system DSV 5445 (option SSI). The SSI-encoder ‚parts‘.

E N D
Dietz-electronic GmbH ‚school‘ • To run a synchron-gearless-motor with SSI-encoder (ECN1313 or other), first the encoder must be adjusted and connected to our system DSV 5445 (option SSI).
The SSI-encoder ‚parts‘ • You need encoder 312212-06, connector 332201-01, cable 309778-10, inbus-tool-2, inbus-tool-5, inbus-tool-6 (and a long M6-metric-srew if an old encoder is to change), SUB-D-15.
The SSI-encoder ‚details 1‘ • If the SUB-D-15-male-connector is not fitted, see the manual 5445 and the manual attached to the Heidenhain-enoceder. Note: If SUB-D-housing is not metal, both shields must be connected to pin 12 of the SUB-D-male-plug.
The SSI-encoder ‚details 2‘ • This connecting-plug has two little cables. The little cable without any plug should be cut (no function). The other littlte plug is to connect to the encoder (see manual Heidenhain).
The SSI-encoder ‚details 3‘ • This is an example how to mount the encoder to the gearless-machine. Please be careful in connecting the cable to the 17-pol-plug to prevent from twist- or bending the pins.
The SSI-encoder ‚details 4‘ • X4 connect to PC. • X3 and XA connect with the yellow UD-cable (only if it is encluded, in any case UD-cable is wired internal). • XC connect to SSI. • XD connect to Bus-system (only if using a system like DCP/ACP).
Working with syn.-gearless 1 • That‘s very important: Running a synchroun-motor connect U1 to U, U2 to V and U3 to W (otherwise the system will NOT work correct). • Never start engine after mount a new encoder! ALWAYS the ‚first intialisation‘ must be run to find the real position of magnets!
Working with syn.-gearless 2 • Open the break! • Connect direct the motor-phases to the DSV 5445 - outputs or close all motor- contactors. • Disconnect plug X1 and X2 from the lift-plc an use spec. Connections for X1 (see next picture) to get ‚pulse enabled‘.
Working with syn.-gearless 3 • A very simple method to get ‚pulse enabled‘ is to use an connection of ‚X1‘ like shown in the picture. Also you can use the ‚24V‘ of your lift-plc directly (in that case connect 11 to 0V and 12 and 5 to 24V of your plc-powersupply). • The reason is: Motor must be get torque to find magnet-position.
Working with syn.-gearless 4 • Use the internal FU-Control, a external FU-Control or (that is the best way) the WinDietz-computer-program to continue the settings for ‚first intialisation‘. • Start WinDietz and choose application to ‚lift_e‘ (otherwise ‚lift_d‘ is setted to work with german language).
Working with syn.-gearless 5 • If you are using a synchr.-gearless with bus-system, you have to stop the bus in changing ‚direction of rotation 0E0C‘ to ‚0‘ (otherwise ‚first initalisation‘ could not be started). • Next step is to set ‚search RHO ATB-gearl. 0E5C‘ to ‚255‘.
Working with syn.-gearless 6 • In that moment you save this values to the DSV 5445 (using FU-Control got to point ‚save values‘), motor must make a ‚little jump‘. • Close parameter-window of WinDietz and read out the variables once more. Choose value ‚0E5C‘ again to 255 an sent it to DSV.
Working with syn.-gearless 7 • No no ‚jump‘ is coming out of the gearless. Now again close and open the parameter-window and reed out the value of ‚0E6eE‘ and paint it to the motor-plate (that is the ‚RHO-0‘ of your machine). • Using a current-meter could be very helpful for the next step (running the motor after reset).
Working with syn.-gearless 8 • Now you can ride the motor with the functions in modus ‚terminal‘. Click the button ‚switch on converter‘, use the ‚rpm-set-shifter‘ and have a look ton the motor. Click in the field ‚neg rotation‘ to run the other direction. Note: All this must be done without load or ropes.
Working with syn.-gearless 9 • If you don‘t work with WinDietz, you could also make the running-test direct with the lift-plc. Replace the help-connecter ‚X1‘ with the original wired connctors to the plc. Plug in ‚X1‘ and ‚X2‘. If you run a bus-mode, change now variable ‚0E0C‘ to ‚255‘! • Now run ‚inspection-mode‘ by your lift-plc and look to the motor.
Last step: Running your lift! • Now check general variables for your lift (suspension, drive wheel diameter, all speeds ... and so on). If all be done, you can start your lift. For good ride you can adjust parameters ‚k‘ and ‚f7‘ or 0E1C/0E1E (see the manual for the details). • For more details look our DVD/MPEG-Video.