Download
1 / 114
1.15k likes | 2.51k Views
The Science Fair Project: Start to Finish Adapted from Emily V á squez Why Science Fair? Science Fair is the real application of scientific principles and techniques, not just reading about what someone else did in a book. Why do a science fair project?

E N D
The Science Fair Project:Start to Finish Adapted from Emily Vásquez
Why Science Fair? • Science Fair is the real application of scientific principles and techniques, not just reading about what someone else did in a book.
Why do a science fair project? • Helps students compare and contrast, look for patterns, organization, gather, analyze and evaluate information, recognize cause and effect relationships, synthesize information and draw conclusions. • To compete in a science fair. • Because science is fun! • To learn more about a certain area in science.
Making predictions Designing an experiment to test those predictions Making careful observations Interpreting those observations Science Project use the “scientific method”
The Scientific Method has four steps: • Observing and describing events • Forming a hypothesis (guess) to explain the event. • Using a hypothesis to predict the results of new observations. • Testing the hypothesis by doing an experiment
Scientific Skills and Methods: • ORGANIZING your experiment • Creating a research QUESTION or PROBLEM • Constructing a HYPOTHESIS • Evaluating RESULTS
Composing CONCLUSIONS • Reporting findings • BUILDING a display and • PREPARING for the science fair
December November October Project Timeline To do a good project, allow 2 to 3 months. Use a log book to document everything you do
Get Organized… • 1st – 2nd week…Decide what area of science interests you the most • 3rd – 4th week…Write a question or problem you want to research. Make a guess on how your research question will turn out. This will be your HYPOTHESIS
5th – 7th week… • Write down your PROCEDURE – step by step • Complete needed forms and get them approved • CONDUCT the experiment • COLLECT the data • 8th Week…ORGANIZE and ANALYZE the data (making tables, charts and graphs).
9th week…Write your conculsions – keep it simple and to the point! • 10th week…Have fun putting together your display – Be creative!
Creating your research question or problem What are you interested in? Pick an area of science that is of interest and research that subject.
Project Categories • Behavioral and Social Sciences • Biochemistry • Botany • Chemistry • Computer Science • Earth Science • Engineering • Environmental Science • Mathematics • Medicine and Health • Microbiology • Physics • Space Science • Zoology
Newspaper Magazines Books TV commercials Internet Your backyard Where to get project ideas?
Web sites to get ideas and information on science fair projects…
http://www.ipl.org/div/kidspace/projectguide/ http://www.scifair.org/ http://school.discovery.com/sciencefaircentral/ http://www.pwcleancouncil.org/scifarpj.htm http://www.isd77.k12.mn.us/resources/cf/ideas.html http://www.fl-ag.com/PlanetAg/ideas.htm http://members.aol.com/ScienzFair/ideas.htm http://earthquake.usgs.gov/4kids/sciencefair.html http://www.sciencehunt.com/hunthow.nsf/8th_Under?openframeset– guide and ideas (excellent)
http://www.infoplease.com/spot/sciproject2.html–project ideas http://www.epa.gov/airmarkets/acidrain/experiments/index.html– acid rain projects http://www.sciencehunt.com/HuntHow.nsf/MainFrame?OpenFrameSet– check out both sites http://www.brainpop.com/science/scientificinquiry/scientificmethod/index.weml?&tried_cookie=true– movie clip http://www.twingroves.district96.k12.il.us/ScienceInternet/Experiment.html- complete science fair guide
http://edweb.tusd.k12.az.us/jtindell/- project ideas and guide (very good) http://faculty.washington.edu/chudler/experi.html– projects involving the nervous system http://www.stemnet.nf.ca/sciencefairs/- project ideas http://www.ars.usda.gov/is/kids/fair/story.htm– projects in agriculture http://www.si.edu/resource/faq/nmnh/buginfo/scifair.htm – insects project ideas
http://www.west.net/~vcsf/vcsfidea.htm- ideashttp://k12pages.r8esc.k12.in.us/allen/swacs/sciencefair/ideas.html- ideas
Coming up with a research question or problem Think of something that you are curious about in the area of science that you picked. • Is it something that puzzles or interests you? • Or someone told you a fact and you don’t think it is true.
Now you know your question or problem…what do you do? When you decide what you want to investigate, ask yourself these questions… • Can it be done? • Is there enough information available? • How much will it cost? • How much help is needed? • Are the materials easy to get or build?
Is there enough time? • Do I have paperwork completed? • If I use animals or plants, do I know how to take care of them?
What safety precautions are needed? • Are there any laws concerning my project?
READ about your question…use your library, school, the internet… Remember…Use a log book to take notes and write down where you got them!
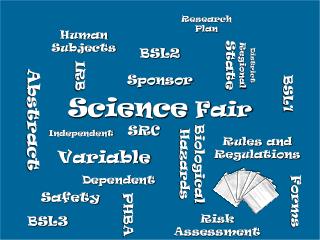
All projects require some paperwork (forms) to be completed • Make sure to get science fair project forms to fill out BEFORE you start your project • Everyone needs to fill out three forms: • Checklist for Adult Sponsor (1) • Research Plan (1A) • Research Plan Attachment • Approval Form (1B).
Additional forms are required for projects involving: Human subjects, vertebrate animals, potentially hazardous biological agents, controlled substances, chemicals, equipment, firearms, radioactive substances, radiation.
Go to the following web site to obtain the forms you need…Florida Foundation for Future Scientists - www.fffs.ucf.eduInternational Science and Engineering Fair - www.sciserv.org
Read the Rules for science fair projects in the following web site… • StateRules: http://www.fffs.ucf.edu/FFFS_05_WEBPAGE/New%20Site/Forms/SSEF%20Rules%20Supplement%2004.pdf • Rule Wizard: http://www.sciserv.org/isef/students/wizard/index.asp • Rule Book: http://www.sciserv.org/isef/document/Rule2006.pdf • Be sure and read and fill in all the forms (except 1C and 7) BEFORE being approved. • Experimentation prior to approval can result in disqualification of a project.
Do not start an experiment until your project and forms have been approved by the teacher!
Constructing a Hypothesis • What is a HYPOTHESIS? It’s an educated guess on how you think your experiment will turn out. • How to write a hypothesis… • Make sure the words “if” and “then” are included in your hypothesis • Needs two variables
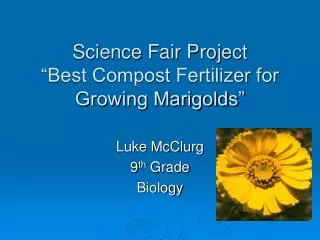
Example:If tomato plants are grown with different amounts of fertilizer then the plants receiving the most fertilizer should grow more.
The hypothesis should force you to think about what results you should look for in your experiment.
Developing a Procedure • Write down what experiment you plan to do (present tense). • Write down what materials you will need… • Can I buy them ($)? • Can I borrow them (ask)? • Can I make them (time and $)? • Decide where (home, school or other) and when you will do your experiment.
Carefully plan the set-up of your experiment. Make sure you have included: • An independent variable – something that can be changed or manipulated…a treatment, program or cause. Fertilizer
Plant height • A dependent variable – something that changes in response to the independent variable and that you can measure.
For example: • A control group – a group to which the independent variable is not applied • Repetitions – more than one test subject for each variable and control
Variable Test subject 2nd treatmentless than the amount of fertilizer that is recommended 3rd treatment more than the amount of fertilizer that is recommended Remember: same age, same kind! Fertilizer will be the variable in this example and you will add different amounts to your plants. 1st treatmentamount of fertilizer that is recommended
Choosing your control Don’t forget to include a CONTROL group. A control group is where you don’t use your independent variable IMPORTANT!!!
Variable 1st treatment 1 2nd treatment 2 3rd treatment 3 No fertilizer 4 CONTROL
Choosing your repetitions Finally, your results are more reliable if you use more than one test subject for each variable change. This is called REPETITIONS or “reps”.
REP A REP B REP C REP D REP E Variable 1st trt 1 1 1 1 1 2nd trt 2 2 2 2 2 3rd trt 3 3 3 3 3 CONTROL 4 4 4 4 4
Use at least 5 test subjects for each treatment and control… You should try to do all your “reps” at the same time or under the same conditions (same time, place, temperature, etc.)
Use metric measurements when you measure height, weight and size! Don’t use just yourto measure your results! . 5.Decide what kind of measurements you will use to measure the change your variable will cause ….height ….weight ….size …..how often …..what time
6. Plan how to record your measurements (DATA) and observation…In the log book! Experimental data (results) sheet Activity sheet (journal)
7. Log the steps of your procedure • Have you written out your procedure (steps that you will follow) carefully? This plan should explain how you will do your experiment and what it will involve. • Each step should be numbered and describe only one action. • After you have your procedure written, show and discuss it with your adult sponsor or teacher for approval.
Example: • I will purchase 25 tomato plants (my test subjects) that are the same age and kind. There will be 5 plants for each treatment and control. • I will obtain one kind of fertilizer (my variable) and I find out how much is recommended. • I will place my plants in a good location outside. • I will measure the different amounts of fertilizer carefully. • I will add the amounts to my plants once a week. • I will measure the height (data) of my plants every two daysfor 3 weeks.
You are now ready to conduct your experiment… Remember…be careful and be safe!
What should you do if your experiment doesn’t go how you planned or the data doesn’t agree with the hypothesis? Don’t worry… You could amend the procedure or hypothesis…talk it over with your teacher or advisor. Do not use white out – line through date and initial new procedure on forms and in log book.
What do you do when you have finished conducting your experiment?