Download
1 / 20
200 likes | 325 Views
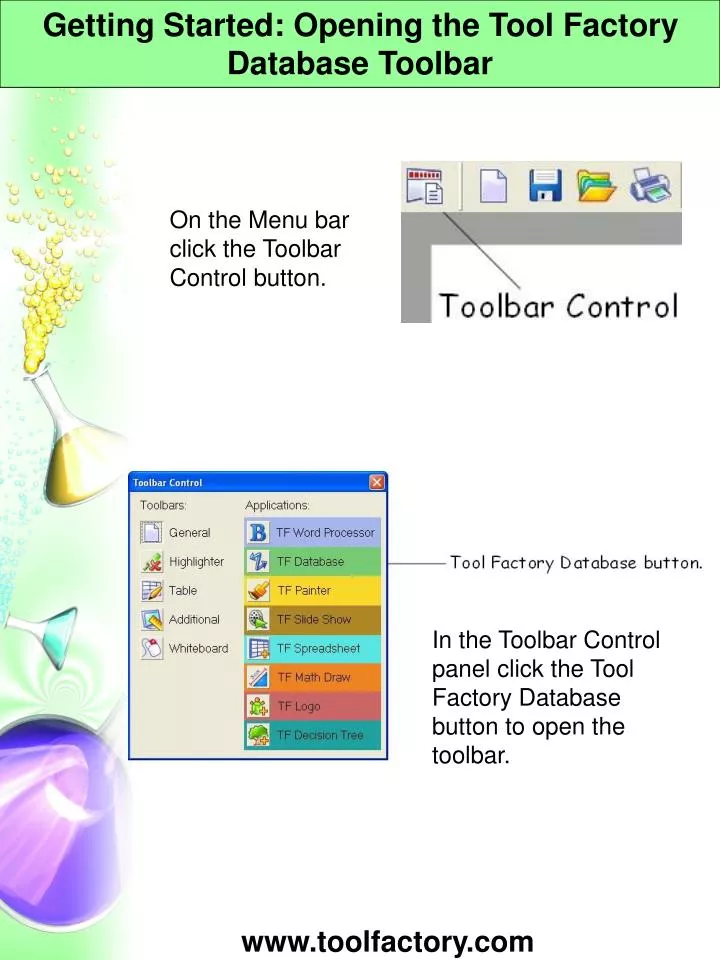
Getting Started: Opening the Tool Factory Database Toolbar. On the Menu bar click the Toolbar Control button. In the Toolbar Control panel click the Tool Factory Database button to open the toolbar. www.toolfactory.com. Getting Started: Personalize Toolbars (CTRL+Shift+T).

E N D
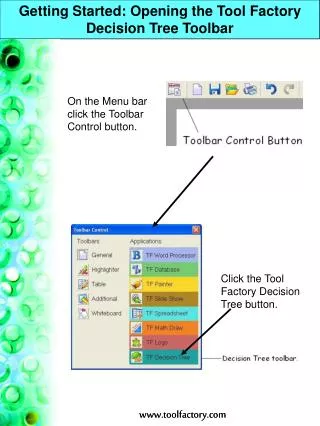
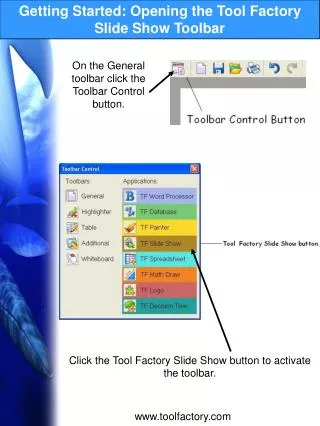
Getting Started: Opening the Tool Factory Database Toolbar On the Menu bar click the Toolbar Control button. In the Toolbar Control panel click the Tool Factory Database button to open the toolbar. www.toolfactory.com
Getting Started: Personalize Toolbars (CTRL+Shift+T) On the General toolbars click the Toolbar Control button. On the keyboard click CTRL+Shift+T. Click on the boxes to turn functions on or off. www.toolfactory.com
Building a Database: Creating a Database Step 1 On the Database toolbar click the Connect button. Step 2 Choose either a Single User or Multi-User database and click create. Step 3 Add fields to your database and lay them out on the page. Step 4 After you create different records use this window to scroll through them and add new ones. www.toolfactory.com
Building a Database: Creating a Record Click the Add Record button on the Navigation panel. Here is an example of a completed record with five different fields. www.toolfactory.com
Building a Database: Creating Fields Click the Field List button on the Database toolbar. Click the New Field button. Name the field and choose the type of field and then click Add. Add as many different fields as you like! www.toolfactory.com
Building a Database: Editing Records Use the Navigation window to find the record that you wish to edit. Click on the field you wish to edit and proceed to do so. Click and select from Color panel. Click and type to enter data. Click and select from drop down menu. Drag a new image from the Resource Bank. www.toolfactory.com
Building a Database: Viewing Records On the Menu bar click Tool Factory Database>Show Navigation Window. Jump to last record. Jump to first record. Previous. Next. Create a new record. Delete record. www.toolfactory.com
Building a Database: Customizing Your Database Tool Factory Database lets you do many things to fully customize the look of your page. Drag a picture from the Resource Bank onto the background of your database. To add a title just click on the background and type. You can even rearrange the fields on your records by clicking and dragging them! www.toolfactory.com
Building a Database: Saving Your Files To save your files, on the Menu bar click File>Save. If you click Save As you can change the path that the file is saved under. www.toolfactory.com
Graphs: Create a Graph/Chart On the Database toolbar click the Worksheet View button. Click the drop down menu to select which field you want to use. Select which chart or graph type you want to use and click OK. The chart will appear right on the page! www.toolfactory.com
Graphs: Graph Chart/Types Bar Chart. Pie Chart. Bar Line Graph. Block Graph. Pictogram. www.toolfactory.com
Graphs: Editing a Graph Select the chart you wish to edit and click the Effects button on the General toolbar. Fill Color tab. Line Color tab. Style tab. If you click on the graph’s text and then the Effects button you will open the Text Effects panel. www.toolfactory.com
Using Queries: Create a Query Put the page in either Form View or Table View by clicking the appropriate button on the Database toolbar. Click Interrogate on the Database toolbar to open up the Interrogate panel. Click the New Query button then the New Query Line button. Fill out the fields of the query and click OK. To activate the query click the check box that says activate in the Interrogate panel. www.toolfactory.com
Using Queries: Activate/Deactivate Queries On the Database toolbar click the Interrogate button. To activate a query click the check box next to the word active. To deactivate it click the check box to remove the check. The database contains 10 records, but notice only three are showing because a query is active. Uncheck Active and all 10 records will interactively show. www.toolfactory.com
Using Queries: Edit Queries Click the Interrogate button on the Database toolbar. Click the Edit Field button in the Interrogate window and then edit your query however you wish. www.toolfactory.com
Special Features: Field Types On the Database toolbar click the Field List button. Click the New Field button. Select the type of field from the Type drop down menu. www.toolfactory.com
Special Features: Edit Fields On the Database toolbar click the Field List button. Click the Edit button in the Field List panel. Change what you want to edit from the Field Properties panel. www.toolfactory.com
Special Features: Use List When you want to use a drop down list to select an entry, this is the perfect feature. On the Database toolbar click Field List>New List (+). In the New Field panel click the Use List check box. You can add either pictures or text as your drop down list selection. Click the Picture button to add pictures from the Resource Bank or type in your text selections. www.toolfactory.com
Special Features: Three Ways to View Data Worksheet view lets you create charts/graphs from your data. www.toolfactory.com
Special Features: Teacher Options Open an existing database by clicking File>Open on the Menu bar and selecting the file. Press CTRL+Shift+T on the keyboard. From this panel you can change what your students have access to when editing a database. TIP: If you can’t get into the teacher options it’s because you don’t have any data to restrict. Make a database first and then this will work. www.toolfactory.com