Download
1 / 18
180 likes | 329 Views
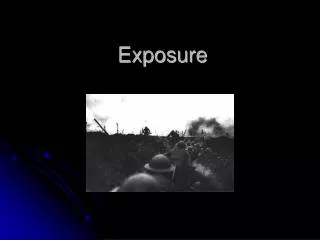
Exposure. Gray Card and White Balance. Purpose:. To explore exposure in both camera. To understand white balance. To learn to download images. To learn to save to server. To be introduced to Bridge CS3 and PhotoShop CS3. Goals. To understand and control light using a camera.

E N D
Exposure Gray Card and White Balance
Purpose: • To explore exposure in both camera. • To understand white balance. • To learn to download images. • To learn to save to server. • To be introduced to Bridge CS3 and PhotoShop CS3
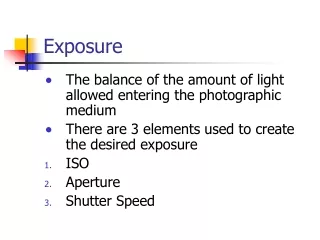
Goals • To understand and control light using a camera. • Know the three variables effecting exposure. • Know and be able to use a photographic gray card. • Understand and be able to use bracketing techniques. • Understand the terminology used by photographers describing exposure and white balance. • Understand the different qualities of natural and artificial light. • Understand how the temperature of a light source effects the quality of light. • Understand and be able to use white balance to control the qualities of light. • Understand and be able to obtain metadata in Adobe CS3 Bridge and PhotoShop. • To create a contact sheet using Adobe Bridge and PhotoShop CS3. • To create a print representing a balance of highlights and shadows demonstrating proper exposure.
Subject: Human face with a gray card next to it.
Directions: • Set your camera’s white balance to the daylight setting (sun mode). • You will be taking a series of photos all photos are to have these characteristics. • All photos with an ISO 800 (indoor) setting. • All photos so they show an 18% gray card and a face. • Take a series of photos in three different settings; • Under florescent light (like the classroom), • Under direct daylight (sun), • Under trees (in shade) during daylight, • Under incandescent light (standard household light bulb). • In each of the 4 locations take 5 photos bracketing your exposure. • +2 ( four times the amount of light) • +1 (twice the amount of light) • Normal (according to the light meter) • -1 (half the amount of light) • -2 (one forth the amount of light) • Record your exposure on the exposure log. • You will have taken 20 photos when you are done.
Bracketing: Purpose: • To vary settings to insure proper lighting and exposure and allow for a variety of lighting conditions.
Stop of Light One “Stop of Light” equals One change in shutter speed (+ or -) OR One change in ƒ/stop (+ or -) OR One change in ISO (half or double)
Stop of Light • It is an amount of light. • Each stop is a doubling or halving of the amount of light.
Bracketing • Normal — what the light meter says • +1 stop (double the amount of light) • -1 stop (half the amount of light) Normal
Bracketing • Normal — what the light meter says • +1 stop (double the amount of light) • +2 stops (4x the amount of light) Normal +1x +2x
Bracketing • Normal — what the light meter says • -1 stop (half the amount of light) • -2 stops (1/4 the amount of light) Normal -1x -2x
Exposure Log: • Completed Exposure Log
Bracketing • +2 stops (4x the amount of light) • +1 stop (double the amount of light) • Normal — what the light meter says • -1 stop (half the amount of light) • -2 stops (1/4 the amount of light) +2x +1x Normal -1x -2x ƒ/4 @ 1/250 ƒ/5.6 @ 1/250 ƒ/8 @ 1/250 ƒ/11 @ 1/250 ƒ/16 @ 1/250
Bracketing +2x ƒ/22 @ 1s • +2 stops (4x the amount of light) • +1 stop (double the amount of light) • Normal — what the light meter says • -1 stop (half the amount of light) • -2 stops (1/4 the amount of light) +1x ƒ/22 @ 1/2 Normal ƒ/22 @ 1/4 -1x ƒ/22 @ 1/8 -2x ƒ/22 @ 1/15
Requirements —What to turn in: • 20 digital images on server • Place in purple folder • 1 contact sheet, 20 images • 4 prints • 1 Each lighting type • Should be best exposure • Self-evaluation sheet • Exposure log
Exposure Log: • Completed Exposure Log
Requirements: • Self-evaluation Sheet (there are 2 sides) • Fill in top portion completely
Grading • This project is worth 100 points