Download
1 / 5
0 likes | 15 Views
Unlock the power of WordPress with this in-depth guide, enabling you to establish a strong online presence and create a website tailored to your specific needs.<br>

E N D
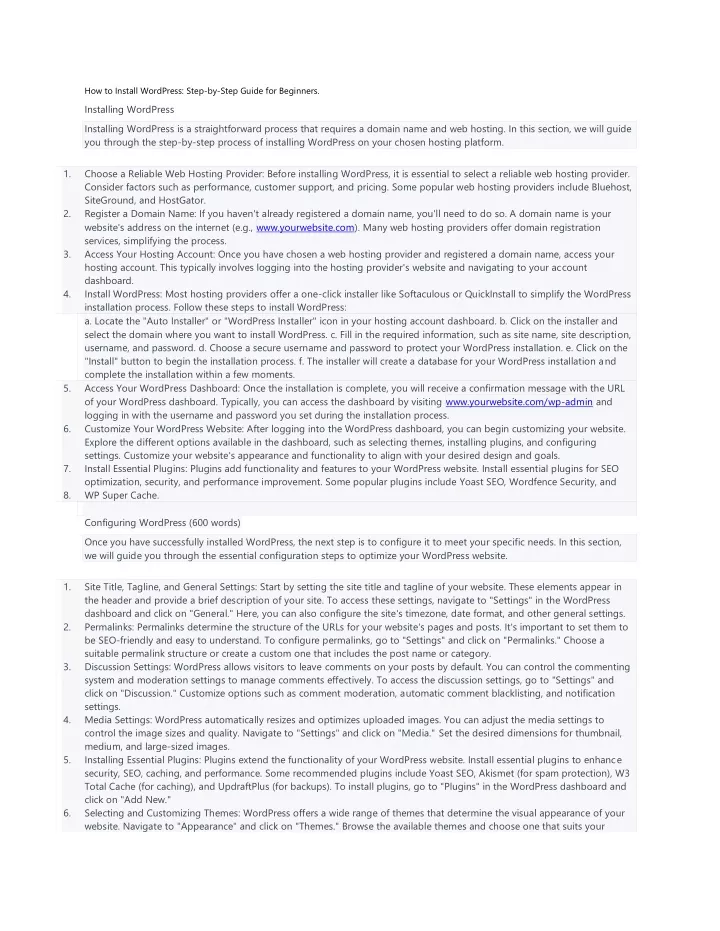
How to Install WordPress: Step-by-Step Guide for Beginners. Installing WordPress Installing WordPress is a straightforward process that requires a domain name and web hosting. In this section, we will guide you through the step-by-step process of installing WordPress on your chosen hosting platform. 1. Choose a Reliable Web Hosting Provider: Before installing WordPress, it is essential to select a reliable web hosting provider. Consider factors such as performance, customer support, and pricing. Some popular web hosting providers include Bluehost, SiteGround, and HostGator. Register a Domain Name: If you haven't already registered a domain name, you'll need to do so. A domain name is your website's address on the internet (e.g., www.yourwebsite.com). Many web hosting providers offer domain registration services, simplifying the process. Access Your Hosting Account: Once you have chosen a web hosting provider and registered a domain name, access your hosting account. This typically involves logging into the hosting provider's website and navigating to your account dashboard. Install WordPress: Most hosting providers offer a one-click installer like Softaculous or QuickInstall to simplify the WordPress installation process. Follow these steps to install WordPress: a. Locate the "Auto Installer" or "WordPress Installer" icon in your hosting account dashboard. b. Click on the installer and select the domain where you want to install WordPress. c. Fill in the required information, such as site name, site description, username, and password. d. Choose a secure username and password to protect your WordPress installation. e. Click on the "Install" button to begin the installation process. f. The installer will create a database for your WordPress installation and complete the installation within a few moments. Access Your WordPress Dashboard: Once the installation is complete, you will receive a confirmation message with the URL of your WordPress dashboard. Typically, you can access the dashboard by visiting www.yourwebsite.com/wp-admin and logging in with the username and password you set during the installation process. Customize Your WordPress Website: After logging into the WordPress dashboard, you can begin customizing your website. Explore the different options available in the dashboard, such as selecting themes, installing plugins, and configuring settings. Customize your website's appearance and functionality to align with your desired design and goals. Install Essential Plugins: Plugins add functionality and features to your WordPress website. Install essential plugins for SEO optimization, security, and performance improvement. Some popular plugins include Yoast SEO, Wordfence Security, and WP Super Cache. Configuring WordPress (600 words) 2. 3. 4. 5. 6. 7. 8. Once you have successfully installed WordPress, the next step is to configure it to meet your specific needs. In this section, we will guide you through the essential configuration steps to optimize your WordPress website. 1. Site Title, Tagline, and General Settings: Start by setting the site title and tagline of your website. These elements appear in the header and provide a brief description of your site. To access these settings, navigate to "Settings" in the WordPress dashboard and click on "General." Here, you can also configure the site's timezone, date format, and other general settings. Permalinks: Permalinks determine the structure of the URLs for your website's pages and posts. It's important to set them to be SEO-friendly and easy to understand. To configure permalinks, go to "Settings" and click on "Permalinks." Choose a suitable permalink structure or create a custom one that includes the post name or category. Discussion Settings: WordPress allows visitors to leave comments on your posts by default. You can control the commenting system and moderation settings to manage comments effectively. To access the discussion settings, go to "Settings" and click on "Discussion." Customize options such as comment moderation, automatic comment blacklisting, and notification settings. Media Settings: WordPress automatically resizes and optimizes uploaded images. You can adjust the media settings to control the image sizes and quality. Navigate to "Settings" and click on "Media." Set the desired dimensions for thumbnail, medium, and large-sized images. Installing Essential Plugins: Plugins extend the functionality of your WordPress website. Install essential plugins to enhance security, SEO, caching, and performance. Some recommended plugins include Yoast SEO, Akismet (for spam protection), W3 Total Cache (for caching), and UpdraftPlus (for backups). To install plugins, go to "Plugins" in the WordPress dashboard and click on "Add New." Selecting and Customizing Themes: WordPress offers a wide range of themes that determine the visual appearance of your website. Navigate to "Appearance" and click on "Themes." Browse the available themes and choose one that suits your 2. 3. 4. 5. 6.
content and style preferences. Click on "Install" and then "Activate" to activate the selected theme. Customize the theme further by accessing the "Customize" option under "Appearance." Creating Navigation Menus: Navigation menus help visitors navigate your website easily. To create a menu, go to "Appearance" and click on "Menus." Create a new menu, add pages, categories, or custom links to it, and assign it to a specific location on your website, such as the header or footer. Configuring Widgets: Widgets allow you to add various elements to your website's sidebars or widgetized areas. Go to "Appearance" and click on "Widgets" to access the widget configuration panel. Drag and drop widgets to the desired widget areas, such as the sidebar or footer, and configure their settings as needed. User Roles and Permissions: WordPress provides different user roles, such as Administrator, Editor, Author, and Contributor. Assign appropriate roles and permissions to users based on their responsibilities. To manage user roles, go to "Users" in the WordPress dashboard and click on "Roles." 10.SEO Optimization: WordPress is SEO-friendly, but optimizing your content further can help improve search engine rankings. Install a plugin like Yoast SEO, which provides tools to optimize your content, meta tags, and XML sitemaps. Follow the plugin's guidelines and recommendations for optimizing individual posts and pages. 7. 8. 9. By following these configuration steps, you can optimize your WordPress website's settings and functionality. In the next section, we will focus on creating pillar content for your blog, covering 10 subtopics related to WordPress website development in Dubai. Creating Pillar Content (700 words) Creating pillar content is essential for organizing your blog and establishing your expertise in specific subtopics. In this section, we will guide you through the process of creating pillar content for your WordPress blog, focusing on 10 subtopics related to WordPress website development in Dubai. 1. Define Pillar Content: Pillar content refers to comprehensive, in-depth articles that serve as the foundation of your blog. These articles cover broad subtopics related to your niche and provide valuable information to your readers. Pillar content is typically longer and more detailed than regular blog posts. Choose 10 Subtopics: Identify 10 subtopics within the realm of Word Press website development in Dubai. These subtopics should be relevant to your target audience and align with the services or products you offer. For example, you can choose subtopics such as "Best Practices for Word Press Security in Dubai" or "Optimizing Word Press Websites for Speed in Dubai." Research and Outline: Conduct thorough research on each subtopic to gather information and insights. Use reputable sources, industry publications, and authoritative websites to ensure the accuracy and relevance of your content. Create an outline for each pillar article, organizing the main points, subheadings, and supporting information. Write High-Quality Content: Start writing each pillar article based on the outlined structure. Aim for high-quality, well- researched content that provides valuable insights and solutions to your readers. Include relevant examples, case studies, and practical tips to make the content more engaging and actionable. Length and Formatting: Pillar articles should be longer in length compared to regular blog posts. Aim for a word count of at least 1500 to 2000 words for each pillar article. Break the content into digestible sections using informative subheadings. Incorporate images, infographics, or videos where appropriate to enhance visual appeal and readability. Internal Linking: Utilize internal linking to establish connections between your pillar articles and other relevant content on your blog. Identify opportunities within your pillar articles to link to related blog posts, providing readers with additional resources and encouraging them to explore more of your content. This interlinking strategy improves SEO and keeps readers engaged on your site. Optimize for SEO: Implement on-page SEO techniques to optimize your pillar content for search engines. Conduct keyword research to identify relevant keywords for each subtopic and incorporate them naturally throughout the content. Optimize meta titles, descriptions, and headings to improve search engine visibility. Utilize SEO plugins like Yoast SEO to assist you in optimizing your content. Publish and Promote: Once your pillar articles are complete, publish them on your WordPress blog. Promote your pillar content across various channels, such as social media, email newsletters, and industry forums. Encourage readers to share and engage with your content. Additionally, consider reaching out to influencers or industry experts to amplify the visibility of your pillar articles. Monitor and Update: Regularly monitor the performance of your pillar content using tools like Google Analytics. Track metrics such as page views, engagement, and conversions. Analyze user feedback and comments to identify areas for improvement. Update and refresh your pillar articles periodically to ensure they remain accurate and up-to-date. 2. 3. 4. 5. 6. 7. 8. 9.
10.Expand and Diversify: As your blog grows, consider expanding and diversifying your pillar content. Explore new subtopics within the WordPress website development niche and create additional pillar articles. Continuously assess your audience's needs and interests to provide valuable content that aligns with their evolving requirements. By following these steps, you can create pillar content that establishes your authority and attracts a dedicated audience interested in WordPress website development in Dubai. In the next section, we will explore WooCommerce integration, an essential component for online businesses using WordPress. Introducing WooCommerce ntroducing WooCommerce: Empowering Your WordPress Website for E-commerce Success in Dubai WooCommerce is a powerful e-commerce plugin designed specifically for WordPress. With its extensive features and flexibility, WooCommerce enables you to transform your WordPress website into a fully functional online store. In this section, we will introduce you to the benefits and capabilities of WooCommerce, particularly in the context of online businesses in Dubai. 1. Seamless Integration: One of the biggest advantages of WooCommerce is its seamless integration with WordPress. It seamlessly integrates into your existing WordPress website, allowing you to leverage the robust CMS capabilities while adding e-commerce functionality. This integration enables you to manage both your content and products from a single platform. Feature-Rich Functionality: WooCommerce offers a wide range of features that empower you to create a comprehensive and tailored e-commerce experience. These features include product management, inventory control, shipping and tax configuration, customer management, order tracking, and secure payment gateways. With WooCommerce, you have the flexibility to customize your online store to meet the unique requirements of your Dubai-based business. Extensive Extension Ecosystem: WooCommerce boasts a vast extension ecosystem, allowing you to enhance and expand the capabilities of your online store. With thousands of free and premium extensions available, you can easily integrate features such as subscriptions, bookings, memberships, product variations, and more. These extensions enable you to create a customized and feature-rich e-commerce solution that aligns with your business goals. Localization and Multi-Currency Support: Dubai is a global hub for business, attracting customers from diverse regions. WooCommerce offers localization and multi-currency support, allowing you to cater to a global customer base. You can configure your store to display content in multiple languages, accept payments in various currencies, and provide localized shipping options. This flexibility is crucial for reaching and engaging customers in Dubai and beyond. Seamless Payment Gateway Integration: WooCommerce supports integration with various popular payment gateways, making it easy for your customers to make secure and convenient online transactions. Dubai-based businesses can integrate local payment gateways that are widely used in the region, such as PayTabs, Telr, or Network International. Additionally, WooCommerce supports global payment gateways like PayPal, Stripe, and Authorize.net, ensuring a smooth checkout experience for your customers. Mobile-Friendly and Responsive Design: In today's mobile-centric world, having a mobile-friendly e-commerce store is crucial. WooCommerce provides responsive design options, ensuring your online store looks and functions seamlessly across different devices. This responsiveness is vital for delivering a positive user experience and maximizing conversions, especially in a dynamic market like Dubai. Analytics and Reporting: WooCommerce offers built-in analytics and reporting features that provide valuable insights into your store's performance. You can track key metrics such as sales, revenue, product popularity, and customer behavior. These analytics help you make informed decisions and optimize your e-commerce strategies to drive growth and profitability. Scalability and Flexibility: WooCommerce is highly scalable and can accommodate businesses of all sizes. Whether you're just starting or experiencing significant growth, WooCommerce can scale along with your business. It offers the flexibility to add new products, expand your catalog, and handle increased traffic and transactions seamlessly. 2. 3. 4. 5. 6. 7. 8. By integrating WooCommerce into your WordPress website, you can unlock the full potential of e-commerce and create a robust online store that meets the unique demands of your Dubai-based business. In the next section, we will explore the diverse world of WordPress themes, helping you select the right theme to enhance the visual appeal of your website.
Setting Up a Localhost WordPress Setting Up a Localhost WordPress: A Guide for Development and Testing Setting up a localhost WordPress installation allows you to create and test your WordPress website locally on your computer. This environment is ideal for development purposes, enabling you to experiment, customize, and troubleshoot without affecting your live website. In this section, we will guide you through the process of setting up a localhost WordPress installation using software like XAMPP or Local by Flywheel. 1. Choose a Local Development Software: There are several options available for setting up a localhost environment, but two popular choices are XAMPP and Local by Flywheel. XAMPP is a free, cross-platform software package that includes Apache, MySQL, PHP, and other components necessary for running WordPress. Local by Flywheel, on the other hand, provides an easy-to-use interface and additional features specifically designed for WordPress development. Install and Configure XAMPP or Local by Flywheel: Depending on your chosen software, download and install XAMPP or Local by Flywheel on your computer. Follow the installation instructions provided by the software to complete the setup process. Ensure that the required components, such as Apache and MySQL, are properly configured and running. Create a New WordPress Site: After installing the local development software, create a new WordPress site within the software's interface. Provide a site name, local domain, and other necessary details. The software will automatically set up a database and configure the environment for your WordPress installation. Download and Install WordPress: Download the latest version of WordPress from the official website (wordpress.org). Extract the downloaded file and copy the WordPress files into the appropriate folder in your local development software's directory. For XAMPP, place the files in the "htdocs" folder, while for Local by Flywheel, use the software's interface to import the WordPress files. Configure the Database: Access the database management tool provided by your local development software (e.g., phpMyAdmin in XAMPP). Create a new database for your WordPress installation and take note of the database name, username, and password. Update the wp-config.php file in your WordPress files with the database details to establish the connection. Run the Local WordPress Site: Start the local server environment using XAMPP or Local by Flywheel. Launch your web browser and enter the local domain or IP address provided by the software to access your locally hosted WordPress site. Proceed with the WordPress installation process, which includes providing the site title, admin username, password, and email. Customize and Develop Locally: With your localhost WordPress installation set up, you can now begin customizing and developing your website. Install themes, plugins, and other necessary components to replicate your live website environment. Make design and functionality changes, create or modify content, and test different features and configurations without affecting your live site. Import or Sync Content (Optional): If you have an existing live WordPress site, you may want to import or sync content to your localhost installation. This can be done using plugins like All-in-One WP Migration or manually exporting and importing the WordPress database and media files. Ensure you carefully follow the instructions provided by the chosen method to avoid any data loss or conflicts. Test and Debug: Utilize the localhost environment to thoroughly test and debug your WordPress website. Check for compatibility issues, responsiveness, plugin conflicts, and overall performance. Use debugging tools and error logs to identify and resolve any issues before deploying changes to your live site. 10.Deploying Changes: Once you are satisfied with the changes made in the localhost environment, you can deploy them to your live WordPress site. This typically involves migrating the updated files, database, and media from your localhost to the live server. Use plugins like All-in-One WP Migration or manually transfer the modified files to the appropriate location on your web hosting server. 2. 3. 4. 5. 6. 7. 8. 9. By setting up a localhost WordPress installation, you can confidently develop and test your website without impacting the live environment. This allows for seamless experimentation and troubleshooting, ensuring a smooth and error-free experience for your visitors. In the next section, we will explore the world of WordPress themes, helping you select the perfect theme to enhance the visual appeal and functionality of your website.