Download
1 / 53
530 likes | 743 Views
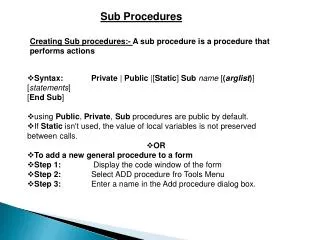
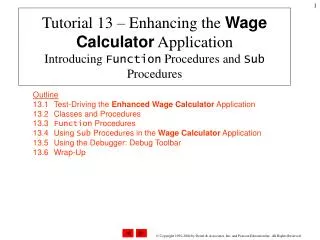
13. Enhancing the Wage Calculator Application Introducing Function Procedures and Sub Procedures. Outline. 13.1 Test-Driving the Enhanced Wage Calculator Application 13.2 Classes and Procedures 13.3 Function Procedures

E N D
13 • Enhancing theWageCalculator ApplicationIntroducing FunctionProcedures and Sub Procedures
Outline • 13.1Test-Driving the Enhanced WageCalculator Application • 13.2 Classes and Procedures • 13.3Function Procedures • 13.4 Using Sub Procedures in the WageCalculator Application • 13.5 Using the Debugger: Debugging Controls • 13.6Optional Parameters
In this tutorial you will learn: Construct applications modularly from pieces called procedures. Work with “built-in” procedures. Distinguish between Function procedures and Sub procedures, and determine when each should be used. Create your own Function proceduresand Subprocedures. Use the Debugging controls on the Standard Toolbar. Objectives
Introduction • The best way to develop and maintain a large application is to construct it from smaller, more manageable pieces. • This technique is known as divideandconquer(also called componentization). • Manageable pieces include program components—known as procedures.
13.1 Test-Driving the EnhancedWageCalculator Application • A payroll company calculates the gross earnings per week of employees. Employees’ weekly salaries are based on the number of hours they worked and their hourly wages. Create an application that accepts this information and calculates each employee’s total earnings. The application assumes a standard work week of 40 hours. The wages for 40 or fewer hours are calculated by multiplying the employee’s hourly wage by the number of hours worked. Any time worked over 40 hours in a week is considered “overtime” and earns time and a half. Salary for time and a half is calculated by multiplying the employee’s hourly wage by 1.5 and multiplying the result of that calculation by the number of overtime hours worked. The total overtime earned is added to the user’s gross earnings for the regular 40 hours of work to calculate the total earnings for that week.
Test-Driving the EnhancedWageCalculator Application • Run the completed application (Fig. 13.1). Figure 13.1|WageCalculatorrunning. • Click the CalculateButton. The result ($475.00) is displayed in the Grossearnings:Label.
13.2 Classes and Procedures • The key to creating large applications is tobreak them into smaller pieces. • In object-oriented programming, these pieces consist primarily of classes, which can be further broken down into methods. • Programmers combine programmer-defined classes and methods with preexisting code inthe .NET Framework Class Library. • Using preexisting code saves time, effort and money. • The concept of reusingcode increases efficiency for application developers.
13.2 Classes and Procedures (Cont.) • Figure 13.2 explains several pre-existingVisual Basic methods. Figure 13.2|Some predefined Visual Basic methods.(Part 1 of 2.)
13.2 Classes and Procedures (Cont.) Figure 13.2|Some predefined Visual Basic methods.(Part 2 of 2.)
Creating the HypotenuseCalculator Application • Open HypotenuseCalculator.sln in the HypotenuseCalculator directory (Fig. 13.3). Figure 13.3|HypotenuseCalculator GUI.
Creating the HypotenuseCalculator Application (Cont.) • The event handler for the CalculateHypotenuseButton is incomplete (Fig. 13.4). Lengths for sides A, Band hypotenuse Square of lengths for sidesA, B and hypotenuse Message dialog displays if negative values (or non-numeric values) are entered Figure 13.4|HypotenuseCalculator template code.
Creating the HypotenuseCalculator Application (Cont.) • The procedure begins in line 28 (Fig. 13.5) with keyword Function, followed by a procedure name Functionprocedure header EndFunction keywords mark the end of aFunction procedure Figure 13.5|HypotenuseCalculator GUI.
Software Design Tip • To promote reusability, each procedure should perform a single well-defined task, and the procedure name should express that task effectively and concisely.
Good Programming Practice • Choosing meaningful procedure names and parameter names makes applications more readable and reduces the need for excessive comments.
Creating the HypotenuseCalculator Application (Cont.) • The procedure name is followed by a set of parentheses containing a parameter declaration. • The declaration in the parentheses is known as the parameterlist, • Variables (called parameters) are declared, enabling a procedure to receive data that helps the procedure perform its task. • The parameter list can contain zero or more declarations separated by commas.
Creating the HypotenuseCalculator Application (Cont.) • A Function procedure returns one value after it performs its task. • To specify the returntype, the parameter list is followed by the keyword As, which is in turn followed by a data type. • The Function procedure ends with the keywords EndFunction.
Good Programming Practice • Procedure names should be verbs and should begin with an uppercase first letter. Each subsequent word in the name should begin with an uppercase first letter. This naming convention is known as Pascal case.
Creating the HypotenuseCalculator Application (Cont.) • The ^ operator (Fig. 13.6) is used to calculate the square of input. • A Returnstatement is used to return this value. Calculate the squareusing the ^ operator Figure 13.6|Square procedure definition.
Good Programming Practice • Placing a blank line between procedure definitions enhances application readability.
Creating the HypotenuseCalculator Application (Cont.) • These lines call Square by using the procedure name followed by a set of parentheses that contain the procedure’s argument (Fig. 13.7). Calling procedure Square Figure 13.7| Invoking procedure Square.
Creating the HypotenuseCalculator Application (Cont.) • Note that typing the opening parenthesis causes the Visual Basic IDE to display a window containing the procedure’s argument names and types (Fig. 13.8). • This is the ParameterInfo feature of the IDE. Parameter Info window Figure 13.8|ParameterInfo window.
Good Programming Practice • Selecting descriptive parameter names makes the information provided by the ParameterInfo feature more meaningful.
Creating the HypotenuseCalculator Application (Cont.) • A procedure is invoked by a procedurecall. • The procedure call specifies the procedure name and provides arguments that the called procedure requires to do its job. • Each argument is assigned to one of the procedure’s parameters when the procedure is called. • The number of arguments in the call must match the number of parameters in the definition. • After completing its task, the called procedure returns control to the caller.
Creating the HypotenuseCalculator Application (Cont.) • Keyword ByVal indicates that a copy of the argument’s value should be passed to Square. • Square receives the copy of the value input by the user and stores it in the parameter input. • When the Return statement in Square is reached, the value to the right of keyword Return is returned to the point in line 23 where Square was called. • The procedure’s execution completes, and the parameter that was holding the copy of the value is discarded. • Program control also transfers to this point, and the application continues.
Creating the HypotenuseCalculator Application (Cont.) • Line 32 (Fig. 13.9) calls the .NET Framework Class Library method Sqrt of class Math. Figure 13.9| Completing the calculateButton_Click event handler.
Error-Prevention Tip • Small procedures are easier to test, debug and understand than large ones.
Creating the HypotenuseCalculator Application (Cont.) • Run and test the application (Fig. 13.10). Figure 13.10|HypotenuseCalculator application running.
Creating a Function ProcedureThat Returns the Largest of Three Numbers • Open Maximum.sln in the Maximum directory (Fig. 13.11). TextBoxes used toinput three values Figure 13.11|Maximum application in Design view.
Creating a Function Procedure ThatReturns the Largest of Three Numbers (Cont.) • Double click the MaximumButton to create an event handler. • Note that Maximum has been underlined in blue, because Function procedure Maximum has not yet been defined (Fig. 13.12). Calling a procedurethat has not yet been defined is an error Figure 13.12|Invoking Function procedure Maximum.
Common Programming Error • Calling a procedure that does not yet exist or misspelling the procedure name in a procedure call results in a compilation error.
Creating a Function Procedure ThatReturns the Largest of Three Numbers (Cont.) • Create the Function procedure Maximum (Fig. 13.13). Empty Function procedure Maximum Figure 13.13|MaximumFunctionprocedure.
Creating a Function Procedure ThatReturns the Largest of Three Numbers (Cont.) • The maximum is determined by using the Maxmethod of .NET Framework Class Library class Math (Fig. 13.14). • The Return statement terminates executionof the procedure and returns the result of finalMaximum. Calling Math.Max to determine the maximum of two values Figure 13.14|Math.Max returns the larger of its two arguments.
Creating a Function Procedure ThatReturns the Largest of Three Numbers (Cont.) • Run and test the application (Fig. 13.15). Figure 13.15|Maximum application running.
Creating a Sub Procedure within theWageCalculator Application • Open WageCalculator2.sln in the WageCalculator2 directory. • Double click the CalculateButton to generatean event handler (Fig. 13.16). Call to DisplayPay Figure 13.16|calculateButton_Click calls DisplayPay.
Creating a Sub Procedure withinthe WageCalculator Application (Cont.) • Add Sub procedure DisplayPay to your application (lines 18–39 of Fig. 13.17). • There is no return type, because Sub procedures do not return values. • When control reaches the EndSub statement, control returns to the calling procedure.
Creating a Sub Procedure withinthe WageCalculator Application (Cont.) DisplayPay calculates and displays the user’s gross earnings Figure 13.17|Sub procedure DisplayPay definition.
Creating a Function Procedure withinthe WageCalculator Application • Note that the return type of the procedure is Boolean (Fig. 13.18)—the value returned by the procedure must be a Boolean. CheckOvertime determines ifthe user has worked overtime Figure 13.18|Function procedure CheckOverTime definition.
Common Programming Error • Failure to return a value from a Function procedure causes the procedure to return the default value for the return-type (0 for numeric types, False for Booleans, Nothing for so-called reference types), often resulting in logic errors.
Creating a Function Procedure within theWageCalculator Application (Cont.) • In Sub procedure DisplayPay, replace the statement on line 26 (Fig. 13.19). Call to procedureCheckOvertime Figure 13.19|DisplayPay calls Function procedure CheckOvertime.
Outline • Figure 13.20 presents the source codeof the application. (1 of 3 ) Call toSub procedure that calculates and displays wages
Outline (2 of 3 ) Sub procedure header specifies parameter names and types Call to Function procedure that determines if user has worked overtime
Outline (3 of 3 ) EndSub keywords indicate the end of Sub procedure definition Function procedure header specifies parameter names and types as well as a return type EndFunction keywords indicate the end of Function procedure definition
13.5 Using the Debugger: Debugging Controls • These ToolStripButtons (Fig. 13.21) provide convenient access to commands in the Debug menu. Start Debugging Step Into Step Out Stop Debugging Pauseexecution Step Over Figure 13.21|Debugging controls on the Standard toolbar.
Using the Debugger: Debugging Controls • In the WageCalculator application, set a breakpointin line 15 (Fig. 13.22). • Select Debug>StartDebugging. Enter the value 7.50 in the Hourlywage:TextBox, and enter 35 in the Weeklyhours: TextBox. Click the CalculateButton Breakpoint set at a line containing a procedure call Figure 13.22| Setting a breakpoint.
Using the Debugger: Debugging Controls (Cont.) • The StepIntoToolStripButton ( ) executes the next statement in the application (Fig. 13.23). • If the next statement to execute is a procedure call, control is transferred to the called procedure. • The StepIntoToolStripButton allows you to entera procedure and confirm its execution. Next statement to executeis a procedure call Figure 13.23| Statementcalls procedure DisplayPay.
Using the Debugger: Debugging Controls (Cont.) • Click the StepIntoToolStripButton to enter procedure DisplayPay (Fig. 13.24). Control transfers to the procedure definition Figure 13.24| Using the Standard toolbar’s Step IntoToolStripButton.
Using the Debugger: Debugging Controls (Cont.) • Click the StepOverToolStripButton ( ) to execute the current statement without stepping into it (Fig. 13.25). Procedure CheckOverTimeexecutes without stepping intoit when you click the StepOverToolStripButton Figure 13.25| Using the Standard toolbar’s Step OverToolStripButton.
Using the Debugger: Debugging Controls (Cont.) • Click the Step OverToolStripButton again. • Step Over behaves like the Step Into when the next statement to execute does not contain a procedure call. • If the next statement to execute contains a procedure call, the called procedure executes in its entirety, and the yellow arrow advances to the next executable line (Fig. 13.26). Figure 13.26|Using the Standard toolbar’s Step OverToolStripButton again.
Using the Debugger: Debugging Controls (Cont.) • Set a breakpoint at the end of procedure DisplayPay in line 39 (Fig. 13.27). Figure 13.27|Using the Standard toolbar’s ContinueToolStripButton.
Using the Debugger: Debugging Controls (Cont.) • Clicking the ContinueToolStripButton ( ) executes any statements between the next executable statement and the next breakpoint or the end of the current event handler. • Click the StopDebuggingToolStripButton ( ).