Download
1 / 32
330 likes | 486 Views
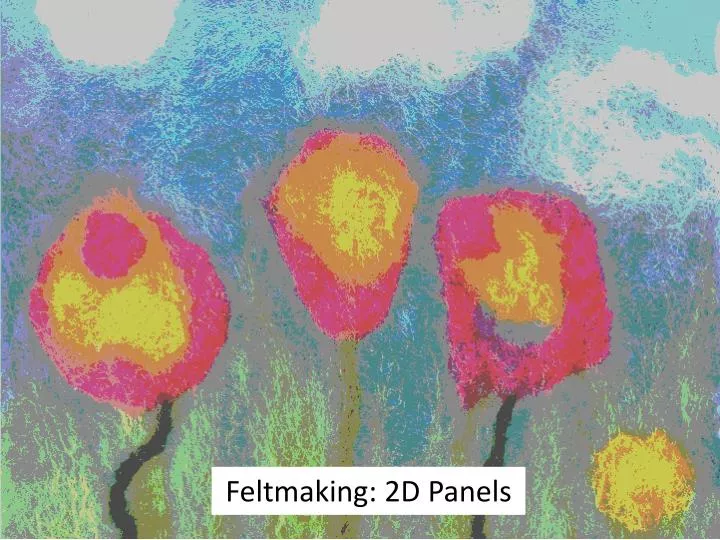
Feltmaking : 2D Panels. f elt is made by pressing and rubbing fibres together to create a strong and thick fabric. Yurt. f ibres that are used for felting are wool & other animal fibres. Sheep s hearing is when the wool is taken off the sheep.

E N D
felt is made by pressing and rubbing fibres together to create a strong and thick fabric Yurt
fibres that are used for felting are wool & other animal fibres
felt is used everywhereit is used to create hats, bags, toys & gifts &handmade gifts
felt can also be used as an insulator &protector image 1 image 2
Materials • Felting wool • Washing up Liquid • Bubble wrap • Netting • Towel • Spray bottle/bottle • Scissors
Materials to Collect • Wool fibres • Open weave fabric scraps • Buttons • Beads • Sequins
Before you start • No bursting the bubbles • The white sheet with the shape, will be under the bubble wrap • Only take out the pieces of felt that you are using immediately
PICK A THEME! spring
what do you see in Spring? rainbows butterflies flowers birds bugs eastereggs
you will learn: • How to prepare the felted design. • How to add your design. • How to do the felting process. • How to finish the felt making process.
. step 1 step 2 pull tufts of wool gently apart step 3 step 4
step 1 step 2 the layers are laid in a crisscross step 3 step 4
step 1 step 2 step 3 step 4
step 1 step 2 tickle! scratch! rub! tap! step 3 step 4
step 1 step 2
step 3 step 4
step 5 step 6
further decoration • Stick on beads, buttons, googly eyes • Sew on buttons • Use 3D fabric paint to draw more designs or to write a word
project suggestions • butterflies • easter Eggs • bookmarks • decorations
Slide 1 Overview- The children will learn the simple process of 2D Felt- making, which will be broken down into 4 Stages: They will learn how to how to design their own felt piece, how to add their designs, the process of felting, and how to finish it. They will also learn how to display it. Duration- The basic class, including the teaching of the knowledge and discussion is approx. 2hrs. Age Group – This lesson is suitable for 1st Class and upwards. There is an option to add further decoration, if they have time, or in a follow-up class. Curriculum strands- This lesson will cover many strands such as Geography (Local knowledge), History (Historical background of felt), English (new words/Poetry), Math’s (Numerical- counting the layers and counting during the felting process), Science (Materials and how it is made) and Music (Songs related to the theme/). For the Visual Art Curriculum, it covers; Fibre & Fabric, Paint & Colour. Health & Safety- As this process is user friendly, the usual health & safety guidelines should be sufficient. Scissors may be used. Excess water may be an issue here. The water that the children use can be controlled- using children’s sized water bottles and filling them up to approximately the half way mark. They can then be refilled from a nearby basin. Aprons are optional, if getting wet is a concern though more often then not, children will avoid getting wet. They can use their towels to wipe away excess on the table to avoid this. Ask the children to roll up their sleeves beforehand. Keep all school books/bag away from the table that is being used. Note: An alternative option is to put the wet felted pieces in a zip lock bag, close and felt by rubbing as usual- it is not as tactile but it will achieve the same results. Slide 2 Felt Felt is made when fibres are pressed and rubbed together to create a strong and thick fabric. It is a very warm fabric. Fibres are threads that can be used to make a fabric.Thetechnique of feltmaking is very old. Yurt- a circular tent made of felt. People in Asia used them when traveling. They were first used at least 3000yrs ago and are still used today, in Asia. Questions to ask: Before the next slide appears, ask the children if they know where does wool come from?
Slide 3 Sheep Fibres that are used for felting are from wool and other animal fibres. Fibres from each breed of animal have a different texture. Some fibres are softer than others and some can be quite wiry or hairy. Tuft is a collection of fibres. Questions to ask Can you think of any other animal that has hair like a sheep that can be good for felting? Answer: Goat. Are there any fields nearby with sheep? How do we get the wool from the sheep? Answer: Sheep Shearing (Next Slide) Slide 4 Sheep Shearing- The sheep’s wool is sheared/cut from its body by his owner or shearer and the wool is then washed. Afterwards it is dyed in many different colours and then it is ready to be used. Slide 5 These items are handmade. Explain that handmade is made by hand, not by a machine. Questions to ask Ask the children to name any of the items. Have they seen them before, does anyone in their family have items like these? Would you wear a felted scarf during the summer or the winter, why? Is there anything made of felted wool, in the classroom? Slide 6 Felt can also be used as an insulator and protector. A felt insulator is a material that prevents heat loss in buildings. Questions to ask -Ask the Children if they can name the items in these images. -Have they seen/heard about any of these items before? Image 1: Felt is used in the attic to keep the house warm. Image 2: Felt pads are used on furniture like chairs to protect the floors from scrape marks.
Slide 7 Materials • Felting wool- Merino or Corendale is the best. Place these in clip bags. The children can swap colours if they like. Pull or cut 6/7” lengths from the wool. You will need at least 3 lengths for the base layers and 2/3 more for the design. • Bubble wrap- Cut 2 pieces or if the space allows, cut one piece, which can be doubled over. The bubble wrap should be bigger than the piece that will be felted. • Netting- Cut a piece, large enough to cover the felted piece. • Water bottles- use kids bottles and fill up to the half way mark. Do not shake the bottles. • Washing up liquid and warm water. • Towels – the children can be asked to bring in their own tea towels. • Basins- Make up a mixture of warm water and washing up liquid. The bottles can be filled quickly this way and topped up during class. Fill up the basin half way and add approx. 1 tablespoon. • Scissors • Templates for shapes (optional) • Aprons (optional) Slide 8 (Image of Collected Materials) Collect Materials; • Wool fibres • Silk or embroidery threads • Sequins • Sparkly or fancy string • Glitter • Scraps of open weave fabric • Note: Sequins and Glitter may best kept for the older classes if working with larger groups. Slide 9 (Prep Work & Materials on the table) Pull or Cut approximately 6 or 7-inch lengths of felt from the roving. You will need 3 lengths for the layers and 2/3 for the design. Place these in ziplock bags. The bags keep the wool safe from the water. The children can swap colours if they wish. Draw, using permanent marker, the desired shape, ( 7x 8inches) which the felt will be contained within. This prevents the children from using all the felt in one go and it also gives the children a guideline to create the desired shape. Another equal and possibly less time consuming alternative, is to photocopy the outline onto white sheets of paper. The black outline will be seen through the bubble wrap. Older groups of children can also do their own drawings in black marker on the white sheet. Place the sheet under the bubble wrap, keeping the bubbles facing up. Note: Often the children will try and burst the bubbles. Tell them that it is really important not to burst the bubbles, otherwise it will not work! Slide 10 Pick a theme: Springtime! Slide 11 Talk about the season, Spring. Questions to ask What do you see in Spring? Write down words What seasons come before and after Spring? What do you like most about Spring? Least? Flowers Butterflies Bees Trees Easter Birds Rainbows…. Slide 12 Ask the Children to draw and colour their ideas about Spring. They will be using their drawings to inspire their work. What colours comes to mind when they think of Spring? Will they draw one thing (e.g. Butterfly) or many things (Sun, rainbow, flowers)? Slide 13 How to prepare the felted design How to add your design How to do the felting process How to finish the felt making process Slide 14 For the base we need to create three layers of felt and these will be placed in a criss cross fashion. 1st layer Across, 2nd Layer Up and 3rd Layer across again. This helps the fabrics ‘Weave’ or ‘Stick’ together. Step 1: Take one of the lengths of felt – Holding one end with one hand, use the other hand to gently pull a fine tuft of wool (Pulling hard actually makes it harder to separate the fibres as it resists) . Step 2: Lay this tuft down on the bubblewap, within the box, in ‘across’ direction. Step 3: Continue to place all of the tufts of wool on the bubble wrap, in the ‘across’ direction. Step 4: Do this until the box is filled. Slightly overlap the tufts to cover any gaps and to get an even coverage. The layer should be fine at this stage. Slide 15 Step 1 & 2- Take the second piece of felt and do the same as the first layer. This time, place the fibres in the opposite, ’up’ direction to the first. Step 3 & 4- Take the third piece and do the same as Steps 1 & 2. Place these fibres in the ‘across’ direction- opposite to the previous. Note: These three layers give the basic thickness for felt, more layers can be added for extra thickness. Slide 16 Step 1: –For the forth layer, A design can now be applied. Different colours can be added now to compliment the child’s design. Tufts of felt can now be applied in any direction. Thin Strands can be gently pulled and placed in any direction on the wool. Many strands can be placed in a random fashion and overlapping each other. Thin strands can be used to outline a design. Step 2 & 3: To make a circle or ball shape, take a fine strand of wool and roll it up insides the palms of your hand, place this on the piece and press down. Note: The thicker the strand, the harder it is to felt so keep it thin and feathery. Step 4: Other wool yarns can be placed here. Glitter, sequins can also be added. Slide 17 Blank Slide 18 Step 1: The piece is now ready for felting. Place the net over the piece, this helps keep the fibres from moving around too much, keeping the design intact during the felting process. Sprinkle the warm water/washing liquid over the wool. Do not soak! Step 2: Ensure that there are no dry areas by pressing the fibres down to absorb the liquid. You will know if areas need more water by doing this. If the piece is soaking, mop up with a sponge by pushing it down onto the water through the net and lift it up straight so that you don’t disturb the fibres. Now place the bubble wrap over the net (ensure the bubbles are facing down.) Step 3- Start by tapping gently for the first few minutes- ask the children to count to twenty to keep them focused. – this just sets the design, otherwise the fibres would move everywhere. Now they can start rubbing gently, using a circular motion, for 5 minutes. Ask them to count to 20 or sing a song. See Suggestion. Step 4: Tell them they can now: Tickle it, Scratch it, Scrape it, Thump it, and Pet it! Do this for 5mins minimum. Suggestion: If you find some of the attention of some of the children is waning, think of any poetry/songs that relate to the theme: wool/sheep/spring that the children know. For example, Baa Baa Black Sheep. Ask them to sing it during the process, it makes the process even more fun and keeps them focused! Slide 19 Step 1: Now ask the children to put their towels under the bubble wrap and roll the two layers tightly together. This will squeeze out the excess water. Step 2: Roll back and forth for another 5-10 minutes. (Count to 20 twice/Sing.) Note: the longer the children spend ‘felting’, the stronger the piece will be. Slide 20 Step 1: Unroll the layers and take off the bubble wrap. Unpeel the netting from the felt, if the fibres are loose (layers are coming apart) then it needs more felting. Some of the fibres may stick to the net, but that is fine. Step 2: Ask the children (in small groups) to take turns to come up to the basin/sink of cold water and place their piece in, to rinse the suds out. Going from warm to cold water further helps the felting process. Slide 21 Step 3: They can then squeeze their pieces into a separate empty basin. Do not wring. Step 4: The piece can be laid out or hung to dry. It will shrink 25%-30% from its normal size. Slide 22 Consider ways to display the piece. How they are displayed, is very important, it will make them even more precious and professional looking. How will they be displayed? They can be hung inside a frame or hung by strings (the strings can be beaded), A banner can be made. Clip them/staple them onto string/fabric. A large wall hanging can be made attaching the pieces together using safety pins. Where will they be hung? In the classroom, in the City Hall, City or library. Or will they be taken home? How will you document it? Make an ‘art installation’. Several lengths of bunting/banners can be made, using the felted pieces. These can be displayed between poles/branches outside. This can then be photographed. They can be hung from branches of a tree and photographed. Slide 23 Consider decorating the felted piece with: Glue or sew sequins and beads on the piece. Googly eyes. Using 3D fabric paint to draw/paint designs on felted piece. The Visual art strand: Clay can be brought into this by making polymer beads and attaching these to the piece. Slide 24 Display all the pieces on the wall/ fishing line/the table. Ask the children to explain the process of felting. What is Felt and where did it come from? What can be made from felt? What colours do you see in this felted piece? What does it feel like (soft/hairy, warm/cold, light/heavy)? Did they find it hard to do? What did they like the most, the least? Tell the children that they have created a new fabric from scratch and that they should be very proud of what they have achieved! New Words Felt Tuft Fibre Yurt Shearing Crisscross Slide 25 The technique learnt can now be applied to create many projects with children. Some ideas to consider for future projects; Butterflies- Use a template to cut the shape afterwards or Draw a large outline on a sheet of paper and place under the bubble wrap. Greeting cards- Stick cut pieces or leftovers on card and embellish. Bookmarks- stick on a card or use alone. Easter Eggs- use an egg template to cut the shape afterwards. Halloween- Pumpkin, Ghost Christmas decorations – Bauble shape. Questions to ask Ask the children what ideas they can come up with.
Slide 10 Pick a theme, such as: Springtime! Slide 11 Talk about the season, Spring. Questions to ask What do you see in Spring? Write down words What seasons come before and after Spring? What do you like most about Spring? Least? Flowers Butterflies Bees Trees Easter Birds Rainbows…. Slide 12 Ask the Children to draw and colour their ideas about Spring. They will be using their drawings to inspire their work. What colours comes to mind when they think of Spring? Will they draw one thing (e.g. Butterfly) or many things (Sun, rainbow, flowers)? Slide 13 How to prepare the felted design How to add your design How to do the felting process How to finish the felt making process Slide 14 For the base we need to create three layers of felt and these will be placed in a criss cross fashion. 1st layer Across, 2nd Layer Up and 3rd Layer across again. This helps the fabrics ‘Weave’ or ‘Stick’ together. • Step 1: Take one of the lengths of felt – Holding one end with one hand, use the other hand to gently pull a fine tuft of wool (Pulling hard actually makes it harder to separate the fibres as it resists) . • Step 2: Lay this tuft down on the bubblewap, within the box, in ‘across’ direction. • Step 3: Continue to place all of the tufts of wool on the bubble wrap, in the ‘across’ direction. • Step 4: Do this until the box is filled.Slightly overlap the tufts to cover any gaps and to get an even coverage. The layer should be fine at this stage.
Slide 15 • Step 1 & 2- Take the second piece of felt and do the same as the first layer. This time, place the fibres in the opposite, ’up’ direction to the first. • Step 3 & 4- Take the third piece, do the same as Step 1 & 2. Place these fibres in the ‘across’ direction opposite to the previous. Note: These three layers give the basic thickness for felt, more layers can be added for extra thickness. Slide 16 • Step 1: –For the forth layer, A design can now be applied. Different colours can be added now to compliment the child’s design. Tufts of felt can now be applied in any direction. Thin Strands can be gently pulled and placed in any direction on the wool. Many strands can be placed in a random fashion and overlapping each other. Thin strands can be used to outline a design. • Step 2 & 3: To make a circle or ball shape, take a fine strand of wool and roll it up insides the palms of your hand, place this on the piece and press down. Note: The thicker the strand, the harder it is to felt so keep it thin and feathery. • Step 4: Other wool yarns can be placed here. Glitter, sequins can also be added. Slide 17 Blank Slide 18 • Step 1: The piece is now ready for felting. Place the net over the piece, this helps keep the fibres from moving around too much, keeping the design intact during the felting process.Sprinkle the warm water/washing liquid over the wool. Do not soak! • Step 2: Ensure that there are no dry areas by pressing the fibres down to absorb the liquid. You will know if areas need more water by doing this. If the piece is soaking, mop up with a sponge by pushing it down onto the water through the net and lift it up straight so that you don’t disturb the fibres. Now place the bubble wrap over the net (ensure the bubbles are facing down.) • Step 3- Start by tapping gently for the first few minutes- ask the children to count to twenty to keep them focused. – this just sets the design, otherwise the fibres would move everywhere. Now they can start rubbing gently, using a circular motion, for 5 minutes. Ask them to count to 20 or sing a song. See Suggestion. • Step 4: Tell them they can now: Tickle it, Scratch it, Scrape it, Thump it, and Pet it! Do this for 5mins minimum. Suggestion: If you find some of the attention of some of the children is waning, think of any poetry/songs that relate to the theme: wool/sheep/spring that the children know. For example, Baa Baa Black Sheep. Ask them to sing it during the process, it makes the process even more fun and keeps them focused!
Slide 19 • Step 1: Now ask the children to put their towels under the bubble wrap and roll the two layers tightly together. This will squeeze out the excess water. • Step 2: Roll back and forth for another 5-10 minutes. (Count to 20 twice/Sing.) Note: the longer the children spend ‘felting’, the stronger the piece will be. Slide 20 • Step 1: Unroll the layers and take off the bubble wrap. Unpeel the netting from the felt, if the fibres are loose (layers are coming apart) then it needs more felting. Some of the fibres may stick to the net, but that is fine. • Step 2: Ask the children (in small groups) to take turns to come up to the basin/sink of cold water and place their piece in, to rinse the suds out. Going from warm to cold water further helps the felting process. Slide 21 • Step 3: They can then squeeze their pieces into a separate empty basin. Do not wring. • Step 4: The piece can be laid out or hung to dry. It will shrink 25%-30% from its normal size. Slide 22 Consider ways to display the piece. How they are displayed, is very important, it will make them even more precious and professional looking. How will they be displayed? They can be hung inside a frame or hung by strings (the strings can be beaded), A banner can be made. Clip them/staple them onto string/fabric. A large wall hanging can be made attaching the pieces together using safety pins. Where will they be hung? In the classroom, in the City Hall, City or library. Or will they be taken home? How will you document it? Make an ‘art installation’. Several lengths of bunting/banners can be made, using the felted pieces. These can be displayed between poles/branches outside. This can then be photographed. They can be hung from branches of a tree and photographed. Slide 23 Consider decorating the felted piece with: • Embroider, stitch or applique on the piece. • Glue or sew sequins and beads on the piece. • Using 3D fabric paint to draw/paint designs on felted piece. • The Visual art strand: Clay can be brought into this by making polymer beads and attaching these to the piece. Slide 24 Display all the pieces on the wall/ fishing line/the table. Ask the children to explain the process of felting. What is Felt and where did it come from? What can be made from felt? What colours do you see in this felted piece? What does it feel like (soft/hairy, warm/cold, light/heavy)? Did they find it hard to do? What did they like the most, the least? Tell the children that they have created a new fabric from scratch and that they should be very proud of what they have achieved! New Words Felt Tuft Fibre Yurt Shearing Crisscross Slide 25 The technique learnt can now be applied to create many projects with children. Some ideas to consider for future projects; Butterflies- Use a template to cut the shape afterwards or Draw a large outline on a sheet of paper and place under the bubble wrap. Greeting cards- Stick cut pieces or leftovers on card and embellish. Bookmarks- stick on a card or use alone. Easter Eggs- use an egg template to cut the shape afterwards. Halloween- Pumpkin, Ghost Christmas decorations – Bauble shape. Questions to ask Ask the children what ideas they can come up with.
Slide 24 Display all the pieces on the wall/ fishing line/the table. Ask the children to explain the process of felting. What is Felt and where did it come from? What can be made from felt? What colours do you see in this felted piece? What does it feel like (soft/hairy, warm/cold, light/heavy)? Did they find it hard to do? What did they like the most, the least? Tell the children that they have created a new fabric from scratch and that they should be very proud of what they have achieved! New Words Felt Tuft Fibre Yurt Shearing Crisscross Slide 25 The technique learnt can now be applied to create many projects with children. Some ideas to consider for future projects; Butterflies- Use a template to cut the shape afterwards or Draw a large outline on a sheet of paper and place under the bubble wrap. Greeting cards- Stick cut pieces or leftovers on card and embellish. Bookmarks- stick on a card or use alone. Easter Eggs- use an egg template to cut the shape afterwards. Halloween- Pumpkin, Ghost Christmas decorations – Bauble shape. Questions to ask Ask the children what ideas they can come up with.