Download
1 / 9
90 likes | 244 Views
Entering a Purchase Request. Draft Departmental User Instructions June 2014. E-forms and Workflow. A new system is being rolled out that will replace paper forms or email requests for financial transactions processed by Finance Centers.

E N D
Entering a Purchase Request Draft Departmental User Instructions June 2014
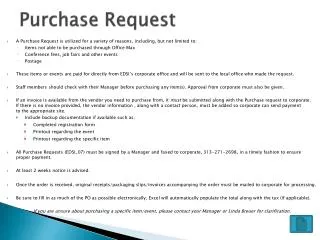
E-forms and Workflow A new system is being rolled out that will replace paper forms or email requests for financial transactions processed by Finance Centers. The first process to be moved to the new system is Purchase Requisition. The on-line form was developed using OnBase. OnBase is also used as the campus Records Management system and is now in use in several other offices. Later there will be similar forms for other transactions like submitting P-Card receipts, and requests for journal entries. Using a current browser; IE9 or IE10, Chrome or Firefox 19 – 29 • Access the purchase requisition form at https://onbase-app.dartmouth.edu/FCDataProvider/form_links.html • As additional forms are completed they will be added to this menu
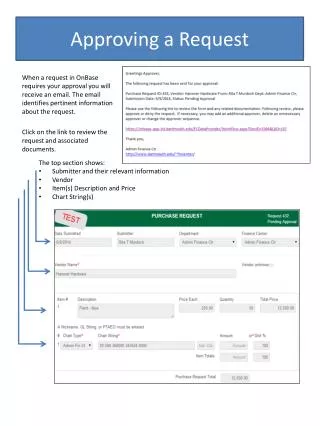
Starting the Requisition When you open a new form the Date Submitted, Submitter name, Department and Finance Center are pre-populated. Fields that are Greyed Out cannot be changed. If you have more than one department in the HR System: • use the drop down menu to select the department related to this request • use the drop down to change the Finance Center where the request will be routed As a Submitter you will have the ability to see the Requisitions that you enter. You will receive an email confirming your submission and providing a link to view it in the future. A Department Administrator is able to see all Requisitions assigned to Orgs or Awards to which he or she has access in IRA. When text is Greyed Out in a field OnBase is providing hints on what is expected or the format to be used in that field.
The Basics To submit a request you need to complete the required fields indicated by * • Vendor Name or check Vendor unknown, • Chart Type, • Chart String, • Amount or Dist% Chart Type has 3 options: GL String, PTAEO String or Nicknames. Nicknames are those you have defined in your eProcurement profile and will be listed in this drop down menu for selection. When a nickname is selected it will fill the GL string fields with the exception of the Natural class. Chart String can be typed in or copied from another source • GL strings are entered as a full string with Natural Class as a separate field. Natural class is not Required • PTAEO strings are broken out into the individual segments When using Dist % the total distributed for the Item must = 100%
Vendor and Item If you know the Vendor enter it in the Vendor Name field. If you don’t know the Vendor check the Vendor unknown box. In the Item section for each item enter a Description and if known Price Each and Quantity. Then in the Chart section show how the expense for the item will be charged. The expense can be charged to multiple chart strings by clicking ‘Add Additional String’ Enter the expense to be charged to the chart string in the Amount field or show an allocation to the chart string by entering the Dist%. But not both on the same item. If you don’t know the amount just enter the Dist %
Vendor and Items When there are multiple items on the Requisition add lines by clicking ‘Add Additional Item’ To correct a Chart String either re-type the information or use the Remove button The Delete Item button will delete the Item unless it is the only Item on the form
Access When entering a Requisition that is expensed to an Org or PTAEO Award that your Department Administrator does not have access to in IRA check the Department Administrator Additional Access check box. When you check the box you are presented with two additional fields. The first field is a drop down menu that defaults to ‘Security GL Org’. Also in the drop down menu is ‘PTAEO Award’ and then a list of the Nicknames that you have defined in your eProcurement profile. Select the correct option from the pull down and enter in a value; GL Org or PTAEO Award, that the Administrator has access to in IRA, except in the case of selecting a Nickname when the GL Org will be auto populated. To correct the value entered either re-type the information or use the Remove button When entering Request on behalf of begin by typing the Last Name and a list is generated. Select the correct name from the list. Enter the Requestor Phone number andDelivery to Location as appropriate.
Attachments Attach supporting documents to the Purchase Request by using the Add and Remove Attachments button. When the Supporting Attachments box opens first select a Document Type (Contract, Bid, Sole Source) from the drop down list and then click on the Select button to browse your computer to find the file and click Upload. You can add multiple attachments. When complete click Done.
Approve and Submit Not all Requisitions require an approver but when you determine one does OnBase will route to one or more Approvers. This approval can then be captured in the eProcurement system. Note this is only for approvals that are now done through email, not approvals that go through the eProcurement Workflow. In the Approvals field type in the name of the Approver beginning Last name first. Once you have found the correct name in the list, click on the name and then click Add The Approver. To add multiple Approvers repeat the step to add an approver. If you have entered more than one approver you can re-sequence the order of the approvers by changing the Sequence number for an approver. To then send the request to the Finance Center click Submit. If you have not finished entering the Purchase Request you can click Save Without Submitting at any pointand will receive an email with a link to continue working on the form. If you want to pretend you never started click Close Without Saving.