Download
1 / 27
310 likes | 711 Views
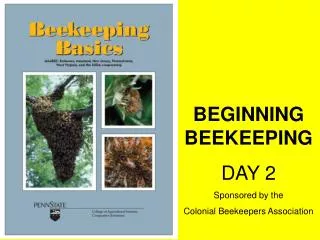
Beginning Beekeeping. Week Two – Starting Out with a Hive. Siting Your Hive: the ideal and the real. Ideal: High and Dry South/East facing Wind protected Away from property lines Accessible by car/truck Near-by storage. (From “ The Beekeeper ’ s Handbook ” Sammataro and Avitable).

E N D
Beginning Beekeeping Week Two – Starting Out with a Hive
Siting Your Hive: the ideal and the real • Ideal: • High and Dry • South/East facing • Wind protected • Away from property lines • Accessible by car/truck • Near-by storage
Siting: Ideal vs. Real • Real: • Best for your site • Read the South Portland ordinance and MSBA best practices
MSBA Best Practices • Hive Density • Up to ¼ acre: 2 hives • > ¼ to ½ acre: 4 hives • > ½ to 1 acre: 6 hives • 1 acre + : 8 colonies • Hive Placement • Quiet, low traffic area • Not against property line unless 6 ft barrier in place • Entrance should allow bees to fly across your property if possible • Use barriers to redirect flight if not possible • Water Source
Packages vs. Nucs • Advantages of packages • Readily available • Easy to install • Slow build up provides more gradual learning curve for beginners • Disadvantages of packages • Where did my bees come from? • Must be installed right away • Possibility of queen failure • Slow build-up, lower odds of 1st year honey harvest
Packages vs. Nucs • Advantages of nucs • Real nucs vs. splits • Accepted queen • Established colony • Over wintered, local? • Faster build-up • Disadvantages of nucs • Harder to install, may harm queen • Faster build-up
Installing a package • “The Backyard Beekeeper” instructions are good • Tips: • Spray bottle for sugar water • Install in the bottom box • Place queen cage away from the center, so syrup won’t leak on her • Remove wooden plug from the candy side of the cage (BE SURE IT IS THE CANDY SIDE) • Flottum’s instructions on queen release are quite cautious. Many beekeepers remove the candy the day they install the queen with no adverse effect • In either event, check in 3-5 days to insure queen has been released • Check in a week to see if you have eggs • Know your bee math
The package will contain a feeder can and a queen cage (and about 10-12,000 calm bees.) Mist them with a bit of 1:1 sugar syrup.
Remove the can – the corner of your hive tool works well for this • Remove the queen cage – brush the bees off into the new hive (with your hands) and check that your queen is moving around. • Place the cover back over the opening
Pull out the cork from the candy end of the cage. • Again, the corner of your hive tool gets the job done • Attach the cage to the frame candy side up • Set this frame aside
Thump and Dump: • Mist the bees again with syrup • Thump the package right side up so the bees fall to the bottom • Remove the cover • Pour the bees into a space left by leaving 2-3 frames out of the hive • Put the package against the hive entrance so bees can crawl or fly into their new home. They’ll find the queen before nightfall. • In lousy weather you can put the package inside a top hive body, above the inner cover (Click here to see a video of Erin Forbes installing a package in a hive.)
Installing a nuc • Pull out one more frame than # of frames in your nuc from the bottom box of your hive • Light smoker • Gently smoke the nuc • Remove the nuc frames and place them in the box in the same order as they were in the nuc • Replace the one missing frame on the outside • Put on inner cover and feeder • Cover feeder with extra empty super • Outer cover on top • Leave for at least 5 days before inspecting • Observe the hive. You should see bees flying, doing orientation flights
Prop the nuc box at the hive entrance; the bees will find their way home
Feeding Bees • When to feed • Feed a new hive • Feed a weak hive • Feed a hive low on stores • What to feed • 1:1 in the summer • How to feed • Hive top • Quail waterers • Jar with holes • Baggy • Bucket with screen • Avoid Boardman feeders (attach to front of hive). They promote robbing.
Make a few slits or pin holes on the top of the bag. • On top bars works great for keeping syrup warm but be careful not to leave that space on for too long or they’ll build comb in unhelpful ways. • Sandwich or snack bags above the inner cover work well for small amounts
Bucket feeders are useful if you can’t be at your hive on a regular basis. • Be careful not to let the plug come loose and flood your colony • On cold nights this becomes a big chiller on top of your hive through the next day
Boardman feeders are convenient, cheap, and easy to keep an eye on, but . . .
. . . they can promote robbing like crazy. • Always use an entrance reducer (and consider a robbing screen) • If you’re feeding one hive, put feeders on all other hives in the area
How is my hive doing? • Healthy queen • Eggs • Larvae • Brood • Drawing Comb • Bringing home pollen = brood rearing
Bee Math • Worker: • Egg for 3 days • Larva for 6 days • Capped for 12 days • Queen • 3, 5, 8 • Drone • 3,7, 14 (See Bushfarms.com – Here’s the link)
When to stop feeding • Overfeeding can promote swarming • 2/3 drawn comb, add a box • Once brood boxes are drawn, add honey super and stop feeding (Bushfarms.com also has a very thorough discussion of feeding – here’s the link)