Download
1 / 29
290 likes | 497 Views
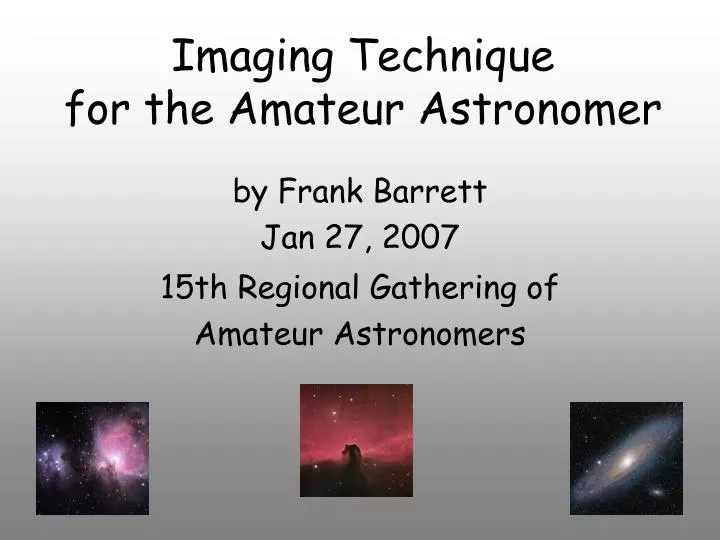
Imaging Technique for the Amateur Astronomer. by Frank Barrett Jan 27, 2007 15th Regional Gathering of Amateur Astronomers. Objectives. Overview of Astro Imaging Requirements Emphasis on Imaging Technique If time permits, A Short Processing Demo End with a slide show. The Question.

E N D
Imaging Technique for the Amateur Astronomer by Frank Barrett Jan 27, 2007 15th Regional Gathering of Amateur Astronomers
Objectives • Overview of Astro Imaging Requirements • Emphasis on Imaging Technique • If time permits, A Short Processing Demo • End with a slide show
The Question What is required to take really good astronomical images? ???
The Answer Priority Patience Time Persistence Equipment Tools Software Acquisition Technique Processing
Imaging Technique Technique: a method of accomplishing a desired aim- Merriam-Webster so when we speak of technique we are speaking of a methodology or perhaps a framework of methodologies working together to accomplish our goal: Really Good Images! --> Tools are NOT Technique
Acquisition How do we use our tools (equipment + software) when preparing and recording images? Usually done under the stars. Image Processing What can we do with the image data acquired to maximize signal and reduce noise? Usually done on the computer. Two Phases of Technique
Acquisition Techniques • Polar Alignment • Guiding, PEC • Balance • Focus, focus, focus! • Location • light pollution • latitude • horizon • weather • Seeing/Thermal effects • pavement vs. grass • cool down time
Acquisition Techniques • Dew Prevention • Target Location • low on horizon? • over a chimney? • meridian flip? • Optical configuration • focal length/FOV • focal reducer • Barlow • mosaic preparation
Acquisition Techniques • Imaging • sub exposure duration • total number of subs • darks, flats • bin factor • filters • light pollution • narrow band • color • dithering
Processing Technique Two main phases to image processing: 1) Noise reduction (both random and non random) 2) Signal enhancement Noise - an unwanted signal or disturbance in an electronic device or instrument; irrelevant or meaningless data or output occurring along with desired information Signal - a detectable physical quantity or impulse by which messages or information can be transmitted (ref: Merriam-Webster, http://m-w.com)
Noise Reduction Combatting Non Random Noise with Image Calibration (a.k.a. Reduction): 1) Darks - every electronic imaging device produces noise due to “dark current”. An image taken in the “dark” for the time and temperature of your light frames can be subtracted to remove this form of noise. 2) Flats - another form of unwanted noise may come from the optics of our system. Dust, dirt, and uneven illumination can conspire to produce unwanted artifacts in our images. A flat is an evenly illuminated image which can be used as a baseline for removing these artifacts.
Noise Reduction Combatting Random Noise by Combining Frames: • The predominant noise in a calibrated frame is random in nature...it will be different from one subframe to the next. • Note that the signal is constant, but the noise is random. • We can leverage this knowledge by mathematically combining the pixels of a stack of such images. • Averaging N subframes will decrease noise by SQRT(N). • Note: subframes have to be properly calibrated and aligned before combining.
Noise Reduction Combination Algorithms: • Simple Average - Add up all the pixel values from the stack and divide by N. • Produces a very smooth image, but may allow effects due to satellite trails or cosmic ray hits to “bleed” through. • Median - sort all the pixel values from the stack and select the one in the middle. • A bit noisier than average, but does excellent job removing hot and cold pixels and other unwanted artifacts such as satellite trails or cosmic rays. • Sigma Clip - remove out-liers (both high and low) and average the remaining pixels. • Gives the best of both worlds. Needs at least 6 subframes to be effective.
Noise Reduction Combatting Non Random Noise by Dithering Frames: • Dithering is an acquisition technique where the guide star is purposefully moved from one subframe to the next. • This has the effect of shifting the signal around on the imaging chip. • After alignment any non random noise from the camera will be located at different locations of the image stack and will be removed nicely by the combination algorithm.
Noise Reduction A Final Note: • All subframes contain noise. This includes darks, flats, and light frames. • For this reason all Frame types should be taken with multiple subframes and combined! • Furthermore, Flat frames should be calibrated with their own darks, and light frames should be calibrated with darks and flats. • A typical frame inventory: • w Flats (one set per filter) • x Darks for Flats • y Lights • z Darks for Lights
Signal Enhancement Once we have done a good job of removing noise we can focus our attention on bringing out the signal of our target. Our primary goal here is to bring out the detail, color, and character of the underlying data. We strive not to distort, but to enhance. Please Note: It is impossible to remove all the noise and therefore we need to be very careful that we enhance the signal and not the remaining noise.
First Step: Histogram Stretch Most of the signal in a typical deep sky image is in the low end of the histogram: • There are many software techniques to perform histogram stretch. I prefer to use Adobe PhotoShop's Levels and Curves because it gives more control over the result.
Histogram Stretch with Levels and Curves • The idea here is to bring up the low end of the histogram while preventing burn out in the high end. • After applying an iteration or two of Curves it is usually necessary to adjust the black point with Levels.
Next Step: Cleanup • Despite our best efforts to remove noise there will still be unwanted artifacts in the image that should be removed at this time. • To remove hot and cold pixels, specks, splotches or other nasties I prefer to use PhotoShop’s clone tool.
Next Step: Separating Zones • Ron Wodaski has written an excellent image processing book entitled “Zone System for Astro Imaging” whereby the image is separated into 3 or more zones based on the signal to noise ratio of that zone. • The darkest areas of the image contain almost no signal and therefore contain the lowest signal to noise ratio. • Conversely, the brightest areas of the image will contain the highest signal to noise ratio. • The idea is to separate these zone out so that we can apply different processin techniques to each of the zones. This is typically done in PhotoShop with the Color Range Selection Tool and Layers.
Zone Processing • The stars. Creating a layer with just the stars allows us to be aggressive in processing other zones without destroying any background stars. • Dark Zone. This zone typically contains almost all noise and can be defeated by raising the dark point in Levels. • Dim Zone. These are the faintest areas of our image. We can best mitigate the noise here by applying a mild blur to soften the noise. • Mid Zone. If the image has a wide dynamic range I will create this zone from tones between the Dim Zone and Bright Zone. This zone typically does not require any smoothing, but is not detailed enough to warrant sharpening. • Bright Zone. This zone will contain the brightest and perhaps most detailed portions of the image. Here we will want to apply sharpening. I like to use PhotoShop’s Unsharp Mask.
So What? • For most of us our time is limited and we do astronomy on a budget. • Therefore we have to fit in with the time available and make do with the equipment we have. • The variable with which we have the most control is therefore Technique. • The best way to go about developing your Technique is to focus on problem areas. Continuously ask yourself, “What could I have done to make this image even better.” • If you decide to stay in it for the long haul you will never stop asking that question and your images will continue to improve! • When you hit that brick wall (and you probably will) you may be faced with the fact that you have reached the limits of what your time and/or tools will allow. Either accept that or go about making improvements.
See more at:http://celestialwonders.comcontact me at:frankb@celestialwonders.com
Bibliography • “The New CCD Astronomy” by Ron Wodaski • “The Zone System for Astro Imaging” by Ron Wodaski • “Photoshop Astronomy” by R. Scott Ireland • “Photoshop for Astrophotographers” by Jerry Lodriguss • CCD Topics by Stan Moore: http://www.stanmooreastro.com/CCD_topics.html • Technical Notes by John Smith: http://www.hiddenloft.com/notes.htm • SBIG Yahoo Group: http://tech.groups.yahoo.com/group/SBIG • Great CCD Software: http://www.ccdware.com/ • CCDSoft, TheSky: http://www.bisque.com/Products/ • FocusMax, PoleAlignMax: http://users.bsdwebsolutions.com/~larryweber/ • Cartes du Ciel: http://www.stargazing.net/astropc/