Download
1 / 98
980 likes | 1.13k Views
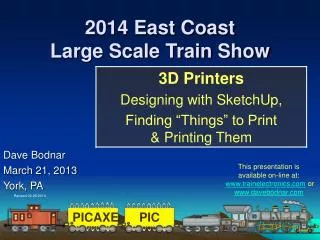
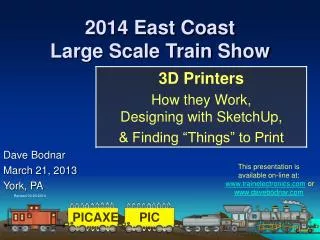
2013 East Coast Large Scale Train Show. Dave Bodnar March 22, 2013 York, PA. This presentation is available on-line at: www.trainelectronics.com or www.davebodnar.com. Revised 03-22-2013. Objectives. Demonstrate various devices & projects that utilize microcontroller operation …

E N D
2013 East CoastLarge Scale Train Show Dave Bodnar March 22, 2013 York, PA This presentation isavailable on-line at:www.trainelectronics.com or www.davebodnar.com Revised 03-22-2013
Objectives • Demonstrate various devices & projects that utilize microcontroller operation … • … and some that do not! • (Hopefully) Excite you with the possibilities and enable you to begin experimenting and enhancing your railroad!
Topics to be Covered • PICAXE review – What is it? Why use it?How do we use it? • New PICAXE chip • A NEW PICAXE project • A NEW LED lighting project • Revolution /w Sound Overview • Lots of Animation ideas • Easy Uncoupling with Revo or Small Remote • Tips, Tricks, Tools • New & improved gizmos & gadgets
PICAXE Basics • Not spending much time on a PICAXE introduction this year • You can view my introductory PICAXE seminars on YouTube • davebodnar.com ortrainelectronics.com • Under Presentations • Or search YouTube for “Bodnar PICAXE”
Garden Railways PICAXE Article April 2013 Issuepages 54-59 Contains a detailed introduction to the PICAXE and several projects
Garden RailwaysPICAXE Article Shows how to build: • Single LED Lighthouse • Single LED Mars Light • Morse Code Beacon All using the same circuit
PICAXE - What You Need • Computer with serial port or … USB to serial adapter or … USB programming cable • Windows computer running free PICAXE software (Mac & Linux, too) • Power source • 3 @ AA cells = 4.5 volts
Tip USB to Serial Adapter Spark Fun sells PICAXE cable – part # PGM-08312 for about $26.00 Or Spark Fun’s USB to Serial – part # PGM-09260for about $15.00 Details on use at www.trainelectronics.com
Tip USB to Serial Adapter #2 Modern Device sells a similar board for about $14.00 Details on use at www.trainelectronics.com
Garden RailwaysPICAXE Article #NO_DATA 'speeds up programming #Picaxe 08M2 'identify the chip SETFREQ m32 'speed it up to 32 MHz SYMBOL Loopie = b2 'label variable b2 as Loopie SYMBOL Brightness = b1 'label b1 as Brightness SYMBOL Dlay = 150 'set constant Dlay to 150 Start: For Loopie = 0 to 100 step 1 '100 steps from off to bright brightness=255-loopie pwmout c.2, brightness, loopie 'use PWM to brighten the LED pause Dlay 'pause a bit next loopie 'get the next item in for/next pwmout c.2, 255,1023:pause 1000 'flash to full bright briefly for loopie = 100 to 0 step -1 'repeat above backwards brightness=255-loopie pwmout c.2, brightness,loopie pause Dlay next loopie pause 2000 'pause a bit with LED off goto start 'do it again! Single LED Lighthouse
Garden RailwaysPICAXE Article #NO_DATA 'speeds up programming #Picaxe 08M2 'identify the chip SETFREQ m32 'speed it up to 32 MHz SYMBOL Loopie = b2 'label variable b2 as Loopie SYMBOL Brightness = b1 'label b1 as Brightness SYMBOL Dlay = 2 'set constant Dlay to 2 Start: Gosub ShortFlash 'do the shorter flash routine Gosub LongFlash 'do the longer flash routine GOTO Start: 'repeat ShortFlash: 'a label For Loopie = 0 to 100 step 1 '100 steps from off to bright brightness=255-loopie pwmout c.2, brightness, loopie 'light the LED pause Dlay next loopie for loopie = 100 to 0 step -1 'repeat above backwards brightness=255-loopie pwmout c.2, brightness,loopie sertxd (#loopie, " ") pause Dlay next loopie return 'return to the point where the routine was called LongFlash: 'do the longer flash For Loopie = 0 to 255 step 1 '255 steps from off to bright brightness=255-loopie pwmout c.2, brightness, loopie pause Dlay next loopie for loopie = 255 to 0 step -1 'repeat above backwards brightness=255-loopie pwmout c.2, brightness,loopie pause Dlay next loopie return Single LED Mars light
Garden RailwaysPICAXE Article Morse Codebeacon
Garden RailwaysPICAXE Article More to come…
New PICAXE Chip • Prior seminars focused on the PICAXE 08M - 8 pins – about $3.00 each • A new 18 pin chip, the PICAXE 18M2 -about $5.00 and has much more capability • Faster • 15 pins for input & output • Much more memory • Low voltage operation (as low as 2 volts!) • Built in timer & multitasking
New PICAXE Project • This new project is to create a completely solid state track side or on-board speed controller… • …that has a really cool trick up its sleeve… • …that can be modified to supply up to 12 amps of power!
PICAXE Speed Controller • Objectives: • Controls DC track power: speed & direction • Manages smooth acceleration / deceleration • Never changes direction when power is on • Controlled by inexpensive television IR remote control • Can handle several amps
Speed Controller • Parts: • PICAXE 18M2 or 18M2+ • Single chip “H-Bridge” • IR Receiver chip • 18+ volt power supply
Speed Controller • Many older circuits used a relay to reverse direction and a transistor to control speed • This circuit uses a single L298N to do both jobs
Speed Controller • The first version of the controller operates a simple track side layout using the IR remote control • It can be used as a basic speed / direction controller • …or it can be programmed to change direction based on time (easy point-to-point controller!)
How Do We Control the Controller? • Speed and other settings can be modified with a simple TV remote control • Set min & max speed • Set rate of deceleration • Set time to wait at ends on point-to-point & IR sensor
IR Control Built into PICAXE • PICAXE program to display IR codes Symbol IRSense = b.2 'pin 8 Symbol InfraRED = b12 #TERMINAL 4800 IRTEST: Irin [50, IRTEST],IrSense, InfraRED SERTXD("InfraRED Code = ",#InfraRED,13,10) GOTO IRTEST
Motor Control Routine Revers: toggle relay SERTXD("@Revers",13,10) GOSUB decel SERTXD("Pausing 1000 millisecods",13,10) PAUSE 1000 TOGGLE direction1:TOGGLE direction2 GOSUB accel RETURN Accel: SERTXD("@Accel",13,10) FOR loopie0= MinSpeed TO SetSpeed STEP 5 SERTXD(#loopie0," ") PWMDUTY motor,loopie0 ; set pwm duty PAUSE adrate NEXT loopie0 SERTXD(13,10) RETURN Decel: SERTXD("@Decel",13,10) FOR loopie0= SetSpeed TO MinSpeed STEP -5 SERTXD(#loopie0," ") PWMDUTY motor, loopie0 PAUSE adrate NEXT loopie0 SERTXD(13,10) RETURN SYMBOL Direction1 = b.0 'pin 6 SYMBOL Direction2 = b.1 'pin 7 SYMBOL Motor = b.3 'pin 9 SYMBOL Loop1 = b27 SYMBOL ADRate = b16 SYMBOL MinSpeed = w3 SYMBOL Loopie0 = W1 SYMBOL SetSpeed = w2 Symbol Relay = c.0 'pin 17 SetSpeed=0 PWMOUT motor,50,500 '150 ; set PWM duty HIGH Direction1:LOW Direction2 PWMDUTY motor, SetSpeed setspeed=200 ADRate=100 GOSUB Accel Cruise: SERTXD("Pausing 5000 millisecods",13,10) PAUSE 5000 GOSUB revers GOTO Cruise
Control Options • Remote Control Buttons • Channel UP - Increase speed • Channel DOWN - Decrease speed • Volume UP - Change direction to forward (if not already going forward) • Volume DOWN - Change direction to backwards (if not already going backwards) • MENU - stop the train remembering the current speed - press MENU again to restart at the same speed and in the same direction
Additional Control Options • Press the RETURN button to change settings • Change Maximum Speed • Change Minimum Speed • Change Run Time • Change Acceleration / Deceleration rate
Point-to-Point Setup • OPTIONAL: Reset RETURN / V-Chip / EXIT • Set Min speed then hit MUTE • Set Max speed • Set run time - RETURN / 3 / three digit time in seconds • POWER to set deceleration point
Train Recorder • The newest version automatically records (at a rate of 50 recordings per second) a train’s movements so that you can play them back over & over • A rather unusual but very cool thing to do! • Makes station-stops and complex routes a snap!
Train Recorder • Additional Components: • A memory chip to store activity (can store up to 20 minutes of train movements!) • A potentiometer to control speed & direction • Optional: A relay to control a “stop block” that keeps things in “sync”
More POWER! • The L298N supplies up to 3 amps with a heat sink • This is enough for most of us but not all! • There is an easy add-on that can handle 12 amps continuously and peaks of up to 30 amps! • Voltage can be as high as 24 volts
Other Uses • The same controller can be used to automate and control anything that has a DC motor • Animations • circus rides • cranes, trucks, cars • inclines • trams
Animation • Animation adds fun and excitement to your layout • Moving things is easy with the PICAXE as it knows how to talk to model airplane servos
Servos • A servo is made up of a small motor and set of gears • A string of control pulses precisely position the servo’s arm • They are commonly used to operate control surfaces on model planes, boats and cars
Animation • By sending precisely timed pulses the PICAXE can set the servo’s arm to a specific position and hold it there.
Servos The PICAXE can talk directly to a servo SYMBOL Temp = b0 SYMBOL ServoPin = c.2 ‘pin 5 Start: FOR Temp = 225 TO 75 Step -1 sertxd (#temp," ") SERVO ServoPin, Temp PAUSE 15 NEXT Temp sertxd (13,10) FOR Temp=75 TO 225 Step 1 sertxd (#temp," ") SERVO ServoPin, Temp PAUSE 15 NEXT Temp sertxd (13,10) GOTO Start:
Animation • Only three wires go to the servo • Two for power and 1 for control pulses • The SERVO command is built into the PICAXE
Servo Examples • Elephant
Servo Examples • Outhouse
Servo Examples • Water Spout
Servo Examples • Prairie Dogs
Servo Recorder • For more complex servo movements the train recorder has been modified to operate one or two servos • Ideal for • dual axis searchlight • dual servo bear animation
Servo Examples • Scanning Spotlight • Uses brightLED • And twoServos
Servo Examples • Bears • Two servos on large bear • One each on others
Servo Examples • Eggliner • eyes blink • and move
Servo Examples • Children’s Hospital Searchlight • Rotates back & forth via servo • Only works when train is running and lights are down
Servos Come in Many Sizes • Standard • 9 gram • 4.3 gram • 1.5 gram
Servos • Coupler control • Servos can easily uncouple cars • Uses a simple PICAXE controller and some type of radio control • RC can be Revolution receiver • Can be an inexpensive keychain transmitter & its small receiver
Servos with the Revolution Auxiliary Port • Revolution users who want to operate live steam or boats need to be able to operate servos • A custom interface allows you to use the six auxiliary buttons to move two servos
Where do project ideas come from? • I recently received an email from a garden railroader who wanted to illuminate his passenger cars with battery powered LEDs • After some discussion and experimentation a solution was designed that provides us with many options for using and powering LED lighting
LED Coach Lights • Design called for battery operation and enough lights to illuminate g-scale coaches using only 3 to 5 volts • First units were built on popsicle sticks to get layout and spacing right • All of the LEDs are wired in parallel to keep operating voltage down Adding parallel resistors increases brightness & decreases run time
LED Coach Lights • Lights can be turned on and off by a latching reed switch • Pass a magnet over one end of the reed switch and the LEDs go on • Pass it over the other end and they go off • The reed switch can be placed against the top of the car so nothing is seen and no holes are drilled in the car
LED Coach Lights • A custom circuit board was designed • And sent off for manufacture