Download
1 / 21
210 likes | 364 Views
Excel Graphics Feature. SmartArt and Images. Objectives. Insert a SmartArt graphic on a worksheet Modify a SmartArt graphic Add effects to a SmartArt graphic Insert an image on a worksheet Modify an image on a worksheet. Plan Ahead.

E N D
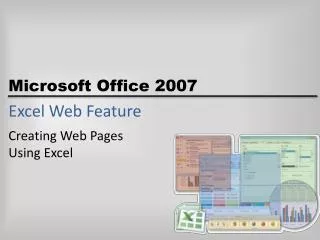
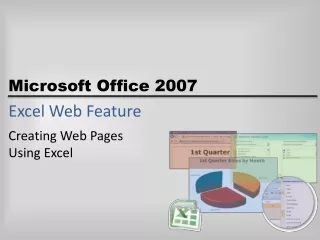
Excel Graphics Feature SmartArt and Images
Objectives • Insert a SmartArt graphic on a worksheet • Modify a SmartArt graphic • Add effects to a SmartArt graphic • Insert an image on a worksheet • Modify an image on a worksheet Microsoft Office 2007: Complete Concepts and Techniques - Windows Vista Edition
Plan Ahead • Choose the type of graphics to use for the organization chart • Determine the contents and layout of the organization chart • Specify the formatting for the organization chart • Obtain the image to be used in the worksheet Microsoft Office 2007: Complete Concepts and Techniques - Windows Vista Edition
Opening a Workbook, Turning Off Gridlines, and Inserting an Organizational Chart • Connect a USB flash drive to one of the computer’s USB ports • Start Excel and then open the workbook, Malik Legal Services IT Department, from the Data Files for Students • Save the workbook using the file name, Malik Legal Services IT Department Complete • Click the View tab on the Ribbon and then click the Gridlines check box to turn off gridlines on the worksheet • Click the Insert tab on the Ribbon and then click the SmartArt button on the Ribbon to display the Choose a SmartArt Graphic dialog box Microsoft Office 2007: Complete Concepts and Techniques - Windows Vista Edition
Opening a Workbook, Turning Off Gridlines, and Inserting an Organizational Chart • Click Hierarchy in the Type list on the left side of the Choose a SmartArt Graphic dialog box. The middle portion of the dialog box (the layout list) displays a gallery of hierarchy charts, and the right side of the dialog box (the preview area) displays a preview of the selected SmartArt graphic • Click Organization Chart (column 1, row 1) in the layout list to see a preview of the chart in the preview area • Click the OK button to insert an Organization Chart SmartArt graphic in the worksheet. If necessary, click the Text Pane button on the Ribbon to display the Text pane • While holding down the ALT key, click and drag the top of the chart to the bottom of row 13 • Click the middle sizing handle on the right edge of the chart and while holding down the ALT key, drag the sizing handle until the right edge of the chart is aligned with the right edge of column H Microsoft Office 2007: Complete Concepts and Techniques - Windows Vista Edition
Opening a Workbook, Turning Off Gridlines, and Inserting an Organizational Chart • Drag the Text pane to the right side of the chart • If necessary, scroll the worksheet down until row 30 is displayed • Click the middle sizing handle on the left edge of the chart and while holding down the ALT key, drag the sizing handle until the left edge of the chart is aligned with the right edge of column A • Click the middle sizing handle on the bottom edge of the chart and while holding down the ALT key, drag the sizing handle until the bottom edge of the chart is aligned with the bottom edge of row 29 Microsoft Office 2007: Complete Concepts and Techniques - Windows Vista Edition
Opening a Workbook, Turning Off Gridlines, and Inserting an Organizational Chart Microsoft Office 2007: Complete Concepts and Techniques - Windows Vista Edition
Adding Shapes and Modifying Text in the Organizational Chart • Right-click the top shape in the organization chart to display the shortcut menu • Point to Add Shape on the shortcut menu to display the Add Shape submenu • Click Add Shape Above to add a new shape to the organization chart • Click the first shape in the third level of the organization chart to select it • Click the Add Shape button arrow on the Ribbon to display the Add Shape menu • Click Add Shape Below on the Add Shape menu to add a new shape below the first shape in the third level of the organization chart Microsoft Office 2007: Complete Concepts and Techniques - Windows Vista Edition
Adding Shapes and Modifying Text in the Organizational Chart • Click the top shape in the organization chart and then type Phil Johansen to add text to the shape • Click the entry under Phil Johansen in the Text pane to select it • Type Carrie Pecakin the second line of the Text pane to change the text in the shape in the second level of the organization chart • Repeat the previous steps for each of the remaining shapes in the organization chart and enter text in each shape as shown on the following slide • Click the Save button on the Quick Access Toolbar Microsoft Office 2007: Complete Concepts and Techniques - Windows Vista Edition
Adding Shapes and Modifying Text in the Organizational Chart Microsoft Office 2007: Complete Concepts and Techniques - Windows Vista Edition
Changing the Position of Shapes and Adding Effects to the Organizational Chart • Click the lower-right shape in the organization chart (Diana Landry) and then drag the shape to the right until the right edge of the shape is aligned with the right edge of the organization chart • Click the shape containing the text, David Ko, and then drag the shape to the left until the right edge of the shape is aligned approximately with the right edge of column B • Click the shape containing the text, AndrianaPineiro, and then drag the shape to the left until the lower-left corner of the shape is aligned with the lower-left corner of the organization chart • Click the SmartArt Styles More button to display the SmartArt Styles gallery • Point to the Cartoon style in the SmartArt Styles gallery to display a preview of the style in the organization chart Microsoft Office 2007: Complete Concepts and Techniques - Windows Vista Edition
Changing the Position of Shapes and Adding Effects to the Organizational Chart • Click the Cartoon style in the SmartArt Styles gallery to apply the style to the organization chart • Click the Change Colors button on the Ribbon to display the Change Colors gallery • Point to the Colorful Range – Accent Colors 4 to 5 color scheme in the Change Colors gallery to display a preview of the color scheme in the organization chart • Click the Colorful Range – Accent Colors 4 to 5 color scheme in the Change Colors gallery to apply the color scheme to the organization chart • Click the Format tab on the Ribbon. Click the Shape Effects button arrow to display the Shape Effects gallery Microsoft Office 2007: Complete Concepts and Techniques - Windows Vista Edition
Changing the Position of Shapes and Adding Effects to the Organizational Chart • Point to the Preset button on the Shape Effects menu to display the Preset gallery • Point to the Preset 5 effect in the Preset gallery to display a preview of the effect in the organization chart • Click the Preset 5 effect in the Preset gallery to apply the effect to the organization chart • Select cell A14 • Click the Save button on the Quick Access Toolbar Microsoft Office 2007: Complete Concepts and Techniques - Windows Vista Edition
Changing the Position of Shapes and Adding Effects to the Organizational Chart Microsoft Office 2007: Complete Concepts and Techniques - Windows Vista Edition
Inserting and Modifying an Image in the Worksheet • Click the Insert tab on the Ribbon • With your USB flash drive connected to one of the computer’s USB ports, click the Insert Picture from File button on the Ribbon to display the Insert Picture dialog box • If the Folders list is displayed below the Folders button, click the Folders button to remove the Folders list • If necessary, click Computer in the Favorite Links section and then scroll until UDISK 2.0 (E:) appears in the list of available drives • Double-click UDISK 2.0 (E:) to select the USB flash drive, drive E in this case, as the device that contains the picture. Your USB flash drive may have a different drive letter and name Microsoft Office 2007: Complete Concepts and Techniques - Windows Vista Edition
Inserting and Modifying an Image in the Worksheet • Click Malik Legal Services IT Department to select the file name • Click the Insert button to insert the picture in the worksheet • Scroll the worksheet vertically until row 1 appears • Click anywhere in the image and while pressing the ALT key, drag the image so that its upper-left corner is aligned with the upper-left corner of cell E1 • While pressing the ALT key, drag the lower-right sizing handle of the image to the lower-right corner of cell I12 Microsoft Office 2007: Complete Concepts and Techniques - Windows Vista Edition
Inserting and Modifying an Image in the Worksheet • Click the Picture Styles More button on the Ribbon to display the Picture Styles gallery • Point to the Reflected Rounded Rectangle picture style (column 5, row 1) to see a preview of the style in the worksheet • Click the Reflected Rounded Rectangle picture style to apply the style to the image • Click the Save button on the Quick Access Toolbar Microsoft Office 2007: Complete Concepts and Techniques - Windows Vista Edition
Inserting and Modifying an Image in the Worksheet Microsoft Office 2007: Complete Concepts and Techniques - Windows Vista Edition
Quitting Excel • Click the Close button on the right side of the title bar • If Excel displays a Microsoft Office Excel dialog box, click the Yes button to save the workbook Microsoft Office 2007: Complete Concepts and Techniques - Windows Vista Edition
Summary • Insert a SmartArt graphic on a worksheet • Modify a SmartArt graphic • Add effects to a SmartArt graphic • Insert an image on a worksheet • Modify an image on a worksheet Microsoft Office 2007: Complete Concepts and Techniques - Windows Vista Edition