Download
1 / 49
951 likes | 3.72k Views
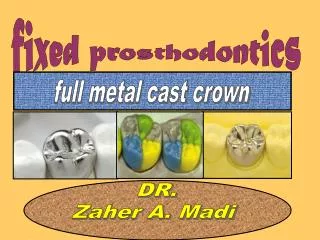
fixed prosthodontics. full metal cast crown. DR. Zaher A. Madi. Full veneer metal (cast) crown.

E N D
fixed prosthodontics full metal cast crown DR. Zaher A. Madi
Full veneer metal (cast) crown its extracoronal cast metallic restoration , that cover all (or veneer) tooth surfaces (axial and occlusal ) and restore its anatomy and function of prepared teeth , it can be used as a single crown or as a retainer for fixed bridge Indications 1- single restoration in posterior teeth where esthetics is not needed 2- extensive caries or trauma in posterior teeth where partial coverage would lack retention 3- short clinical crown ,where its provide maximum retention and resistance 4- as retainer in FPD with long span 5- rotated ,tilted and malformed (maloligned) teeth 6- protection of enndodontic treated posterior teeth 7- as a retainer to support RPD ( clasp , attachment )
Contraindications 1- anterior teeth for esthetic reasons 2- where other more conservative preparation can be made ( partial coverage) 3- when maximum resistance and retention is not needed Advantages 1- maximum resistance and retention offered by full rstracoronal coverage 2- hard enough to withstand masticatory forces 3- restoration of high strength 4- conservative when compared with all ceramic restoration Disadvantages 1- bad esthetics 2- pulp vitality cannot be tested 3- recurrent caries under restoration cannot be detected 4- not conservative when compared with partial coverage restoration
Steps of preparation 1- occlusal reduction and functional cusp bevel 2- axial reduction (buccal – lingual – proximal ) 3- establishing of finish line ( supragingival ) 4- roundation of line angles and finishing Armamentarium 1- tapered round-ended bur (depth cuts , occlusal ,axial reduction , finish line ) 2- needle bur ( breaking of proximal contact with adjacent teeth) 3- football bur and wheel bur ( occlusal reduction ) 4- utility wax or reduction gauge ( measurement of clearance ) 5 – fine grit tapered round-ended bur (finishing and roundation of line angles
Depth of reduction 1 mm
Impression taking Impression is taken using c-silicon butty ( Zetaplus ) by two- stage technique
Die preparation Type of die 1- Removable stone die (separated die)
Trimming of die After section of the die , using an acrylic bur the die is trimmed apically to finish line Ditching A circumferential groove ,3mm deep is cut below the preparation margin (finish line ) using acrylic bur and round bur ,it act as guide during waxing and finishing of casting The marginof preparation are marked with checking pencil (red or blue) for identification
Waxing – up procedure - Wax Instrumentsand materials Electric sculpting unit Wax heater Dipping wax unit
Applyingliquicol to seal the die and harden the preparation margin Die spaceris applied (gold Pico-fit) 1mm short of margin to provide an even thickness of cement space (film thickness)
Die lubricant( separating agent ) is applied to prevent molten wax from sticking to the die Applyingthin coat of separating agent (Picosep) over the whole die to below the preparation margin Also applyingthe separating agent to the adjacent teeth and the opposing teeth
Dipping The dieis dipped into molten wax to produce uniform layer ,for adaptation to the die Support your hand with your little finger Dipit to below the preparation margin
Remove the die slowly and uniformly by turning it again in the same direction An accurately fitting coping with uniform thickness
Crown wax-up 1- cusp cones Wax cusp cones are placed to determine the location and height of cusp tips L Up.
The mesiobuccal cusp cone is waxed up first Then the distobuccal cusp cone is waxed up The pattern is checked in the articulator for balancing the contacts
2- marginal and cuspal ridges The cuspal ridge of the bccal cusps is added Waxing up the palatal working (funct.) cusp Checking the interdigitation – palatal view The mesial and distal marginal ridges are added
3- axial contour (buccal –palatal and proximal) The distal surface is waxed up and contact are created The mesial surface are waxed and the contact is checked with articulating paper The buccal and palatal contours are waxed
The buccal surface (contour) are added and shaped The buccal surface are shaped and adjusted The palatal contour are adjusted and shaped
4- triangular ridges The triangular ridge of the mesiobuccal cusp is waxed The triangular ridge of mesiopalatal cusp descends directly into centralfossa The triangular ridge is added to the distobuccal cusp from the tip of the cone to the transversal ridge
Triangular and secondary ridges A clearly defined secondary ridge completes the distobuccal cusp A small slope is extended from the cusp tip of the distobuccal cusp A secondary ridge is then extended into proximal space
The mesial secondary ridge of the mesiopalatal cusp is waxed up The distal secondary ridge on the mesiobuccal cusp is also waxed up Complete wax of the mesial marginal ridge The completed crown wax-up with all surfaces
5- Remargination The excess dipping wax is cut and remove Shortening he cervical margin with knife Cervical (margin) wax is added around the crown margin
Excess wax is removed from cervical margin using opus blade The margin is adapted and smoothed with lightly beavertail instrument 6- completion Complete crown wax-up
The reservoir sprue is attached with sticky wax and wax I added to smooth the junction Using ( waxfinish) liquid give uniform and smooth surface
Spruing For spruing used roll wax 2,5 mm and 3 mm Incorrect sprue placement Sprue placed at angulation 45c and to be flared at point of attachment with wax pattern
Investing 1- crucible former 2- casting ring 3- ring liner (paper) 4- crucible former 5- investment Rubber crucible former
Attach the wax pattern to the crucible former Ring placed in crucible former with liner and mixing the investment Pouring the investment in the ring Preheat furnace
Place the ring in preheat furnace to burn out the wax Centrifugal casting machine Removing investment after casting by air abrasion
Removing the remaining investment by air abrasion Cutting the sprue after casting
Finishing and polishing • After casting is accomplished , the next stepa are : • 1- Recovery of the casting • after the ring (mold) is cooled in room temperature the investment is removed from the ring by section the mold and by air abrasion (sandblast) and then releive the metal casting (restoration) from any rests of the investment • 2- finishing • The sprue ia cut with disc and stones , the restoration should completely seat on the die . • The fitting surface should be checked for any nodules which are carefully removed , nodules on internal surface are removed with high speed handpiece • Occlusal anatomy is refined with mounted tapered and inverted cone stone or carbide inverted cone . • Casting is smoothing with rubber wheels and mounted points
3 – polishing Rubber or felt wheels impregnated with abrasive (pumice) are used in first , final polishing is accomplished with a polish compund using chamois wheel
Casting failures Perfect casting can only be result of strict following of the rules of casting Manifestations of common fefects and their possible causes could be summerized as follows ; 1- nodules Presence of gas bubbles on the surface of the wax pattern during investment will appears as nodules on the casting . These are caused by air entrapment during investment Causes: - lack of surfactant on the wax pattern - rough surface of wax pattern , not smooth - thick mix of investment - inadequate and excessive vibration during pouring - disturbance of the ring during setting of the investment Nodules may be on all surfaces of casting , if its located at the margin and internal surface its need to recating
Nodules 2- fins Fins are caused by cracks in the investment that have been filled with molten metal Causes: 1- inadequate mix of investment ( high w/p ratio) 2- excessive casting force 3- overheating of the investment 4- rough or premature handling of the ring after investing 5- wax pattern located to close to the end of the ring
3- Roughness (Rough surface ) the surface of casting must be moderately smooth ( finishing and polishing procedure are still required ) Causes : 1- rough wax pattern (improper finishing of wax pattern ) 2- thick mix (improper w/p ratio) 3- excessive surfactant 4- overheating of investment or alloy 5- using investment with large grain size
4- porosity • Ita the reduction in density of a casting caused by the presence of voids due to the absorption of gases and failure to compensate for alloy contraction . • It may be ……. Externally located in the surface • …….. Internally - may weaken the casting • and ……. Voids in the marginal are , which may be caused by debris trapped in the mold , a well-waxed smooth sprue will help prevent them • Types of porosity • 1- suck-back porosity (contaction porosity ) • Causes : • - Improper pattern position ( incorrectly located .. Not in the thermal zone of the mold ) • - Narrow (thin) and too long sprue • ( the metal in the sprue channel solidifies before that in the mold)
2- inclusion porosity (sub-surface porosity) Its appear during finishing of the cast Causes : - particles of investment dislodged during casting - entrapment of gas bubbles 3- back-pressure porosity Cause : - entrapped air (air pressure ) on the surface of the casting it results from inability of the air in the mold to escape through the investment pores
5 – marginal discrepancy Its inaccuracy of fit at the margin Causes : - wax pattern distortion during removing from the die - uneven expansion of the mold - underheated alloy or mold (ring) - insufficient casting pressure (force) - sprue channel is too long
6 – incompleteness (incomplete casting ) Causes : - incomplete wax elimination (improper burn – out) - the molten alloy not properly directed to the mold cavity - inadequate metal or lack of amount of metal - cold ring - inadequate melting of the alloy - low casting oressure (force) 7 – dimensional inaccuracy Casting may be etheir too samll or too long Cause - improper expansion compensation …..(hygroscopic exp.) ( w/p ratio – spatulating – ring liner – mold heating )