Download
1 / 7
80 likes | 495 Views
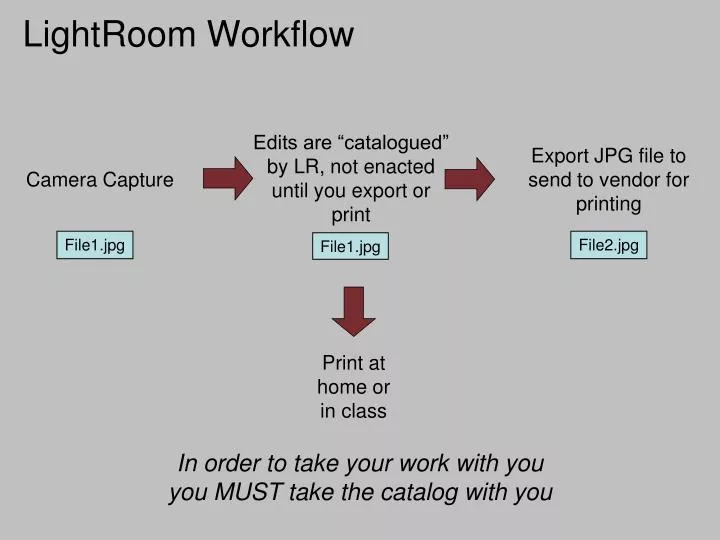
Edits are “catalogued” by LR, not enacted until you export or print. Export JPG file to send to vendor for printing. Camera Capture. File1.jpg. File2.jpg. File1.jpg. Print at home or in class. LightRoom Workflow. In order to take your work with you you MUST take the catalog with you.

E N D
Edits are “catalogued” by LR, not enacted until you export or print Export JPG file to send to vendor for printing Camera Capture File1.jpg File2.jpg File1.jpg Print at home or in class LightRoom Workflow In order to take your work with you you MUST take the catalog with you
Work Process Steps - Overview • LIBRARY MODULE • Download your files from your camera card • Sort, rank, and delete unacceptable images in Library Mode • DEVELOP MODULE • Make your corrections/adjustments • PRINT MODULE • Print to a printer • If you are ready to send it to a print service, Export the file from the File menu
Organizing your work with LR • Organize your files or you will pay for it later • Put them all in ONE location • Set up a simple structure BEFORE you start using LR • LR work resides in a catalog • LR will want to put your catalog in your “Pictures” folder. • You need to create a catalog ON YOUR TRAVEL DRIVE. • Prior to launching LR • Create a folder called “My Photography” • Your catalog and ALL your images will be kept here. • It is a good idea to download your images into subfolders with some kind of meaningful name. I don’t find the “By Date” option helpful. • In LR select New Catalog under the File menu • Name this catalog “Your Name’s Photo 70” (ie., Bob’s Photo 70) • Save the Catalog into your “My Photography” folder
Organizing your work in general • No one can tell you how to organize your work • Organize it how you will look for it. • Examples: • By Date: • My Pictures> 2010_01 • By Subject: • My Pictures> Weddings> Smith_Jones • My Pictures> Landscape> 2010_01 Rockville Hills • By “Client”: • My Pictures> Beth’s Photo 70
Getting images in from your camera card • Connect card reader • Go to Import From Device under the File Menu • Tell it where you want it to put the files and how • Chose “Copy photos to new location and add to catalog” • Chose the “Copy to” location • If you are shooting RAW convert to DNG • If you have a 2nd backup drive copy the files there now as well • Chose how you want the files organized • One folder or by date, subfolders, etc. • Chose backup location (2nd drive) • Chose your naming convention • Pick an naming convention that works for you from LRs options • Or create your own • Leave Develop settings alone • Apply any Keywords if you wish (ONLY GLOBAL) • Select the type of preview you’d like
Getting ready to work - Sorting • Sorting Files • Pick (P) white flag – something I want to work with • Reject (X) black flag – something I want to throw away • Throw away rejects – Photo menu > Delete Rejected Photos > • My recommendation is to delete them entirely, not just from the catalog • If you aren’t sure about deleting them just flag as rejected. • To remove a flag from an image (U) - unflag • Ranking Files • 1 = 1 Star Ranking • Designate the images you’d like to work with first
How I want you to sort your files for me • “Pick” all the images you think are good (White Flag, P) • Give 1 Star to the images you are seriously considering for the assignment (1) • Mark all images printed for the assignment RED (6) • Designate which assignment or exercise an image is being submitted for in its keywords