Download

1 / 15
150 likes | 328 Views
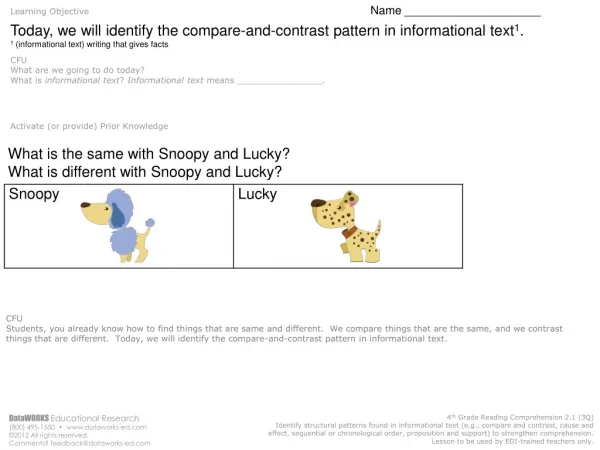
One of These Things Just Does Not Belong…. By: Taylor Branick, Kailee Odell, Caitlin LeMay and Kristen Kolsun. Overview. We are going to take well-known objects, landmarks, and monuments and place them in areas of the world in which they clearly do not belong. The Sphinx.

E N D
One of These Things Just Does Not Belong… By: Taylor Branick, Kailee Odell, Caitlin LeMay and Kristen Kolsun
Overview We are going to take well-known objects, landmarks, and monuments and place them in areas of the world in which they clearly do not belong.
The Sphinx For this image, we are putting the Sphinx of Ancient Egypt on a glacier in Alaska. I cropped the sphinx out of its picture with the magnetic lasso and copied the layer into the picture of Alaska. Then I used paint and contrast adjustments to make it look like it fitted into the picture realistically.
Lion with Piñatas In this image we will be putting a piñata in the African Sahara with a lion chasing it. I cropped the background into the area that I wanted. Then I used the magnetic lasso tool and copied layers of the pieces of the other images I wanted into the background. After, I free-transformed the images into the positions they should be. I then used the paint tool to create shadows around the images, and after I used the clone stamp to multiply the amount of candy around the piñata and savannah grass around the area. I then changed the image size and sharpened the image.
In order to create this image, I opened the background image of a swimming pool and then adjusted the size so that it was bigger overall. I then cropped the lochness monster out of its own image with the magnetic lasso and added it as a new layer to the background, and then free transformed it to the right size. After this I used the eraser with a low opacity so that I could blend in the edges of the lochness monster to the water and make it look more realistic. I did the same with the female lifeguard. Then I adjusted the contrast, brightness, saturation, and levels of the lifeguard and monster so that they would blend into the rest of the picture. Finally I added the speech bubble and text box. Lochness in the Pool
Pyramids In this image, we placed the pyramid from the Louvre in between the pyramids of Giza To create this image, I started by using the polygonal lasso tool to select the image of the Louvre, and then I dragged it in to the image of the pyramids. Next, I altered the shape of the Louvre using the free transform tool. Then I changed the brightness of the image. Finally, I created a shadow by once again using the polygonal lasso tool, painting the new layer black, and changing the opacity.
The Oreo in St. Peter’s Square • In this image, we put Villanova’s Oreo in St. Peter’s Square. To create the image, I first used the magnetic lasso tool to isolate the Oreo. To make the lines even better, I used the magic wand tool. Once I was satisfied with the edges, I moved the Oreo into the picture of St. Peter's Square. The colors looked off, so I changed the hue and saturation of Oreo so it better fit in with the image of St. Peter's.
This image was produced through using various tools on Photoshop. I found two images that I thought would be funny together. I needed to search for a city scene and for an elephant mid-stride to make the image more legitimate. I magnetically cut out the elephant from its background and made it fit along with the people (free transform). Then I cleaned it up and figured out where to place it. Elephant in the City
The Statue of Liberty in Washington To create the image, used the crop tool and cropped the Statue of Liberty at the base. Then I used the magic wand to create a clear sky around the statue. I resized the image and copy and pasted it over the image of the Washington Monument. Next, I deleted the white background with the magic wand. Then I mirrored the image of the original statue, rotated the image 180 degrees, cropped the base of the new image to fit with the water reflection, and dragged the image into the monument picture. To put it into place, I positioned it and then used free rotate.
Leaning Tower of Pisa in the Desert This image was produced through many different tools in Photoshop. I used the eraser, magnetic lasso, pattern stamp (creating my own patter), clone stamp, and the text box. Through previous labs I used my knowledge to judge which tool would work for which task in merging the two pictures.
Ice Scene For this imaged, I first loaded the picture of Antarctica (which I did not edit). I used the magic wand tool to separate the Stonehenge from the grass and the sky in the picture (layer via cut). I had to use the clone stamp tool to recreate the missing parts of the rocks. I also changed the opacity of the Stonehenge. I used the magic wand tool for the balancing rocks. For the ship, I used the magnetic lasso. I made a copy of the ship’s layer, lessened its opacity and changed its position to make the ship's reflection in the water. I used the magnetic lasso for the Mount Rushmore image. I pasted all these layers onto the Antarctica image and then used the free transform and move tools.
The Desert Scene For this image, I started with a picture of the Sahara Desert, which I did not change. I used the crop tool and the magnetic lasso to edit the image of the Sydney Opera House. I cropped the highway sign image, but I had to use the clone stamp tool to restore some of the color. Then, I placed both images as individual layers on top of the Sahara image and used the move tool and the free transform tool to change their positions. Finally, I used the text tool to write the message in the bottom right corner.
Ocean City For this image, I used the crop tool and the magic wand to select the buildings of the skyline. I made a "layer via copy" and placed the skyline onto the island image. I used the move tool and the free transform tool to change its size and position. Next, I copied the same layer and flipped the image and lessened the opacity to make its reflection on the water. I used the same process for the taxi (i.e. using the magic wand tool to select the object that I wanted from the image, layer via copy, free transform). I also flipped the taxi so that it was facing a different direction. I also added the umbrella with this same procedure. I used the text tool to add the text "the real ocean city..." in the corner of the image.
Eskimo On the Beach This image is one of my favorites; it’s a beach scene (I love the beach) with an Eskimo man and his dogs sitting with him. It looks very weird. I had to magnetic lasso and resize the image and properly place it so it looks more realistic. the way he is sitting is hard to make it looks real. I also cleaned the image up using the eraser.
Sources • http://www.abolitionist.com/reprogramming/lion.jpg • http://blog.craftzine.com/zebra_pinata.jpg • http://kellebelle.files.wordpress.com/2009/08/loch-ness-monster2.jpg • http://www.teignbridge.gov.uk/media/images/7/r/Chudleigh_Community_Swimming_Pool_large_image.jpg • http://mormonmatters.org/wp-content/uploads/2008/02/elephant.jpg • http://www.canalmuseum.com/canalphotos/panama-city-15.jpg • http://www.thetravelpeach.com/united-states-vacations/las-vegas/desert.jpg • http://www.toursonline.org/wp-content/uploads/2008/03/leaning-tower-of-pisa.jpg • http://hannasyalala.com/wp-content/uploads/2009/03/dreamland-beach-bali.jpg • http://www.costumzee.com/users/Barbaro-2779-thumb.gif • http://beautiful-island.50webs.com/beautiful-island/sunny-beach-palm.jpg • http://celebratecanada.files.wordpress.com/2009/01/toronto-city-skyline.jpg • http://www.selamtransportation.com/images/taxi%20cab.jpg • http://www.ver-sc.com/catalog/images/beachwood-big.jpg • http://3.bp.blogspot.com/_sjc-KgnreDg/SGlLyMufOBI/AAAAAAAAABI/jgkoElDyR1c/s1600-R/stonehenge-wallpaper-1.jpg • http://www.thetravelpeach.com/attactions/cruise/antarctica.jpg • http://www.traveljournals.net/pictures/l/6/61600-the-world-famous-balancing-rocks-harea-zimbabwe.jpg • http://www.floridabahamascruisevacations.com/images/cruise-ship2.jpg • http://upload.wikimedia.org/wikipedia/commons/1/10/Mount_Rushmore_National_Memorial.jpg • http://kollinz.ironcube.info/kollin/amazingplaces/places/Sahara%20Desert,%20Morocco.jpg • http://zoomandgo.com/destinations/image_viewer.asp?dak=111515067 • http://www.myharcum.com/s/1044/images/editor/Campus%20Images/HIGHWAY%20SIGN.JPG