Download
1 / 15

E N D
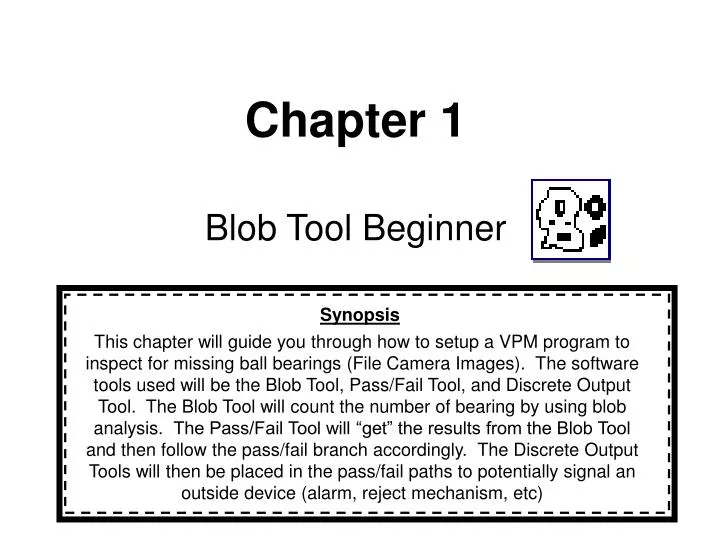
Chapter 1Blob Tool Beginner Synopsis This chapter will guide you through how to setup a VPM program to inspect for missing ball bearings (File Camera Images). The software tools used will be the Blob Tool, Pass/Fail Tool, and Discrete Output Tool. The Blob Tool will count the number of bearing by using blob analysis. The Pass/Fail Tool will “get” the results from the Blob Tool and then follow the pass/fail branch accordingly. The Discrete Output Tools will then be placed in the pass/fail paths to potentially signal an outside device (alarm, reject mechanism, etc)
1-Launch VPM 2-Connect to the emulator or live camera (Refer to chapter 1--A) 3-Load the bearing images into the File Camera (Refer to chapter 1--B) The file names are 01_bearing_fail.png, 02_bearing_fail.png, etc. 4-Click on the orange IMPACT icon.
1-Click on Create New Vision Program. Notice the icon that is orange. 2-Click New Program.
1-Open the Flaw Detection tool drawer by clicking on it. 2-Drag and drop the Blob tool into the program tree
1-Click 2. ROI (ROI = Region Of Interest) 2-Place ROI as shown in image 2-Chose Autothreshold Contrasting Bright Pixels Rotate ROI Move ROI Resize ROI
1-Click on a ball bearing 2-Notice how it shows the actual area of the ball bearing 3-Click the Area check box 4-Set the filter parameters from 240 to 260 5-Enter 8 and 8 here
1-Drag a Discrete Output tool and drop it on top of the word “Pass.” This will place the tool in the pass branch. The Discrete Output tool is an open collector TTL logic switch.
1-Setup the tool like this. This indicates discrete output 1 will turn on and discrete output 2 will turn off when the tool is run. 2-Add a Discrete Output tool to the fail branch and set it up to turn on output 2 and off output 1.
1-Click the Trigger button to snap through all of the images.
Camera triggered by outside input Image is acquired Task is executed – logic flow begins Blob tool runs and counts the number of ball bearings Pass Fail tool runs and “gets” the Pass/Fail result of the Blob tool and directs the logic flow down the pass or fail branch. If fail If pass Logic follows fail branch Logic follows pass branch Discrete Output tool runs (output 1 turns on, output ) Discrete Output tool runs (output 2 turns on) Overview
HISTOGRAMS Select Fixed Thresholding
HISTOGRAMS Highlight ROI Click Histogram Adjust


![TGV Tool [1]](https://cdn1.slideserve.com/2718370/florian-winkelbauer-ak-softwaretechnologie-1-716-174-dt.jpg)