Download
1 / 10
110 likes | 244 Views
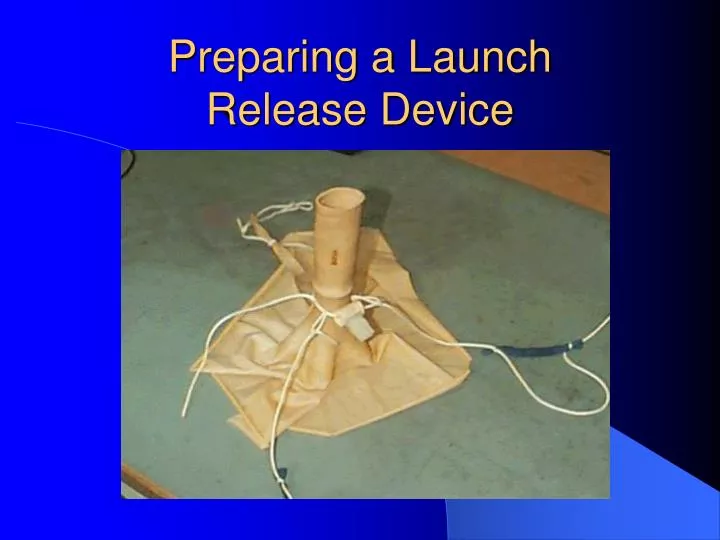
Preparing a Launch Release Device. Gather the required parts. 1 – Appropriate sized balloon 1 – Burner coil 1 – Spool 1 – String with small loop on one end 3 – Elastic stack lines. Insert the spool. Insert the spool into the neck of the balloon

E N D
Gather the required parts • 1 – Appropriate sized balloon • 1 – Burner coil • 1 – Spool • 1 – String with small loop on one end • 3 – Elastic stack lines
Insert the spool • Insert the spool into the neck of the balloon • Slide the spool about 3 or 4 inches up the neck • Be sure to leave enough room below the spool so the neck can be folded over and secured to the stack line
Prepare the elasticlines and burner • Thread the string with the loop in it through an elastic line, the burner, and the other two elastic lines as shown in the picture
Wrap cord around spool • Wrap the cords around the neck where the spool is • Hold the loop end of the main cord with your thumb • Put the free end of the main cord through the loop and draw the main cord snug
Start a knot • Start a knot by passing the free end of the main cord under itself and through the new loop that is formed • Start a second knot in the same way • Do not tighten either not yet
Tighten main knot • Pull the main cord as tight as you can and hold it taught with your thumb • Finish tying the first knot • The main cord must be TIGHT... It must not slide off the spool Move thumb here to hold main cord taught
Finish main knot andstart the backup knot • Finish the main knot making sure the main cord it tight around the neck and spool • If the main cord is not tight, stop now and redo the first knot • Tie the backup knot in the same manner as the first one
Finish backup knot • Pull the backup knot tight • Double check that the main cord is tight around the spool and balloon neck • Cut off the excess main cord here
The final product • Here’s the final product, ready to fly • Store the balloon in a dark plastic bag


![Forex Trading Guy Launch New Website ForexTradinGuy.Com [Press Release]](https://cdn5.slideserve.com/9965351/freepressreleasedb-com-dt.jpg)