Download
1 / 59
590 likes | 604 Views
Weka Package. Weka package is open source data mining software written in Java. Weka can be applied to your dataset from the GUI, the command line or called by your own java code.

E N D
Weka Package • Weka package is open source data mining softwarewritten in Java. • Weka can be applied to your dataset from the GUI, the command line or called by your own java code. • It also provides a variety of tools for preprocessing and evaluating the result of learning algorithms on any given dataset.
Online Documentation • Software website • Book: Data Mining: Practical Machine Learning Tools and Techniques with Java Implementations • User guide for the Explorer GUI • User guide for the Experimenter GUI • ARFF file format • API documentation • Collections of datasets • Weka-related Projects
Input: ARFF file format • The data must be converted to ARFF • Required declarations of @RELATION, @ATTRIBUTE and @DATA • @RELATION declaration associates a name with the dataset • @RELATION <relation-name> • @ATTRIBUTE declaration specifies the name and type of an attribute • @attribute <attribute><data type> • Data type can be numeric, nominal, string or data • @DATA declaration is a single line denoting the start of the data segment • Missing values are represented by ?
Data Example @relation weather @attribute outlook {sunny, overcast, rainy} @attribute temperature real @attribute humidity real @attribute windy {TRUE, FALSE} @attribute play {yes, no} @data sunny,85,85,FALSE,no sunny,80,90,TRUE,no overcast,83,86,FALSE,yes rainy,70,96,FALSE,yes …………
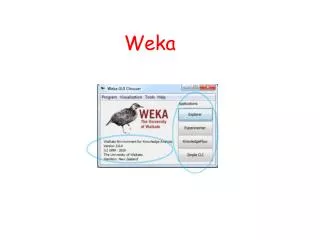
Weka GUI • Strat->Programs->Data Mining Tools->Weka-3-2
Weka GUI - Experimenter • Convenient Environment for creating, running, modifying and analyzing experiments.
Defining an Experiment • Initialize an experiment: click on “new”, system loads the default parameters. • Define dataset to be processed in dataset panel • Select “use relative paths” • Click on “add new”
Saving result of the experiment • Click on the “CSVResultListener” entry in the Destination panel. • Click on “outputFile” in the new popped window • Type the name of the output file, click Select • The file name is displayed in the outputFile panel.
Saving the experiment definition • Select “Save…” at the top of the setup window. • Type the dataset name with the extension “exp” • The experiment can be restored by selecting Open in the setup window and then selecting the file in the dialog window • Click Start to run the experiment.
Running an experiment • Click the Run tab at the top of the window. • The current experiment performs 10 randomized train and test runs on the Iris dataset, using 66% of the patterns for training and 34% for testing, and using the ZeroR scheme. • The results of the experiment are saved to the dataset experiment.txt • The results are generated in comma-separated value (CSV) form and can be loaded into a spreadsheet for analysis.
Changing the Experiment Parameters • Clicking on the ResultGenerator panel. • Click on the splitEvaluator entry to display the SplitEvaluator properties • Click on the classifier entry(ZeroR) to display the scheme properties • Click on the drop-down list for the scheme to select a different scheme.
Adding Additional Schemes • Additional Schemes can be added in the Generator properties panel. • To begin, change the dropdown list entry from Disabled to Enabled in the Generator properties panel. • Click Select property and expand splitEvaluator so that the classifier entry is visible in the property list; click Select. • The scheme name is displayed in the Generator properties panel. • Now when the experiment is run, results are generated for both schemes.
Adding Additional Datasets • The scheme(s) may be run on any number of datasets at a time. • Additional datasets are added by clicking “Add new …” in the Datasets panel. • Datasets are deleted from the experiment by selecting the dataset and then clicking Delete Selected.
Raw Output • The output generated by a scheme can be saved to a file and then examined at a later time • Open the Result Producer window by clicking on the Result Generator panel in the Setup window. • Click on rawOutput and select the True entry from the drop-down list. • By default, the output is sent to the file splitEvaluatorOut.zip. The output file can be changed by clicking on the outputFile panel in the window. • Now when the experiment is run, the result of each processing run is archived.
Instances Result Producer • Results can also be sent to an Instances Result Listener and then analysed by the Weka Experiment Analyser. • Click on the result listener portion of the Destination panel and then select Instances Result Listener. • Then select the output dataset. The dataset extension should be “arff”. • When this experiment is run, results are generated in “arff” format.
Instances Result Producer • @relation InstanceResultListener • @attribute Key_Dataset {iris} • @attribute Key_Run {1,2,3,4,5,6,7,8,9,10} • @attribute Key_Scheme {weka.classifiers.ZeroR} • @attribute Key_Scheme_options {''} • @attribute Key_Scheme_version_ID {6077547173920530258} • @attribute Date_time numeric • @attribute Number_of_instances numeric • @attribute Number_correct numeric • @attribute Number_incorrect numeric • @attribute Number_unclassified numeric • @attribute Percent_correct numeric • … • @data • iris,1,weka.classifiers.ZeroR,'',6077547173920530258,20010205.1546,51,15,36,0,29.411765, • 70.588235,0,0.446239,0.473777,100,100,81.592363,81.592363,0,1.59985,1.59985,0,0,0,0,0,0, • 0,0,1,31,1,20,0,0,0,? • iris,2,weka.classifiers.ZeroR,'',6077547173920530258,20010205.1546,51,11,40,0,21.568627, • 78.431373,0,0.451365,0.480492,100,100,83.584631,83.584631,0,1.638914,1.638914,0,0,0,0,0, • 0,0,0,1,31,1,20,0,0,0,? • iris,3,weka.classifiers.ZeroR,'',6077547173920530258,20010205.1546,51,15,36,0,29.411765, • 70.588235,0,0.446239,0.473777,100,100,81.592363,81.592363,0,1.59985,1.59985,0,0,0,0,0,0, • 0,0,1,35,1,16,0,0,0,?
Experiment Analyzer • Analyze the results of experiments that were sent to an Instances Result Listener • The experiment shown below uses 3 schemes, ZeroR,OneR, and j48.J48, to classify the Iris data in an experiment using 10 train and test runs, with 66%of the data used for training and 34% used for testing.
Experiment Analyzer • Run the experiment. • Analyse tab -> Perform test to generate a comparison of the 3 schemes. • The percentage correct for each of the 3 schemes is shown in each dataset row. • The annotation “v” or “*” indicates that a specific result is statistically better (v) or worse (*) than the baseline scheme at the significance level specified
Cross-Validation Result Producer • Change from random train and test experiments to cross-validation experiments.
Explorer GUI • Explorer GUI: different preparation, transformation and modeling algorithms on a dataset • Experimenter GUI: run different algorithms in batch and to compare the results • Tabs: • Preprocess • Classify • Cluster • Associate • Select attributes • Visualize
Preprocessing • Opening files • Base relation and working relation • Base relation: originally loaded version of data, unchanged during performing actions. • Working relation: copy of base relation, changed when any filters are applied to the data. • Working with attributes • Attributes in base relation • Attributes info for base relation
Working with Filters • Preprocess section allows filters to be defined. • Filters transform the data in various ways. • E.g. DiscretizeFilter - discretizes a range of numeric attributes in the dataset into nominal attributes. • E.g. NominalToBinaryFilter – transform nominal data to n-1 bits binary fileter (n is the number of categories) • Multiple filters can be applied onto data • Transformation results are save in working relation
Classification • Select classification algorithms • Test options • Use training set • Supplied test set • Cross-validation • Percentage split • Click start to run the classification
Classification • The classifier output text • Run information: gives relation name, instances, attributes and test mode. • Classifier model: a textual representation of the model • Summary: a list of statistics summarizing of accuracy • Detailed accuracy by class: more detailed per-class break down of the prediction accuracy. • Confusion Matrix: show how many instances have been assigned to each class.
Clustering • Cluster modes • Ignoring attributes • Learning clusters
Associating • Setting up • Learning association
Selecting attributes • Searching and evaluating • Options • Performing selection
Visualizing • Changing the view • Selecting instances