Download
1 / 40
400 likes | 409 Views
This tutorial provides an in-depth understanding of how to analyze and design bin type walls with tierod using DeepEX 2015 software. The program offers both 2D limit-equilibrium and non-linear analysis methods for braced excavations in soils, as well as structural verification of all elements. The tutorial covers topics such as program layout, file menu, general input tabs, design section list, model space, project tree view, and more.

E N D
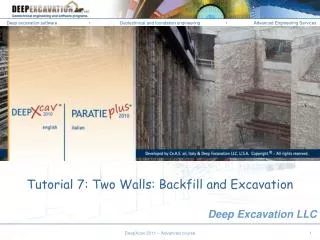
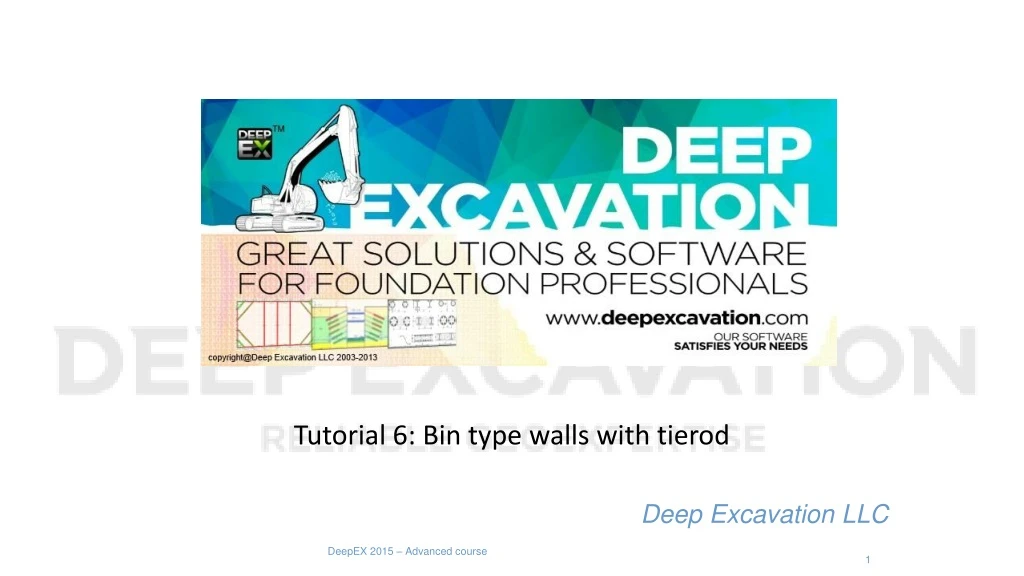
Tutorial 6: Bin type walls with tierod Deep Excavation LLC DeepEX 2015 – Advanced course 1
INTRODUCTION DeepEX is a software program for braced excavations in soils with 2D limit-equilibrium and non-linear analysis methods, and structural verification of all elements (with AISC, ASD, Eurocodes). It offers the ability to analyze walls with multiple braces (tiebacks) in multilayered soils. The non-linear analysis considers elastoplastic behavior for the whole soil-wall-support system. The program also offers the ability to perform traditional limit-equilibrium analyses. The graphical interface is completely interactive and the input is simplified to a great extend. The program utilizes archives of wall types, structural and soil materials, ground anchors etc. The analysis can be performed in either an utlimate state or at a service state (allowable design, LRFD, or Eurocode 7 design approach methods). The program offers the ability to automatically set all critical settings according to the desired design methodology. Corso Paratie, Milano 30 settembre 2009 DeepEX 2015 – Advanced course 2
Program layout File menu (click) General input tabs Design section list (right click) Model space (left or right click on any item) Project tree view 3D Model (Frames) Mouse is over item Units Wall selection View and other Model stages (right click options similar to excel) Command prompt (enter coordinates) Instruction box Press to perform calculations. DeepEX 2015 – Advanced course
Enter basic project information 1. Select this button 2. Define the project name etc. 3. Press OK DeepEX 2015 – Advanced course
Move model elevations 1. Select this button 2. Set new reference elevation to 100 ft 3. Check All boreholes (this moves all soil layers) 4. Press OK
1. Add a 2nd wall2. Double click on right wall3. Change dimensions3.1 Change xwall= 60ftDepth L= 45ft
Define basic model limits (top, bottom, left, right) 1. Select this button 2. Set Top= 130ft Bottom= 40ft Left= -60ft Right= 120ft 3. Press OK DeepEX 2015 – Advanced course
Modify soil types (database of soils) 1. Select this button. Or Expand the Soils Tree and Double click on F Options: Right click or press Delete Boring with F soil Note: In DeepEX you can use any soil type in more than one borehole. For example the F soil can be used in boring 1 or boring 2 etc. You can use any Boring on any design section. Thus changing any property of the F soil will affect all the excavation Design Sections where F is used!
Soil type data form Test data for estimating soil properties Short soil name, description and color. Available soil types Soil type & initial clay behavior Density Strength Add new, copy, delete, paste soil DeepEX 2015 – Advanced course
Soil type continued Soil properties: General Soil name: F (this appears in the boring) Description: Detailed soil description. Soil type: Sand gt= 125 kcf : Total unit weight gdry= 120 kcf : Dry unit weight (above water table) c‘= 0 : Effective cohesion F’= 30 degrees : Effective friction angle v= 0.35 Poisson’s ratio Kx = Horizontal permeability Kz = Vertical permeability Parameters only for clays Su = Undrained shear strength Fcv= Constant volume shearing angle Fpeak= Peak shearing angle DeepEX 2015 – Advanced course
Soil properties (Resistance and Elastic) Enter elasticity values as shown before. Click on > buttons for more options. KoNC = At rest lateral earth pressure coefficient for normally consolidated state. DeepEX 2015 – Advanced course
Soil S1 Soil properties: Change S1 A. General Soil name: S1 (this appears in the boring) Description: Sand Detailed soil description. Soil type: Sand gt=125 pcf : Total unit weight gdry= 120 pcf: Dry unit c‘ 0: Effective cohesion F’ = 36 degrees : Effective friction angle V = 0.35 Poisson’s ratio C. Elasto-plastic E = 500 ksf rEur = 3 D. Bond Ultimate bond = 30 psi Press OK
Edit Borings (soil layers) To edit the soil layers double click on the model boring. The borings can also be edited from: a) Edit Borings Button. Or from the: Tree View – Stratigraphy – boreholes Double click here (or right click) with the mouse. DeepEX 2015 – Advanced course
Enter Soil Layers To edit the soil layers click on the blue button and enter the top of layer elevation. For this example type 90 here: Then select soil type S1 here: Press OK DeepEX 2015 – Advanced course
Double click on wall DeepEX 2015 – Advanced course
2. Select edit section data, to change wall properties 1. Change wall depth to 45ft Number of nodes controls the divisions along the wall in a limit-equilibrium analysis. (Suggested 200 min, or set so that small intervals (0.25 ft) are generated) DeepEX 2015 – Advanced course
Change wall section AZ 19 sheet pile 1. Change wall type 2. Select AZ-19 section 3. Select A50 steel (fy= 50 ksi) 4. Select OK DeepEX 2015 – Advanced course
Wall using AZ-19 wall section Select OK DeepEX 2015 – Advanced course
Add a new stage (Model Tab) Or right click (to add a stage, similar to Excel) DeepEX 2015 – Advanced course
Stage 1 change external elevations toEl. 90 Stage 1 DeepEX 2015 – Advanced course
Add Stage 2: Add a strut at El. +92 Right click and add stage 2 DeepEX 2015 – Advanced course
Select tool to add a tieback Note: After selecting the “Draw ground anchor button” the program tells you to select/enter the 1st tieback point at the wall (x z) DeepEX 2015 – Advanced course
Add tieback with mouse 1. Select 1st point on left wall (we will modify the coordinates later) 2. Select 2nd point on right wall when wall highlights
Edit tieback properties (support options) 1. Change dimensions z= 92 ft (elevation) Horizontal spacing to 5ft (length is determined by program) Select OK DeepEX 2015 – Advanced course
Edit tierod section to #18 bar – 80ksi • Select solid bar • Change grade to 80 • Select #18 bar • Specify one bar per tierod • Dfix does not play a role
Add a surcharge on the center surface. Select this tool button. DeepEX 2015 – Advanced course
Add surcharge with mouse 2. Select 2ndpoint 1. Select 1nd point on left DeepEX 2015 – Advanced course
Modify surcharge Change coordinates X1= -22 X2= -2 Change surcharge qz1= 0.6 ksf qz2= 0.6 ksf Point 1 is on the left side Point 2 is on the right side Wall index refers to which wall the load is applied: 0 = left wall, 1= right wall, -1 all walls 3. Select OK DeepEX 2015 – Advanced course
Add stage 3: Excavate to El. 80ft left and right side Right click and add stage 3 DeepEX 2015 – Advanced course
On stage 3: Go to Analysis tab Change analysis mode to “Limit Equilibrium and Beam Elastoplastic Foundations” In this mode, DeepEX first performs a limit-equilibrium analysis and stores the conventional wall embedment safety factors. Then, DeepEX runs the elastoplastic solution (non-linear) and stores wall moments, shears, displacements and other parameters from the non-linear analysis. DeepEX 2015 – Advanced course
No wall friction to be used • Wall friction (wall to soil) is ignored because walls are not expected to experience vertical movement (Analysis tab)
Select US structural codes (Design Tab) 1. Select US allowable settings from Design tab DeepEX 2015 – Advanced course
Review Assumptions (Yellow table Stage 2) Concrete code and Steel Code (1.6 is safety on Ultimate cap) Clay behavior Water pressure analysis Driving pressures Ka= Active without wall friction Resisting pressures Kp/1.5 = Passive divided by 1.5 Table displays assumptions for both limit-equilibrium and non-linear analysis DeepEX 2015 – Advanced course
Analyze the model (current design section) Analyzes all design sections DeepEX 2015 – Advanced course
Summary table (all Design sections) DeepEX 2015 – Advanced course
Summary table (Selected design section all stages) Note: You may select another design section or another wall (when a 2nd wall is used) Press EXIT DeepEX 2015 – Advanced course
Results Tab (for viewing results on model screen) Tables and diagrams Display soil mass stresses (when water flownet analysis is performed) Display stresses and pressures on walls. Wall embedment and other safety factors Wall moment, shear, axial, displacement. Support reaction R. Display wall capacity (moment and shear), Stress ratios (ratios <1 OK) Click on Min-Max to display min and max values. Show ENV= Show result envelope (this design section) DeepEX 2015 – Advanced course