Download
1 / 1
10 likes | 28 Views
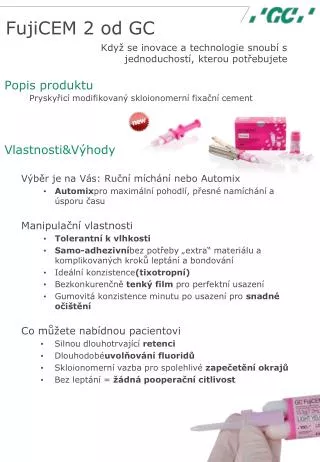
GC INDIA recommends GC FujiCEM - the first resin reinforced glass ionomer luting cement in a PASTE formulation. A complete dental restorative system for faster and more confident luting.

E N D
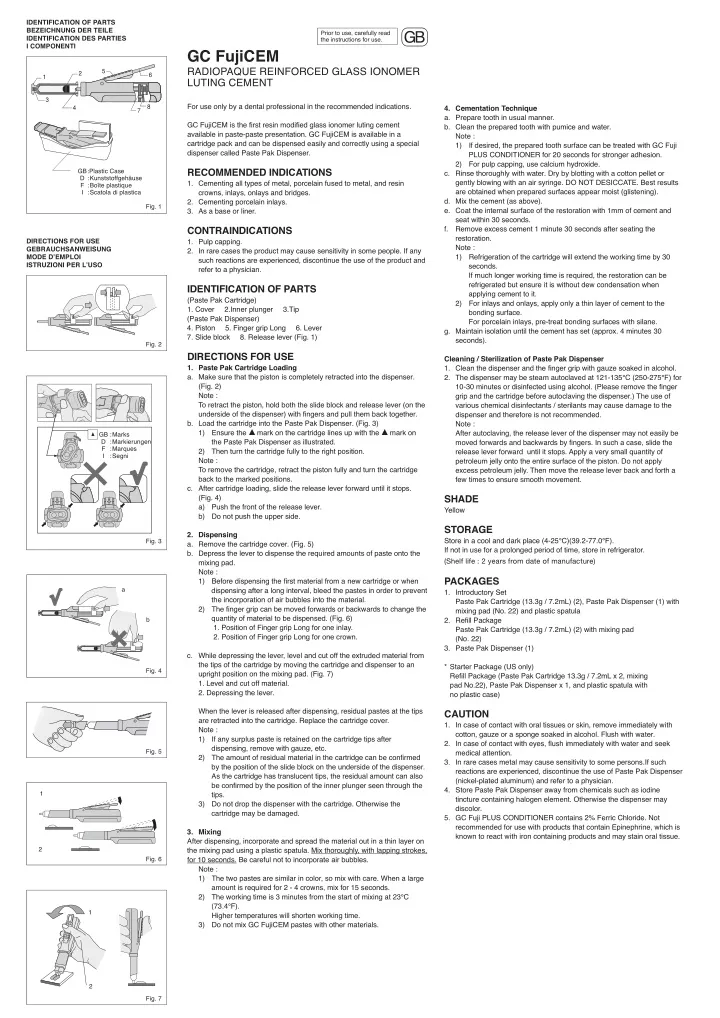
IDENTIFICATION OF PARTS BEZEICHNUNG DER TEILE IDENTIFICATION DES PARTIES I COMPONENTI Prior to use, carefully read the instructions for use. GB GC FujiCEM RADIOPAQUE REINFORCED GLASS IONOMER LUTING CEMENT 5 2 6 1 3 For use only by a dental professional in the recommended indications. 8 4 4. Cementation Technique a. Prepare tooth in usual manner. b. Clean the prepared tooth with pumice and water. Note : 1) If desired, the prepared tooth surface can be treated with GC Fuji PLUS CONDITIONER for 20 seconds for stronger adhesion. 2) For pulp capping, use calcium hydroxide. c. Rinse thoroughly with water. Dry by blotting with a cotton pellet or gently blowing with an air syringe. DO NOT DESICCATE. Best results are obtained when prepared surfaces appear moist (glistening). d. Mix the cement (as above). e. Coat the internal surface of the restoration with 1mm of cement and seat within 30 seconds. f. Remove excess cement 1 minute 30 seconds after seating the restoration. Note : 1) Refrigeration of the cartridge will extend the working time by 30 seconds. If much longer working time is required, the restoration can be refrigerated but ensure it is without dew condensation when applying cement to it. 2) For inlays and onlays, apply only a thin layer of cement to the bonding surface. For porcelain inlays, pre-treat bonding surfaces with silane. g. Maintain isolation until the cement has set (approx. 4 minutes 30 seconds). 7 GC FujiCEM is the first resin modified glass ionomer luting cement available in paste-paste presentation. GC FujiCEM is available in a cartridge pack and can be dispensed easily and correctly using a special dispenser called Paste Pak Dispenser. RECOMMENDED INDICATIONS 1. Cementing all types of metal, porcelain fused to metal, and resin crowns, inlays, onlays and bridges. 2. Cementing porcelain inlays. 3. As a base or liner. GB:Plastic Case D :Kunststoffgehäuse F :Boîte plastique I :Scatola di plastica Fig. 1 CONTRAINDICATIONS 1. Pulp capping. 2. In rare cases the product may cause sensitivity in some people. If any such reactions are experienced, discontinue the use of the product and refer to a physician. DIRECTIONS FOR USE GEBRAUCHSANWEISUNG MODE D’EMPLOI ISTRUZIONI PER L’USO IDENTIFICATION OF PARTS (Paste Pak Cartridge) 1. Cover 2.Inner plunger 3.Tip (Paste Pak Dispenser) 4. Piston 5. Finger grip Long 6. Lever 7. Slide block 8. Release lever (Fig. 1) Fig. 2 DIRECTIONS FOR USE 1. Paste Pak Cartridge Loading a. Make sure that the piston is completely retracted into the dispenser. (Fig. 2) Note : To retract the piston, hold both the slide block and release lever (on the underside of the dispenser) with fingers and pull them back together. b. Load the cartridge into the Paste Pak Dispenser. (Fig. 3) 1) Ensure the mark on the cartridge lines up with the the Paste Pak Dispenser as illustrated. 2) Then turn the cartridge fully to the right position. Note : To remove the cartridge, retract the piston fully and turn the cartridge back to the marked positions. c. After cartridge loading, slide the release lever forward until it stops. (Fig. 4) a) Push the front of the release lever. b) Do not push the upper side. Cleaning / Sterilization of Paste Pak Dispenser 1. Clean the dispenser and the finger grip with gauze soaked in alcohol. 2. The dispenser may be steam autoclaved at 121-135°C (250-275°F) for 10-30 minutes or disinfected using alcohol. (Please remove the finger grip and the cartridge before autoclaving the dispenser.) The use of various chemical disinfectants / sterilants may cause damage to the dispenser and therefore is not recommended. Note : After autoclaving, the release lever of the dispenser may not easily be moved forwards and backwards by fingers. In such a case, slide the release lever forward until it stops. Apply a very small quantity of petroleum jelly onto the entire surface of the piston. Do not apply excess petroleum jelly. Then move the release lever back and forth a few times to ensure smooth movement. mark on GB :Marks D :Markierungen F :Marques I :Segni SHADE Yellow STORAGE Store in a cool and dark place (4-25°C)(39.2-77.0°F). If not in use for a prolonged period of time, store in refrigerator. (Shelf life : 2 years from date of manufacture) 2. Dispensing a. Remove the cartridge cover. (Fig. 5) b. Depress the lever to dispense the required amounts of paste onto the mixing pad. Note : 1) Before dispensing the first material from a new cartridge or when dispensing after a long interval, bleed the pastes in order to prevent the incorporation of air bubbles into the material. 2) The finger grip can be moved forwards or backwards to change the quantity of material to be dispensed. (Fig. 6) 1. Position of Finger grip Long for one inlay. 2. Position of Finger grip Long for one crown. Fig. 3 PACKAGES 1. Introductory Set Paste Pak Cartridge (13.3g / 7.2mL) (2), Paste Pak Dispenser (1) with mixing pad (No. 22) and plastic spatula 2. Refill Package Paste Pak Cartridge (13.3g / 7.2mL) (2) with mixing pad (No. 22) 3. Paste Pak Dispenser (1) a b c. While depressing the lever, level and cut off the extruded material from the tips of the cartridge by moving the cartridge and dispenser to an upright position on the mixing pad. (Fig. 7) 1. Level and cut off material. 2. Depressing the lever. * Starter Package (US only) Refill Package (Paste Pak Cartridge 13.3g / 7.2mL x 2, mixing pad No.22), Paste Pak Dispenser x 1, and plastic spatula with no plastic case) Fig. 4 When the lever is released after dispensing, residual pastes at the tips are retracted into the cartridge. Replace the cartridge cover. Note : 1) If any surplus paste is retained on the cartridge tips after dispensing, remove with gauze, etc. 2) The amount of residual material in the cartridge can be confirmed by the position of the slide block on the underside of the dispenser. As the cartridge has translucent tips, the residual amount can also be confirmed by the position of the inner plunger seen through the tips. 3) Do not drop the dispenser with the cartridge. Otherwise the cartridge may be damaged. CAUTION 1. In case of contact with oral tissues or skin, remove immediately with cotton, gauze or a sponge soaked in alcohol. Flush with water. 2. In case of contact with eyes, flush immediately with water and seek medical attention. 3. In rare cases metal may cause sensitivity to some persons.If such reactions are experienced, discontinue the use of Paste Pak Dispenser (nickel-plated aluminum) and refer to a physician. 4. Store Paste Pak Dispenser away from chemicals such as iodine tincture containing halogen element. Otherwise the dispenser may discolor. 5. GC Fuji PLUS CONDITIONER contains 2% Ferric Chloride. Not recommended for use with products that contain Epinephrine, which is known to react with iron containing products and may stain oral tissue. Fig. 5 1 3. Mixing After dispensing, incorporate and spread the material out in a thin layer on the mixing pad using a plastic spatula. Mix thoroughly, with lapping strokes, for 10 seconds. Be careful not to incorporate air bubbles. Note : 1) The two pastes are similar in color, so mix with care. When a large amount is required for 2 - 4 crowns, mix for 15 seconds. 2) The working time is 3 minutes from the start of mixing at 23°C (73.4°F). Higher temperatures will shorten working time. 3) Do not mix GC FujiCEM pastes with other materials. 2 Fig. 6 1 2 Fig. 7