Download

1 / 11
110 likes | 285 Views
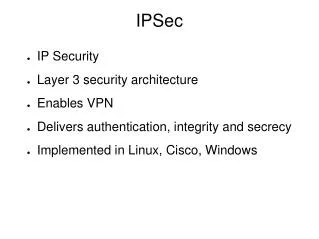
IPSec Lab. Install openvpn. To install openvpn type: yum install openvpn Note: both openvpn and lzo are installed To see what they are type: rpm –qi openvpn rpm –qi lzo rpm –qi openssl. Set Up. Determine who’s left and who’s right Exchange IP addresses

E N D
Install openvpn • To install openvpn type: • yum install openvpn • Note: both openvpn and lzo are installed • To see what they are type: • rpm –qi openvpn • rpm –qi lzo • rpm –qi openssl
Set Up • Determine who’s left and who’s right • Exchange IP addresses • Ping each others address to make sure you have connectivity • Verify /dev/net/tun device file was created • Create an account for your partner using useradd and passwd
Check/Set Firewall • Check to see if firewall is running: • iptables –L -n • Insert firewall rule to allow VPN • iptables -I RH-Firewall-1-INPUT -p udp --dport 1194 -j ACCEPT
VPN Configuration • Change to the following directory: • /usr/share/doc/openvpn-2.1/ • Look around…lot’s of information here • Change into the sample-config-files directory • For the purpose of simplicity we will use config files posted on wildbill.org • right = right.conf.txt • left = left.conf.txt • Copy the right or left config files to /etc/openvpn (depending if you were right or left)
VPN Configuration • Rename the conf file you downloaded to openvpn.conf • Now we will edit the /etc/openvpn/openvpn.conf file • Only the left file needs to be changed by adding the ip address of the right
VPN Configuration • Now one of you has to generate a shared key that will encrypt the tunnel • openvpn --genkey --secret static.key • Now copy that to your partner’s PC • He can then (as root) copy it into the /etc/openvpn directory • Note: the same static.key file must be in both /etc/openvpn directories
Starting the VPN • On both servers type: • service openvpn start • Check to see if the tunnel interface came up: • ifconfig • You should see an interface called tun0 • Now try pinging each other • ping 10.8.0.1 from the left • ping 10.8.0.2 from the right
Check the Connection • Using tcpdump you can verify the connection • start a ping from one side to 10.8.0.x • while on the other side start a tcpdump against the tunnel interface • tcpdump –I tun0 • And against unencrypted interface • tcpdump –I eth0 host <ping host pub ip>
More OpenVPN information • Home Page: • http://www.openvpn.net • Howto • http://openvpn.net/howto.html • Other VPN applications: • Free S/WAN (http://www.freeswan.org) • Stunnel (http://stunnel.mirt.net)