Download
1 / 8
80 likes | 320 Views
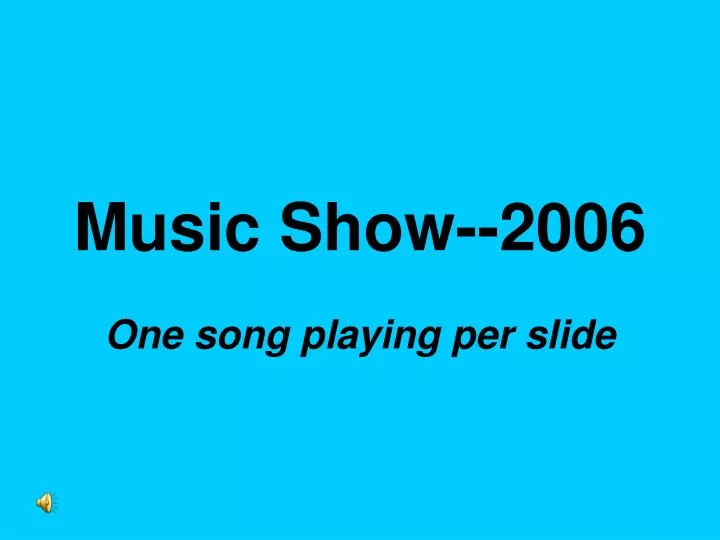
Music Show--2006. One song playing per slide. Slide 2. Slide 3. Play with sound files The presentation opens with its title slide displayed, "Sound file experiments." Exercise 1: Insert a sound and make it play continuously Step 1: Insert a sound

E N D
Music Show--2006 One song playing per slide
Play with sound files The presentation opens with its title slide displayed, "Sound file experiments." Exercise 1: Insert a sound and make it play continuously Step 1: Insert a sound On slide 1, titled "Sound file experiments," insert a sound from the Clip Art task pane. Do you remember the first commands to use? The following steps detail them. On the Insert menu, point to Movies and Sounds, and then click Sound from Clip Organizer. The Clip Art task pane opens and automatically fills with sound clips. In the Search for box above the clips, type Clapping, and then click Go. You should get a clip at the top of your results titled Claps Cheers (the name is below the clip); you may need to scroll to it. Don't click the clip yet. To see file details, point to the clip, and a ScreenTip gives a description, file size, and file type. (If you don't see a ScreenTip, just click somewhere within the PowerPoint window and then hover again.) This one is 27 KB and is a .wav file. If you don't see this clip, scroll to another .wav file that's about the same file size—but don't click it yet. To preview the sound, point to the clip, then click the arrow on it. On the menu, click Preview/Properties; the sound plays for you. Click Close. To insert the clip, click it. You instantly get a message asking how you want the sound to start. Click Automatically. The sound file shows on your slide as an icon , selected, right in the center. In a slide show, the sound plays right after the slide is displayed. To try it, go into slide show mode by clicking the Slide Show button in the lower left of the PowerPoint window (press ESC to get back into normal view). Back in normal view, close the Clip Art task pane
Step 2: Loop the sound Now make the sound repeat. Here's how On the slide, right-click the sound icon, and then click Edit Sound Object. In the dialog box, click Loop until stopped, and then click OK. Before you click to view this in a slide show, read these instructions: When the slide is displayed, you'll hear the sound play automatically and repeat indefinitely, the effect of the "loop" setting you just chose. Click the slide (not the icon itself) while the sound is playing, and note what happens—the sound stops. OK, now go into slide show view (click the Slide Show button). After you click the slide and the sound stops, click all the way through the slides to the black screen, and then click again. The sound stopped when you clicked because its default stop setting is a mouse click. Depending on your use of a sound, it may not matter that the sound stops when you click. But what if you want it to play through other mouse clicks on this slide—for example, if you need to click for a text animation to play? Or what if you want the sound to continue as you click to the next slide? Step 3: Make the sound play continuously Display slide 1, and change the stop setting on the sound file to keep it playing through all the slides. Here's how In normal view, on the slide, right-click the sound icon, and on the shortcut menu, click Custom Animation. That task pane appears. In the middle of the task pane is a big blank area, populated with one item that represents your sound file and looks something like this: If you added more sound files or movie files, or if you created animation effects on this slide, they'd all show up in this list so you could coordinate their settings. To get to the stop settings, click the arrow on the media effect in the pane, and then click Effect Options on its menu. On the Effect tab, notice the Stop playing area. In addition to On click, you can make the sound play through the current slide or over the number of slides you specify. Change the setting from On click to After: x slides , and then set the spin box to 4. Click OK. When you go into slide show mode, the sound starts and keeps playing as you click through the slides. Now press the Slide Show button in the task pane, and click through the slides to hear the sound play continuously. Click through to the black screen and back to normal view. Note You don't need to set a sound to loop before choosing one of these stop settings. That was to illustrate the effect of looping and also to make your sound longer for the purposes of the exercise. Remember, the sound must have a long enough playing time to last through the current slide or several slides.
Exercise 2: More effect options Glance at other choices available in the dialog box that you opened from the Custom Animation task pane. Display slide 1 and click the sound icon to select it. In the task pane, click the arrow on the sound effect, and then click Timing. This opens the same dialog box as in the last exercise but on a different tab. Look at the Repeat box, toward the middle of the dialog box. Click the arrow to see the options here. This is another place you can choose repetition; it has more specific options than the looping option you chose earlier (remember, you got to that earlier dialog box from the shortcut menu on the sound icon). These "repeats" affect only the current slide; none of them will play beyond that. Now click the Sound Settings tab. Do these options look familiar? You saw them originally when you right-clicked the sound icon and clicked Edit Sound Object. So: You can set volume, hide the sound icon, and check total playing time and file path from here, too. (This .wav file is small enough to be embedded, so you see "Contained in presentation" in the File path area, rather than a path to a linked file.) Don't close the dialog box, yet. Tip If you get confused about which options are where, remember that almost all options are available in the Custom Animation options dialog box. The one option that isn't, "looping," you access by clicking Edit Sound Object on the sound icon's shortcut menu. Because the sound plays automatically, you don't need to see the sound icon to click it. Under Display options on the Sound Settings tab, click Hide sound icon during slide show, and then click OK. The icon still shows on your slide in editing view, but when you run the slide show, you'll see that the icon is gone from slide 1. Press the Slide Show button to see the show, and click through the slides and through the black screen to return to normal view. The icon is always available in editing view. Remember that if your sound is set up to play by mouse click, you don't want to hide its icon unless you've created another trigger, such as an action button, that will play the sound. Another thing you can do is edit the sound's start so that it plays when you click the slide rather than the icon, and then you can hide the icon.
Exercise 3: Edit how a sound starts Step 1: Insert a triggered sound Look at the start settings in the Custom Animation task pane, and insert a triggered sound. With slide 1 displayed and the sound icon selected, click the sound effect in the Custom Animation task pane, click its arrow, and click Timing. At the top of the tab, you see a Start box that's set to After Previous, which is the setting that's applied when you insert a sound and choose to have it play automatically. Click the arrow on the box just to see the options here. Note If there are no other effects on the slide, After Previous means "after display of the slide," and so the sound plays right after the slide is displayed. If there are two sounds on the slide, and you select Automatically for the start of each one, the second sound plays after the first one—that is, "after previous." In the dialog box, look at the Triggers button. Click it to see the commands below it. This is where you'd a set up a trigger, such as the sound icon, to play the sound. You'll be coming back to this. For now, click Cancel to close the dialog box. Now you'll insert another sound and start it differently. But first, alter the "stop" setting for the sound on slide 1 so that it only plays through the current (first) slide. Hint Click Effect Options on the sound effect's menu in the task pane. Under Stop playing, click After current slide, and then click OK. Switch to slide 2 by clicking the slide 2 thumbnail on the left side of the PowerPoint window. Then insert another sound from the Clip Art task pane: In the Custom Animation task pane, click the down arrow in the title bar of the task pane, then click Clip Art on the drop-down menu. Click any clip to insert it. When you see the message about how to start the sound, click When Clicked. The sound icon appears on the slide. Use the drop-down menu in the title bar of the task pane to return to the Custom Animation task pane. On the slide, the sound icon now shows with a little hand next to it, like this: (Click the slide to deselect the icon and it will be easier to see.) This means the sound starts by using a trigger. Look at the sound effect in the task pane list. It appears under a "trigger" bar and looks something like this: The trigger means that your sound will play when you click the sound icon itself, rather than playing when you just click the slide. The trigger protects the sound from going off when you click the slide. Test this in a slide show—but read this first: When you click slide 1 to advance, your sound on that slide will stop, because you just set it to stop after the current slide. On slide 2, no sound will play until you click the sound icon—the triggered sound. Then click anywhere on the slide (not the icon) to stop the sound, and advance to the next slide. OK: Press F5 to see the slide show from the start; click through to the black screen and then back to normal view. (If nothing happens when you press F5, click somewhere in the PowerPoint window to give it the focus, and try again.)
Step 2: Change the start setting Now make this triggered sound start automatically instead. With slide 2 displayed, click the sound effect in the task pane list, and then click Timing on its menu. In the Start box, change the setting to After Previous. Click OK. In the task pane list, the effect has lost its trigger bar and has the clock icon next to it that goes with After Previous. You also see After Previous in the Start box above the list. The sound will now play automatically. What if you change your mind and want to set up the trigger-start again for the sound? This is what you do: In the task pane list, click the effect and display the Timing tab again. Click the Triggers button. Click the Start effect on click of option, and note the two items in the list. You want the sound to play when you click its icon, represented by the "media" item in the list (or possibly a file name, depending on the sound you inserted). The other item is Title 1: Slide 2. If you select this, the sound plays when you click the title on slide 2. Click the media item, such as "Media 2," in the list. Note that in the Start box above, the setting changes to On Click. Click OK in the dialog box. On the sound effect in the task pane list, you see the trigger bar again, with the trigger set on the sound itself ("Media 2"), and the mouse icon. You have your trigger start back. Close the Custom Animation task pane. Tips If you want the sound to play by mouse click but not a triggered click—that is, to play when you click the slide rather than the icon—you can change the setting in the Start box to On Click without setting up the trigger. If you already have the trigger set up, you can click the sound effect in the task pane list and drag it above the trigger bar; this takes off the trigger. Or, on the Timing tab, under the Triggers button, click the Animate as part of click sequence option. With the sound starting when you click the slide, you don't need the sound icon anymore and can hide it. The sound plays when you click the slide.