Download

1 / 21
340 likes | 1.09k Views
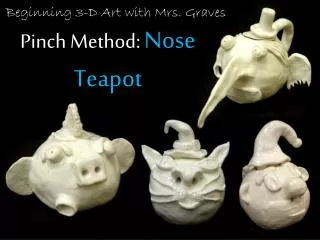
The Teapot. Parts of a Teapot. Body: Lid: Foot: Handle: Spout:. Objectives. Research tea pots through time – review both conceptual and traditional designs Implement planning - determine appropriate hand building techniques to use for construction

E N D
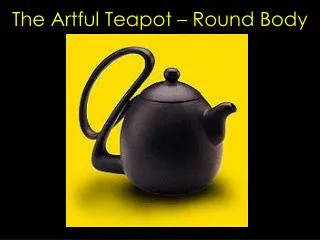
Parts of a Teapot Body: Lid: Foot: Handle: Spout:
Objectives • Research tea pots through time – review both conceptual and traditional designs • Implement planning - determine appropriate hand building techniques to use for construction • Design lid/handle and spout to be part of the overall design as well as function like a tea-pot - design an original teapot • Utilize additive and subtractive sculpture methods • Select aesthetically pleasing glazes/and or under glazes • Demonstrate craftsmanship in forming and glazing.
Procedures • Brainstorm ideas - write down objects that are meaningful to you to use as inspiration for teapot design. • Make several thumbnail sketches of ideas - select one to enlarge and sketch in more detail. Develop a plan using hand building techniques. • An easy way to make body of pot is using draped slab pressed inside a bowl. Using a rolling pin and wooden slats, roll out even slabs to use for construction. Each slab must be slipped and scored. Make body with slab - coil or pinch method. • Create base of teapot before adding strainer, spout and foot. • Form lid to fit into top of base - and mesh with design (without falling in). • Use thin straw to make strainer holes in body before attaching spout. • Finish by adding interesting details that fit chosen theme. Use additive and subtractive techniques to add details. Handle and spout must add to the theme. • Smooth all cracks and rough areas with a damp sponge before letting it dry out. • Extra Credit: • Make two teacups/ mugs that relate to your teapot
Vocabulary • Functional • Traditional • Additive • subtractive • Slab/draped • slab • pinch • coil • contemporary
Resources • Resources: • History of Teapots | History of Teapots (Archive) • Ceramics Monthly - over thirty articles are linked. • The Artful Teapot 20 photos shown from the exhibit. • Gardiner Museum (a few teapots on site) • Teapots a Go-Go - a few examples Richard Swanson - Sculptural teapots • David Stabley | Del Mano Gallery (Archive) • Artful Home's Teapots | Arkansas Art Center • For teapots with a "twist" - enjoy these by Michael Lambert | teapot portfolio (Archive) • Pinterest - This is a collection of their pins on teapots. • Video: The Way Pots Pour by Marvin Bartel. • Video: Contemporary Ceramic Teapots - Crystal Productions