Download
1 / 42
420 likes | 421 Views
This thesis presentation outlines the project overview, infection control risk assessment, technical analyses, and mechanical and electrical systems for the Civista Medical Center in La Plata. Includes background on ICRA, implications, analysis, suggested control actions, and interim life safety measures.

E N D
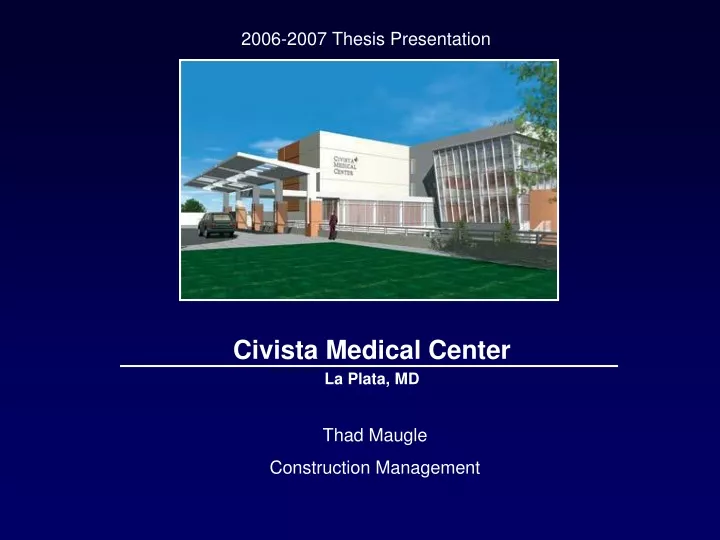
2006-2007 Thesis Presentation Civista Medical Center La Plata, MD Thad Maugle Construction Management
Presentation Outline • Project Overview • Infection Control Risk Assessment • Technical Analyses • Mechanical: Steam Turbine vs. PRV • Electrical: Aluminum vs. Copper Conductors • Acknowledgement • Questions / Comments
Project Overview • Location: La Plata, MD • Building Occupant: Civista Health, Inc. • Scope • Addition: 122,864 SF • Renovations: 36,303 SF • Occupancy & Function • Institutional I-2 • Medical Care • Size: 159,167 SF of total construction • Number of stories above grade / total levels: 4 / 4 • Dates of Construction: 12/1/04 - 8/1/07 (33 months) • Total Project Cost: $ 43,941,344 • Project Delivery Method: CM @ Risk w/ GMP
Project Overview (cont’d) • Existing Site Conditions • Foundation • Augered CIP Concrete piles • Structure • Elevated CIP Concrete • Building Envelope • Precast Stone Masonry Units w/ Modular Face Brick
Project Overview (cont’d) • Mechanical System • Electrical System • 480/277V: Lighting, Major Mech. Equip., Building Equip. • 208/120V: Lighting, Small Mech. Equip., Small Building Equip. • Building Service: 15 kV service
Infection Control Risk Assessment • Problem: • Civista requires an ICRA plan that is properly sequenced. • Goal: • Formulate an ICRA plan unique to Civista • Sequence an area of renovations • Analysis Techniques: • Overview of ICRA • Formulate ICRA plan for Civista renovation
Background • Infection Control Risk Assessment (ICRA) • A strategic plan intended to identify and alleviate potential risks associated with the air quality environment during the construction phase of a project • Interim Life Safety Measures (ILSM) • A series of actions required to be taken to temporarily compensate for hazards posed by existing Life Safety Code deficiencies or construction activities, allowing for safe execution of the ICRA. • American Institute of Architects (AIA) Guidelines for Design and Construction of Healthcare Facilities • Introduced ICRA in 2001 • Joint Commission for Accreditation of Health Care Organizations (JCAHO) • Mandated ICRA in 2001
Implications of ICRA • Owner • Responsible for budget and ICRA completion prior to the commencement of work • Construction Management Team • Preconstruction planning and implementation of the infection control measures • Monitoring, documentation, and quality control • Trade Contractors • Abide by the provided infection control measures • Monetary penalties may result otherwise
ICRA Analysis • Step 1: • Identify Type of Construction Project Activity (Type A-D) • Step 2: • Identify the Patient Risk Group
ICRA Analysis • Step 3: • Match the Patient Risk Group with the planned Construction Project Type to find the Class of Precautions or level of infection control activities required.
Suggested Infection Control Actions • Dust proof plastic barrier with door and frame to be installed. Contains demo debris and dust, and protects patients • Air vents inside the work area will be sealed with plastic sheeting • Dust mats to be placed at entrances and exits of work areas • Negative air pressure to be maintained within work area utilizing HEPA equipped air filtration units • Construction debris to be transported in tightly covered containers • Inside work area to be completely cleaned prior to removal of plastic barrier • After removal of plastic barrier, area to be cleaned again with disinfectant • All staff in the area to be briefed prior to the commencement of work
Suggested Interim Life Safety Measures • Forms submitted and approved. • Fire door exits to be maintained for clear access at all times. • Hospital’s existing life safety systems not to be interrupted. • Additional fire fighting equipment to be available. • Staff to be briefed prior to the commencement of work. • Install dust proof plastic barriers to contain demo debris and protect occupants • Properly cover loads of debris • Clean interior area enclosed by barriers • Remove temporary barriers upon completion • Clean and disinfect entire area upon removal of temporary barriers
Decision Tree • Invasive Work • Layout work plan • Use containment • Shield patients & visitors • Use dust mats • Signage as needed • Cover trash during removal • Type of Containment • 1-14 days: Plastic Wall • Affecting existing utilities? • Plan outages
Wall Mount Configuration • Minimizes number of wall penetrations by running cable and wiring down from the ceilings instead of through the walls
Outage Request Forms • Existing utilities and systems will be affected • (Ex.) Sheaves and belts on Air Handling Unit (AHU) #7 need replaced and upgraded • Affects occupied space being renovated • Requires schedule and approved system outage • Isolate areas - ventilation temporarily out of service • Highly sensitive at-risk patients may need to be moved to a more stable environment for the time being.
2nd Floor East Wing Sequencing • Risk Type • C – work generates moderate to high levels of dust • Patient Type • Highest Risk • Description • Additional Plumbing and sprinkler piping required above ceilings in patient rooms of the 2nd floor • Sequencing will involve two rooms at a time
2nd Floor East Wing Sequencing - (1) Sequence 1, 2, 3, 6, 7, 8 General Trades Remove furniture Construct plastic dust barrier Install floor protection Install HEPA filters in both rooms Cut drywall for tie-ins Lay out piping on ceilings Cut drywall ceiling for piping Cut drywall ceiling in toilet room for sprinkler piping and head Remove drywall debris Plumbing Contractor Lay out piping on ceilings Core drill roof Install hangers and piping Perform pipe testing Sprinkler Contractor Install hangers and piping Install sprinkler heads General Trades Patch drywall walls and ceilings Finish paint Clean entire rooms Remove plastic dust barrier Clean area
2nd Floor East Wing Sequencing – (2) Sequence 1, 2, 3, 6, 7, 8 General Trades Remove furniture Construct plastic dust barrier Install floor protection Install HEPA filters in both rooms Cut drywall for tie-ins Lay out piping on ceilings Cut drywall ceiling for piping Cut drywall ceiling in toilet room for sprinkler piping and head Remove drywall debris Plumbing Contractor Lay out piping on ceilings Core drill roof Install hangers and piping Perform pipe testing Sprinkler Contractor Install hangers and piping Install sprinkler heads General Trades Patch drywall walls and ceilings Finish paint Clean entire rooms Remove plastic dust barrier Clean area
2nd Floor East Wing Sequencing – (3) Sequence 1, 2, 3, 6, 7, 8 General Trades Remove furniture Construct plastic dust barrier Install floor protection Install HEPA filters in both rooms Cut drywall for tie-ins Lay out piping on ceilings Cut drywall ceiling for piping Cut drywall ceiling in toilet room for sprinkler piping and head Remove drywall debris Plumbing Contractor Lay out piping on ceilings Core drill roof Install hangers and piping Perform pipe testing Sprinkler Contractor Install hangers and piping Install sprinkler heads General Trades Patch drywall walls and ceilings Finish paint Clean entire rooms Remove plastic dust barrier Clean area
2nd Floor East Wing Sequencing – (4) Sequence 4 & 5 ** Can be accomplished after normal hours without disturbance to staff General Trades Remove supplies from the supply room Construct plastic dust barrier Install floor protection Install HEPA filters in both rooms Demo drywall ceiling in the supply room Remove drywall debris Install plastic covering on the walls and floors in rooms to be worked that night Remove ceiling tiles as required Plumbing Contractor Lay out piping on ceilings Core drill roof Install hangers and piping Perform pipe testing Sprinkler Contractor Install hangers and piping Install sprinkler heads General Trades Patch drywall walls and ceilings Finish paint Reinstall all ceiling tiles Remove plastic covering from walls and floors Remove plastic dust barrier Clean area
2nd Floor East Wing Sequencing – (5) Sequence 4 & 5 ** Can be accomplished after normal hours without disturbance to staff General Trades Remove supplies from the supply room Construct plastic dust barrier Install floor protection Install HEPA filters in both rooms Demo drywall ceiling in the supply room Remove drywall debris Install plastic covering on the walls and floors in rooms to be worked that night Remove ceiling tiles as required Plumbing Contractor Lay out piping on ceilings Core drill roof Install hangers and piping Perform pipe testing Sprinkler Contractor Install hangers and piping Install sprinkler heads General Trades Patch drywall walls and ceilings Finish paint Reinstall all ceiling tiles Remove plastic covering from walls and floors Remove plastic dust barrier Clean area
2nd Floor East Wing Sequencing – (6) Sequence 1, 2, 3, 6, 7, 8 General Trades Remove furniture Construct plastic dust barrier Install floor protection Install HEPA filters in both rooms Cut drywall for tie-ins Lay out piping on ceilings Cut drywall ceiling for piping Cut drywall ceiling in toilet room for sprinkler piping and head Remove drywall debris Plumbing Contractor Lay out piping on ceilings Core drill roof Install hangers and piping Perform pipe testing Sprinkler Contractor Install hangers and piping Install sprinkler heads General Trades Patch drywall walls and ceilings Finish paint Clean entire rooms Remove plastic dust barrier Clean area
2nd Floor East Wing Sequencing – (7) Sequence 1, 2, 3, 6, 7, 8 General Trades Remove furniture Construct plastic dust barrier Install floor protection Install HEPA filters in both rooms Cut drywall for tie-ins Lay out piping on ceilings Cut drywall ceiling for piping Cut drywall ceiling in toilet room for sprinkler piping and head Remove drywall debris Plumbing Contractor Lay out piping on ceilings Core drill roof Install hangers and piping Perform pipe testing Sprinkler Contractor Install hangers and piping Install sprinkler heads General Trades Patch drywall walls and ceilings Finish paint Clean entire rooms Remove plastic dust barrier Clean area
2nd Floor East Wing Sequencing – (8) Sequence 1, 2, 3, 6, 7, 8 General Trades Remove furniture Construct plastic dust barrier Install floor protection Install HEPA filters in both rooms Cut drywall for tie-ins Lay out piping on ceilings Cut drywall ceiling for piping Cut drywall ceiling in toilet room for sprinkler piping and head Remove drywall debris Plumbing Contractor Lay out piping on ceilings Core drill roof Install hangers and piping Perform pipe testing Sprinkler Contractor Install hangers and piping Install sprinkler heads General Trades Patch drywall walls and ceilings Finish paint Clean entire rooms Remove plastic dust barrier Clean area
Steam Turbine vs. PRV • Problem: • Pressure Reducing Valve (PRV) used to reduce steam pressure. • Goal: • Redesign pressure reducing equipment from PVR to non-condensing backpressure steam turbine. • Analysis Techniques: • Overview of steam turbine system • Size equipment • Conduct energy analysis • Conduct cost analysis
Non-Condensing Backpressure Steam Turbine • Non-condensing (backpressure): • Operates above or in excess of atmospheric pressure • Used where low steam loads are required • Steam passes over turbine blades, spins turbine blade shaft which directly connected to an electrical generator, generates electricity • Low efficiencies (~15-35%)
Sizing the Steam Turbine • Given Variables • Inlet Pressure (Pi) – 60 psig + 14.7 atm pressure = 74.7 • Outlet Pressure (Po) – 10 psig + 14.7 atm pressure = 24.7 • Total Capacity (m) – 3590 lb/hr • Temperature of Steam (T1) – est. 300oF (227oF to 307oF) • Efficiency Rate (n) – est. 20% (15 to 35%) • Find Power Rate: • Q = m h
Sizing the Steam Turbine (cont’d) • Find Enthalpy Using Steam Tables • hi = 269.8 BTU/lb • ho = 1190 BTU/lb • h = ho – hi = 920.5 BTU/lb • Q = m h = 3,635,975 BTU/hr • Factor in Efficiency • Q x n = 3,635,975 BTU/hr x 0.20 = 727,197 BTU/hr • Convert to kW • 727,197 BTU/hr x [(1 kW) / (3412 BTU)] = 213.13 kW ** Equipment can now be sized according to kW output
Cost and Energy Analysis • Impractical to operate at full capacity • Assumed • 40% max capacity during Summer months (Jun – Oct): 85.25 kW • 60% max capacity during Winter months (Nov – May): 127.88 kW • Chart would be most useful in the presence of steam charts
Cost and Energy Comparison w/ Pressure Reducing Valve w/ Steam Turbine • 5,759,158 kWh consumed • $508,907.24 • 5,044,064 kWh consumed • $491,575.76
Cost and Energy Comparison • Steam Turbine estimated performance over 9 month period • Saves over $17,000 • Saves over 715,000 kWh • Cycle produces no emissions • Could be greater savings based on actual efficiency of equipment and actual capacity used.
Aluminum vs. Copper Conductors • Problem: • Civista wired with copper. • Reliable but expensive. • Goal: • Redesign copper feeders with Aluminum Alloy (AA-8000 series) alternative. • Analysis Techniques: • Compare material properties • Resize feeders and conduit • Conduct cost analysis • Conduct schedule comparison
Background • Copper shortage – 1965 • Aluminum was a cheaper alternative • Steel receptacle screws replaced brass • Aluminum to steel connection far more sensitive than copper to brass • Thermal expansion and creep • Oxidation – Resistance - hot • Corrosion • Faulty connections, even fires resulted • No contractor wants to take the risk
Material Composition • Previous Aluminum Classifications • AA-1350 • EC (Electrical Conductor) aluminum • 99.5% pure aluminum • Current Aluminum Alloy Classification • AA-8000 series • 0.001 to 0.3% zinc • 0.001 to 0.03% titanium • 0.001 to 0.5% manganese • 0.03 to 0.4% silicon • Combination yields excellent strength & resistance to corrosion
Problems / Solutions • Improper Installation • Use appropriate tools (i.e. stripping wire) • Wrap wire in a clockwise manner (i.e. tightens while being screwed in placed) • Sufficiently tightened (i.e. adequate contact area at the connection) • Oxidation / Corrosion • AA-8000 series - thermal expansion and creep similar to copper • Proper tightening • Oxide inhibitor
Cost and Schedule Comparison • Saves over $8,000 in conductor and conduit costs of feeders • Saves 4 days in construction time • Savings would be greater when including branch circuits
Acknowledgements • AE Faculty • Dr. Michael Horman • Dr. James D. Freihaut • Professor Richard Mistrick • Professor Kevin Parfitt • Industry Contacts • Ben Alexander - Gilbane Building Co. • Greg Dunkle - Gilbane Building Co. • Mike DuLaney - Gilbane Building Co. • Melanie Townsend - Gilbane Building Co. • Dan Kerr - McClure Company • Gary Hall - Civista Health, Inc. • Fellow AE Students • Alexis Kreft • David Potchek • Andrew Rhodes ...and most importantly, family and friends