Download
1 / 23
230 likes | 333 Views
What's New in the CVS-EEP Data Entry Tool. This document helps point out some the new features and improvements we've made in recent versions. version 2.2.0 by Michael Lee September 1, 2007. Don't have a copy of the tool? Get it here: http://cvs.bio.unc.edu/methods.htm. Default Values.

E N D
What's New in the CVS-EEP Data Entry Tool This document helps point out some the new features and improvements we've made in recent versions. version 2.2.0 by Michael Lee September 1, 2007 Don't have a copy of the tool? Get it here: http://cvs.bio.unc.edu/methods.htm
Default Values • Some fields may have the same value for multiple plots. • e.g., parties sampling plots, plot location, stem source, etc. • To avoid typing the same information over and over, default values may be set: • Default values never overwrite existing data. • You can overwrite the defaults for any plot by typing a new value in the field. Thanks to SS and MM for suggesting default values.
Setting Default Values • Create at least one plot. • Open the form containing the field(s) for which you want to set default values: • plot data form, planted stems form, natural stems form, cover form. • Enter a value into a field that as a default • e.g., enter "9/1/2007" into the "Start Date" field on the plot data form. • Right-click on the field to see default options…
Default Value Options • Set as default value… • for new plots/records: default value will be used only for new plots or new records as you type them. This will not affect existing data. • for new and existing records: default values will be used on any new plots or records, as well as replace all blank values currently in your data. • The replacement of blank values is not reversible, but you can still type over the values manually. • Remove default value: the default value will not be used for any new plots or records, but this will not remove any values used in your existing data. • Manage/edit defaults: takes you to a management screen to change, remove, disable default values.
ConfirmDefaultValue • As an example, click "Set as default for new and existing records" on your plot data form's start date. • You will be asked to confirm that you would really like to do this. • Click "Yes" to continue, updating blanks with the default. Any plots you add later will also use this default, unless you delete or disable it. • Click "No" or "Cancel" if you don't want to use the value as a default.
Removing Default Values • Once your default value is set, you can remove it by right-clicking the field with a default value and selecting "Remove default value." • This does not undo any default values that were already written to your plots. • Or, right-click any field and select "Manage/edit defaults" and delete the default from the management form.
Rows of Default Values • If you want to set default Parties, Strata, Place Names, etc., you can do so in a similar manner. Here, you specify an entire row as a default instead of just one value. • Right-click on the field and select one of the "set default" options (left illustration below). • If right-clicking doesn't show the "set default" options, use the adjacent "defaults…" picklist (right illustration below). • A new form will open that allows you to fill in rows that will be added to new plots or all plots (that is, new plots and existing plots), depending on which option you chose.
Setting Default Rows • An instruction screen will tell you to fill in any rows you would like as default. • Then you should enter one or more rows that will be used for each plot. In the case of parties, you must also specify a ROLE.
Removing Default Rows • If you enter a row, you can delete it if you change your mind. • Right-click on the grey box next to the row (where the black triangle is or a pencil if you are editing that row). Note that this is not the same as right-clicking on the name. • Then select "Cut" (or press the Delete key on your keyboard) and the row will be deleted.
Finishing Default Rows • After you have entered all the default rows (in this case, parties) you wish, close the form with the "x" in the upper right of the form. • See previous illustrations, but your computer may look different depending your version of Windows. • If you specified "set default for ALL plots," you'll get a chance to confirm that you want to add the default parties to all the plots in the database. Click "Yes" if you do.
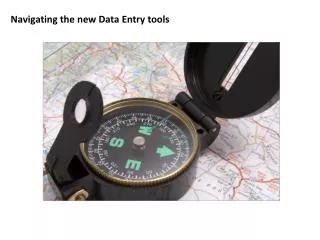
Managing Defaults - 1 • To see the defaults currently set in the entry tool, manage, or edit them, right-click any field and select "Manage/edit defaults." • Or access the same form through the Main Menu | Options | Advanced.
Managing Defaults - 2 For each row you may… • Change whether the default applies to new plots only or all plots • Temporarily disable the single value (or row). This retains the default value so you can use it later, if you re-enable it. • Change whether or not you are asked to confirm default values when you add new plots. • Change the minimum plot level that the default applies to. Some defaults (e.g., strata) only apply to higher level plots. • Edit the default value or delete it completely (same as remove) .
Managing Defaults - 3 • "Global Options" allows disabling defaults. • Default values will not be used on new plots. • You can also prevent edits of defaults. • May help prevent inadvertent edits. • If you want to re-enable editing defaults, you must use Main Menu | Options | Advanced. Right-click managing of default values will be blocked.
Adding new plots with defaults • When you add new plots, a message in the lower right of the screen (outlined in red in the above illustration) tells you if default values will be added to the new plots. • A separate confirmation box may ask you to confirm default values. If you check "Skip confirmation messages" for a default value on the management form, this box will ignore that default value (they will still be added, you just won't see the confirmation box about them). • This means that two different numbers of defaults may be reported. • You are encouraged to click the "view/edit defaults" button if you aren't sure if your new plots should have the defaults.
Changing Plot Years • Ideally, plots are entered into the entry tool during the baseline sampling (year 0). However, sometimes plots are first entered after this initial year, and thus the initial year may not be 0. • You can now specify a year number when adding new plots (0 is the default). • If you need to change the year number for existing plots, you may do so through a button at the bottom of the plot data form "change year." • A menu of plots will be shown. You may select one or more plots and specify a new year number. Remember that 0 is baseline and 1 is the first resampling year. Thanks to lots of people for suggesting this.
Resampling Improvements • When plots are resampled, sometimes stems are found that weren't found in the baseline monitoring, but they are clearly planted stems. • There are a few blank rows at the bottom of the preprinted monitoring datasheets (VMD) to add such stems to the plot. • There is a button ("resampling: add new row") on the planted stems form that allows entry of additional fields (stem source, X, Y, etc.). Thanks to NB.
Preprinted Datasheet Improvements Before, a potentially crowded portion of a page, each stem has its own letter: • Earlier versions had a small map of stems at the bottom of each plot. • Now a full page is provided. • If two stems are close, they are mapped with the same letter, making the map more readable and less crowded. After, a full page, close stems mapped with single letter: Thanks to LR.
Resampling Stem Order - 1 • If the order of the rows on the preprinted datasheets doesn't match the order of rows in the database, press the "Wrong order of rows" button. • A new picklist will allow you to select a different sort order, one of which hopefully matches the order on your preprinted datasheets. Thanks to NB.
Resampling Stem Order - 2 • If all else fails, select the "Type Stem ID then each row" value from the "Order by" picklist. • In the "new row" area, type a stem ID from the preprinted datasheet, then press tab: • That stem appears as a new row, and you enter the new size and vigor information about the stem. Repeat this process for each stem.
Smart Plot Picklists • When selecting a plot, you can type part of a plot name, such as team-plot instead of the full name. You don't have to type leading zeroes this way and can quickly find a plot. For example, type: • team-plot: 1-3 • project-team-plot: 35-1-2 • plot (only): 26 (not illustrated) • The picklist text will turn red if no plots match what you've typed. • Type a dash after each part of the plot name, including plot, if you want to filter out plots in the 30's from plot 3: 1-3- • If only one plot matches what you typed, that plot is selected, and the computer beeps once.
Tab Skips Dotted Borders • Some fields are rarely used, so the cursor skips them when you press tab on the keyboard. • Such fields now have a dotted border. • Some forms change how tab works based on header data, so the dotted borders will change as you type. • Use your mouse to click into these fields if you wish to edit them.
Miscellaneous Minor Updates • You can change a plot's sampling level when you resample the plot. This allows more thorough sampling of the same plot over time. • The type of geo-coordinates (Lat/Long, UTM, State Plane) should be specified, as well as units (meters, degrees, degrees & minutes, etc.) • When you select a genus, "sp." is filled in automatically. If you correct the row to a valid species, "sp." is removed. • There is more information on the project form, such as river basin, size, and required plots. See Main Menu | Extras. Thanks to DI.
More updates • Reporting has expanded to include more about each project, including whether or not stems/acre meets requirements. • Natural Woody Stems: if subsampling is used, or a smaller cut-off height than 10cm, a box is available to record why and how the subsampling/cut-off was done. • Planted Woody Stems, source codes: "M" for mechanically planted, "Tu" for Tublings were added. Transplanted value ("T") became "Tr." Cultivated value ("C") is now obsolete. • If "C" is entered on a datasheet, you can and should still enter "C" in the entry tool form. If "T" is entered, you should enter "Tr" if you have this latest version of the entry tool. Thanks to SR.