Download

1 / 16
180 likes | 420 Views
Lighting. 3 Point Lighting Formula. Lighting Setup. I n typical lighting setups, lighting instruments serve four functions: key lights fill lights back lights background lights. Main Lighting Setup. 3-Point Lighting Setup Made up of Key, Fill, Back and Background light

E N D
Lighting 3 Point Lighting Formula
Lighting Setup • In typical lighting setups, lighting instruments serve four functions: • key lights • fill lights • back lights • background lights
Main Lighting Setup • 3-Point Lighting Setup • Made up of Key, Fill, Back and Background light • Standard for lighting people • Can be modified for objects • Can be modified for alternative ‘looks’
The Key Light is the Main Light • There are four things you need to think about when letting up lights. • follow source Is there an apparent source of light in the setting such as a window or nearby table lamp? If so, be sure to key from this direction. • consistency In most settings it will look a bit strange if two people are sitting next to each other and one is keyed from the left and one from the right. • the person's best side Put the key on this side. It will emphasize the positive and downplay the negative facial characteristics. • what's most practical If there is a wall or obstruction on one side of the subject -- a possible problem when doing on-location shoots -- you will generally want to key from the side that will enable you to use a 45-degree angle.
Keep it Simple • Among other things, the key light creates a catchlight in the eyes of subjects -- a single reflection in each eye that gives the eyes their "sparkle." • When you "put lights everywhere," it not only results in a multitude of catchlights in the eyes, but it generally results in flat, lifeless lighting. • Numerous lights hitting talent areas also create a confusing horde of shadows. Barn doors and flags can be a great help in keeping light out of unwanted areas.
Key Light • In terms of coherence or quality the key light should be in the middle of the hard-to-soft range. Light that is either too hard or too soft is not desirable for most subject matter -- especially people. A "middle ground" is often achieved with a Fresnel light. • In three-point lighting the key light is placed at an angle of between 30- and 45-degrees from either the left or the right of the camera.
Fill Light • The key light by itself — whether it's the sun in a clear sky or a focused quartz light in the studio — produces distracting shadows. The purpose of the fill light is to partially (but not entirely) fill in the shadows created by the horizontal and vertical angles of the key light.
Fill Light • Ideally, the fill light should be about 90 degrees away from the key light. • This means that if you draw lines from the key to the subject and then to the fill light, you'll create a right angle.
Fill Light • Although the fill can be positioned at any point from right beside the camera to 45 degrees away, it's safest to place the fill 45 degrees from the camera. • By lighting a full 90-degree area, an important margin of safety is created in case subjects unexpectedly move during the production and camera angles have to be changed.
Fill Light • If a key light puts out a wide beam of light, part of this light can be bounced off of a reflector board to act as a fill. • a reflector board can be positioned at about 90 degrees from the sun to reflect sunlight into the shadow areas. • Large white Styrofoam or foam core boards are often used in doing close-ups.
Back Light • The third point is represented by the back light. • The function of the back light is to separate the subject from the background by creating a subtle rim of light around the subject.
The back light, sometimes called a hair light, should be placed directly behind the subject in relation to the close-up camera. • From an overhead perspective you should be able to draw a straight line from the lens of the close-up camera, through the subject, directly to the back light
Back Light • By using only back lights with no front lighting a silhouette effect can be created. This can be used for dramatic effects or to hide someone's identity.
Back Light • The use of back light can add depth and separation to subject matter.
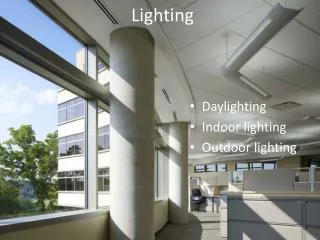
Background Lights • Background lights are used to illuminate the background area and add depth and separation between scene elements. (Remember that a back light is designed to light up the back of subjects and a background light is designed to light up the front of backgrounds.)
Background Lights • Once the background light is added, the lighting setup is complete. • Any type of light can be used as a background light as long as it provides fairly even illumination across the background, does not hit the central subject matter, and is at the appropriate intensity. • Put the background light on the same side as the key, this keeps the dominant light consistent in the scene.