Download

1 / 8
80 likes | 184 Views
More GUI Components. We finish off our examination of GUI components today by looking at a few that we haven’t seen yet we start off with the JSlider the JSlider is a bar with a mouse-movable controller you slide the controller from left to right or right to left

E N D
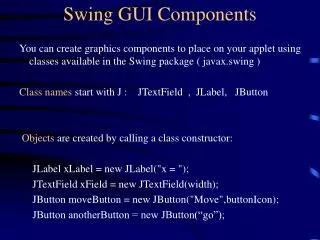
More GUI Components • We finish off our examination of GUI components today by looking at a few that we haven’t seen yet • we start off with the JSlider • the JSlider is a bar with a mouse-movable controller • you slide the controller from left to right or right to left • we will use the JSlider to control things like • speed (as you move it to the right, the Timer’s delay can be shortened, thus speeding up your game • colors, we will see how to do this in a couple of slides where 3 JSliders control the background color • We create a JSlider by initializing it with 3 values: the minimum value (left-hand side or lower limit), maximum value (right-hand side or upper limit), and initial value • JSlider redSlider = new JSlider(0, 255, 0); • this could be used to allow the user to set the amount of Red between 0 and 255, initialized to 0
More on JSliders • You can also create vertical sliders by adding JSlider.VERTICAL at the beginning of the parameters in the instantiation • JSlider slide = new JSlider(JSlider.VERTICAL, 0, 100, 50); // initial value is 50 • To use a JSlider, you need to assign the JSlider a listener (just like you did with a JButton and other GUI components) • the listener needs to implement ChangeListener, so our class’ definition that contains a JSlider will look like this: • public static class JSliderExample extends JPanel implements ChangeListener • To implement a ChangeListener, you need to implement the method stateChanged, which will receive a ChangeEvent • ChangeEvent has a method getValue( ) which will return the current position of the JSlider
JSlider Example public static class SliderPanel extends JPanel implements ChangeListener { private JSlider redSlider, greenSlider, blueSlider; private int red, green, blue; public SliderPanel() { red = green = blue = 0; redSlider = new JSlider(0, 255, 0); greenSlider = new JSlider(0, 255, 0); blueSlider = new JSlider(0, 255, 0); redSlider.addChangeListener(this); greenSlider.addChangeListener(this); blueSlider.addChangeListener(this); JPanel sliderPanel = new JPanel(new GridLayout(3, 1)); sliderPanel.add(redSlider); sliderPanel.add(greenSlider); sliderPanel.add(blueSlider); add(sliderPanel); // Add the panels to the main panel. }
public void stateChanged(ChangeEvent e) { if(e.getSource()==redSlider) red = redSlider.getValue(); else if(e.getSource()==greenSlider) green = greenSlider.getValue(); else if(e.getSource()==blueSlider) blue = blueSlider.getValue(); repaint(); } public void paintComponent(Graphics g) { super.paintComponent(g); g.setColor(new Color(red, green, blue)); g.fillRect(0, 0, getWidth(), getHeight()); } Continued Notice that we use e.getSource( ) to udentify the source of the Change Event (which JSlider was used?)
JSpinners • A JSpinner is used to control a numeric selection • it contains a textfield that has a number, and two arrows to increase or decrease the number • the user can select a value by clicking the arrows • To create a JSpinner, you have to do two things • SpinnerNumberModel mod = new SpinnerNumberModel(init, min, max, step); • JSpinner spin = new JSpinner(mod); • the Model is needed to first define the range of values for the spinner • init is the initial value, min is the smallest value in the range, max is the largest value in the range, and step is the number of values that the value goes up or down by with every arrow press • For instance, we might use 3 JSpinners to allow the user to change the color instead of (or addition to) the JSliders • in which case, we might define 3 JSpinners as: • SpinnerNumberModel mod = new SpinnerNumberModel(0, 0, 255, 1); • JSpinner redSpinner = new JSpinner(mod); • JSpinner greenSpinner = new JSpinner(mod); • JSpinner blueSpinner = new JSpinner(mod);
More on JSpinners • The JSpinner will also use a ChangeListener like the JSlider which means that you must add implements ChangeListener to the class, add the listener to each JSpinner, and implement a stateChanged event • the ChangeEvent passed to the stateChanged method will include both a value and the source, just like the JSlider • You can also create spinners that show lists of strings:String[] classes = {“Freshman”, “Sophmore”, “Junior”, “Senior”, “Graduate”}; • SpinnerModel model = new SpinnerListModel(classes); • JSpinner spinner = new JSpinner(model); • Notice in this case, the model is a List model, not a number model • notice that you do not provide an initial value with the SpinnerListModel, instead • To get the value from a Spinner, you have to be careful because spinner.getValue( ) returns an Object, so if the values are numbers, use: x = Integer.parseInt(“” + spinner.getValue( ));
Lists • There are three GUI components to create lists • JList – a list of items that the user can select in any combination (0 or more) • JComboBox – a list of items available through a drop box, the user selects exactly one item • JMenu – same as the JComboBox except that the menu is attached to the title bar • We will only look at JComboBoxes as they are the easiest • first, you must set up the list of values that will appear in the box • this is done by making an array of Strings • now create the JComboBox by using the array to instantiate it • now you use various JComboBox methods to • determine what item(s) has(have) been selected (what String) • determine what position(s) was(were) selected • change the selection(s)
JComboBox Example • Here we have code that creates a JFrame that consists of a JComboBox and a JLabel • when an item is selected in the JComboBox, the item selected is output in the JLabel public void itemStateChanged(ItemEvent e) { if(jcb.getSelectedIndex( )!=0) lab.setText("Selection: " + (String)jcb.getSelectedItem( )); else lab.setText("Selection:"); } private JComboBox jcb; private JLabel lab; public ListExample() { String[ ] list = {“Select an Item”, “ ”, …, “”}; jcb = new JComboBox(list); lab = new JLabel("Selection: "); jcb.addItemListener(this); JPanel panel = new JPanel(new GridLayout(1, 2)); panel.add(jcb); panel.add(lab); add(panel); } Notice the extra space here, why do you suppose it is needed? getSelectedItem( ) does not return a String, but instead returns an Object, since the items are Strings, we have to cast it as a String before using it in the setText operation