Download
1 / 76
760 likes | 844 Views
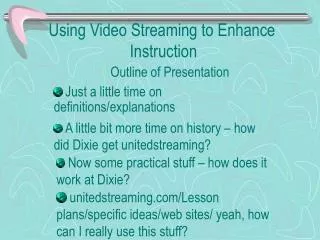
Presenters Anne Diekema Sheri Haderlie Heather Leary Cheryl Walters. Tools for Using and Organizing Online Resources to Enhance Reference and Instruction. The Power of Primary Sources. Digital library – the raw materials of history Accessible for all levels

E N D
Presenters Anne Diekema Sheri Haderlie Heather Leary Cheryl Walters Tools for Using and Organizing Online Resources to Enhance Reference and Instruction
The Power of Primary Sources • Digital library – the raw materials of history • Accessible for all levels • Support high level/critical thinking
Create and Share • Library of Congress (LOC) grant • As you participate today, think of applications in your own situation • General idea of implementation • Index card • By end of THIS session • $50.00 VISA card
Wiki • Tools for using and organizing online resources + .wikispaces.com • http://toolsforusingandorganizingonlineresources.wikispaces.com • Links to digital libraries and repositories • Links to tools and handouts
Annotated Resource Set (ARS) • A simple tool created by Library of Congress • Just need basic computer skills to use • Original purpose: to save and organize primary digital resources for use in teaching • Library uses: • Keep track of book purchases • Save images, videos for Library Guides & Presentations • Save websites and ebookson a given topic • Save any web resources for any purpose
Annotated Resource Set 1 A MSWord file template with three sections 2 3
Example of a filled-in ARSSection 2: The Saved Resources & Links Title Image Link
Example of a filled-in ARSSection 3: Curriculum standards, learning objectives…
How to use an ARS • Get the blank ARS template: http://toolsforusingandorganizingonlineresources.wikispaces.com/Tools • Describe the topic & contents of ARS on its first page • Find a digital resource on the Web • Copy and paste an image of resource and its URL into middle section of ARS • Repeat steps 3 and 4 as needed • Use last page of ARS to note corresponding curriculum standards, learning objectives, etc. • Save
Organize your ARS files for easy reference later… Set up a folder called Resource Sets to hold all your ARS files Name each ARS file something short, but descriptive
What is a fishbone chart? • Cause & Effect diagram, Ishikawa diagram, fishbone pattern • Items organized on bones or branches • Useful for organizing things by time or topic • Allows various media to be inserted or hyperlinked • Good visual to present topic and related primary sources
Where to start? • Download free mapping software from http://www.xmind.net
Getting started • Start Xmind • A new project diagram appears • Go to the top menu • Click view => properties • A menu should appear on the right hand side • Select structures to find the Fishbone structure
Creating topics • While fish head is highlighted • Press “tab” or “enter” key to create main topics
Creating sub-topics • When topic is highlighted • Press “tab” key to create sub topics
Naming topics • Double click or highlight and click on topics to enter topic names
Adding primary sources • Establish organization of your lesson • Create topics and subtopics • Find online primary sources • Sound files • Letters • Images • Etc. • Save them to your hard drive OR • Add hyperlinks to your chart
Frank Clarke • As a lover of nature and nature’s animals I do not hunt. I have sworn eternal veangence[sic] on bears and it shall be mine. • Letters • Photo • Sound file
Inserting images • Highlight topic • Click on insert on menu bar • Select image • Locate image on hard drive
Adding hyperlinks • Highlight topic • PC: Right click topic; Mac: control click topic • Select hyperlink from the menu • For Web link: Paste URL in the box • For File link: Add file path • Click OK
Adding files • Use hyperlink feature to link directly to .pdf or .mp3 files that you saved to your hard drive
Adding notes • Highlight topic • Right click or control click topic • Select “notes”, and type in your text
Sprucing it up • Add labels • Highlight topic; right click topic; select label; type text • Add markers • Click “view” in top menu bar • Select “markers” • Marker options will now appear on the right
Sprucing it up • If you like, select a different style • Click view in top menu • Select styles • Style options will appear at the bottom of the screen
Sharing your Fishbone chart • Select export from file menu • You can save the map as • html, text, or an image (bmp, jpeg, gif, png) • You can also save the file as .xmind file • Upload to Xmind website • Saving it as a web page allows you to select what to save (select everything) • Only way to maintain all links
Best way to share Fishbone chart • Download the XMIND software to your laptop • Save all your files to hard drive • Create your chart • Present your chart using your laptop
Play around with Xmind • You received basic instruction • By playing with Xmind you’ll discover more possibilities (e.g. drilling down within a topic) • Think of other ways to organize your information • Create time line with fishbone chart • Create cross links between concepts in chart • Explore other charts (e.g. concept maps)
Timeline at http://dipity.com • Free software to create timelines and share them online
http://www.dipity.com • Go to dipity.com • Click the green sign-up bottom • Create a free user account • Log in with your new user name
Starting your timeline • Click the My Topics tab at the top • Click Add New Topic • A window will pop up where you provide information about your timeline
Getting to work • Create a timeline by adding events • Specify title, date, description • Add a link to an image or video clip • Supply the location of the event
Apollo Space Program • Add event to time line • JFK’s speech to congress
Sharing your timeline • Timelines are saved online • Embedding timeline into your wiki • Click embed widget on the top right • Follow wiki instructions to embed html code • Different timeline views • Timeline, Flipbook, List, Map • Work collaboratively on timeline • Topic settings, permissions