Download
1 / 11
110 likes | 305 Views
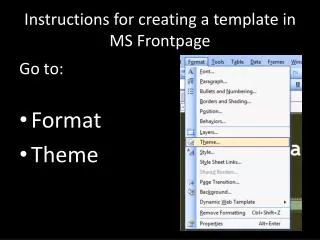
Creating a normal dot template in word. This will show you how to create a master template in word. The first thing you need to do is open up the word programme. at the top of your screen. Now that word is open. Next, click on the tab called.

E N D
This will show you how to create a master template in word. The first thing you need to do is open up the word programme.
at the top of your screen. Now that word is open. Next, click on the tab called Now what you will see in the drop down is a few options. What you need to click on next is the button.
This will open up a new window with your previous files. What you have to do next is click , this is located at the top left. Once this has opened you will need to click on the Templates folder.
Now open the document that is called What you will notice now is that at the top of your word page top header is You can now start making alterations to your master template so that when you open word it will always open like this. For example having the font style you like, page width and margins. You can also add header and footer.
Now I'm going to show you how to make the alterations. Here's how to change your spacing and paragraphs. Make sure you have the tab open and click on the arrow symbol. This will open the next window. Here you can set the default paragraph style and the line spacing to what indent is necessary, the line spacing you require and whether or not you want to select the line spacing.
Make sure once you have finished your alteration's you click on the button. Now this box will appear and you want to highlight . “All documents based on the Normal template” this make this change for all your programmes you open in word. Saving lots of time trying to get the same layout every time. The same every time.
Now to change your font click on the little arrow to the right of the word font. Coincidentally use the tab to see alternatives. You can set other font parameters from here. Always click “Set As default.” Here you can set the font criteria, e.g. your company font, you can also select the colour of font and so on. MAKE SURE you click on Set As Default.
Next, let’s set the page parameters i.e. Paper size, print width, margins Chose Page Layout tab at the top the screen. Click on the symbol by to the right of page setup. Here you can set the paper size, what printer criteria to use and how to print the document. Lastly change the size of the header and footer. Remember ALWAYS to CLICK Set As default.
New Forest Back Office From now on every time you open a document in word wherever you log on you will always have this template with the right font, margin, line and paragraph spacing as well as font styles and layout. Saving You Time And Money
Supplied free for your convenience NFBO Contact us : 02380868391 02380866012