Download
1 / 17
170 likes | 324 Views
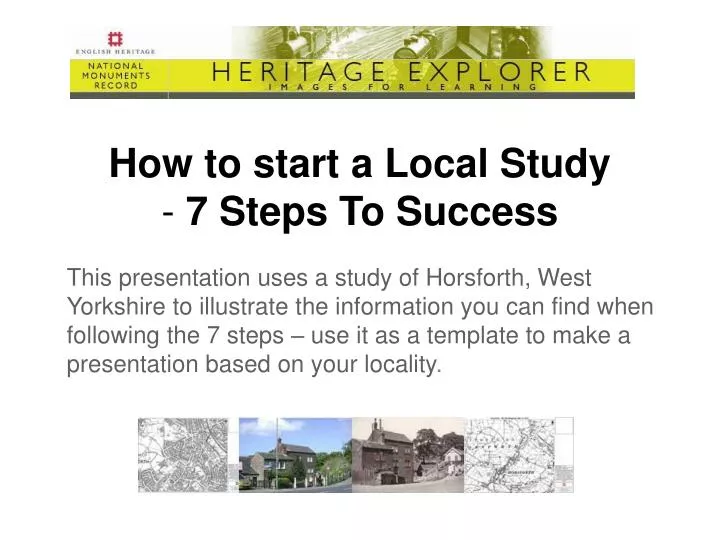
How to start a Local Study - 7 Steps To Success. This presentation uses a study of Horsforth, West Yorkshire to illustrate the information you can find when following the 7 steps – use it as a template to make a presentation based on your locality.

E N D
How to start a Local Study- 7 Steps To Success This presentation uses a study of Horsforth, West Yorkshire to illustrate the information you can find when following the 7 steps – use it as a template to make a presentation based on your locality.
Step 1 – What do we already know about our locality?Find your school on a modern map or aerial view, ask pupils and local people what they already know about the history of their area. You could also use a local websiteWebsites such as http://maps.live.com/ show street names on an aerial view No local knowledge? Street names can be a great starting point Church Road – what’s the church? Hall Lane – where was the hall? Cripple Syke – what is the story?
Step 1 – What do we already know about our locality?Look at a modern Ordnance Survey map http://www.ordnancesurvey.co.uk/oswebsite/ for more detailed information, for example they label all schools. They can also be compared to historical OS maps. • Use OS maps to; • Build up a picture of your area today • Count the schools, places of worship etc • Look for clues to the past, questions to follow up
Step 2 – What can we find from an initial walk around the area?Plan and walk around a route [either alone, with a willing local historian or with pupils] Use information and questions from your map to shape your route.Take along any photographs you already have and identify the places in them. We chose to start from the school, go along the main street – Town Street - as this would be familiar to pupils – up to the station, past the mills that we had picked out on the map and wanted to investigate. main street old mills Use the modern map to plan a route
Step 2 – What can we find from an initial walk around the area?Arm yourself/your pupils with a digital camera. Look for interesting looking buildings; any dates, foundation stones, plaques etc; different architectural styles; local architectural quirks. NB you don’t at this stage need to know the names for architectural styles and features. Just record things that look interesting and note differences Information from a plaque The Reverend Samuel Marsden 1764-1838 Christian missionary and pioneer of the wool producing industry in Australia and New Zealand served as an apprentice in a smithy near this place Online research showed him to have been a very controversial figure in the early history of the convict colony in Australia. A local architectural quirk Shop doorways set flat across corners of buildings with stone cut away above
Step 2 – What can we find from an initial walk around the area? Take photographs and make short notes about features, patterns etcIf your project is small then you could end it here asking pupils to answer the question ‘What makes my locality special?’ We found several unusual doorways Station House 2007 We had an old photograph of the station master’s house and took a modern view from the same place Houses in Town Street 2007 We noticed that several houses had round windows a bit like portholes
Step 3 – What did this area look like in the past?Compare old and new and look for change and continuity. Historic ordnance survey maps from http://magazine.ordnancesurvey.co.uk/magazine/tscontent/general/historicalmappingfaq.html can be compared with your modern map.Ask pupils to play ‘Spot the Difference’ – they could write the differences on post its and stick them to the map 2007A sprawling commuter village with large housing estatesand a railway station 1843A small rural village strung out along the main street with a railway station
Step 3 – What did this area look like in the past?Aerial photographs are also useful source for showing change and continuity and can be ordered from English Heritage http://www.english-heritage.org.uk/server/show/nav.20091 Identify a shape to orientate yourself Use aerial photos alongside maps Can you find out when your school was built? 1948 1970
Step 4 – Which buildings tell me the most about the history of the locality?Look for old photographs of the buildings you have chosen; ask locally; try your local archives, library, or museum; find a local website or search a national websites such as www.english-heritage.org.uk/viewfinderFind the locations today and take a modern view from the same place – take care – the original photographer may have been standing in the middle of a road! Station House in the 1950s The old smithy in the 1950s Town street in the 1950s The old workhouse in the 1950s
Step 4 – Which buildings tell me the most about the history of the locality?Look for change and continuity particularly changes in use that reflect wider changes in the character of the locality and society in general eg heavy industry to retail units or offices. Consider conservation issues. Have old buildings been preserved or demolished? If preserved and re-used have the buildings been restored sympathetically and kept their original windows, chimneys etc? The old smithy in 2007 The old smithy in the 1950s Station House in the 1950s Station House in 2007
Step 5 What were the buildings used for?Having chosen and photographed some of your area’s most interesting buildings you can find out more about them. Creating a series of questions to answer is a good way to structure this. The former Mechanic’s Institute is now the library Questions • When was it built? • What was a mechanics institution and why did Horsforth have one? • When did it become the library? See the next slide for where to look for answers!
Step 5 What were the buildings used for?The former Mechanic’s Institute is now the library – how to find the answers • When was it built? • Did you spot the plaque above the door? The roman numerals Mdccclxxxi tell us it was built in 1881 • What was a mechanics institution and why did Horsforth have one? • It was a building where skilled workmen could learn more about their craft by attending lectures and using the reading room. • Information taken from http://www.imagesofengland.org.uk/searchtips/default.aspx click on building types • Use old maps and trade directories [see next slide] to identify local crafts • When did it become the library? • Check inside the building for aplaque, ask in the library or local archives.
Step 6 Who lived and worked here?Use a trade directory to find more about your locality in the 19th and early 20th centuries. Trade directories are early forms of ‘Yellow Pages’giving information about places along with details of people who lived and worked thereGo tohttp://www.historicaldirectories.org/hd/index.asp and search for your locality – print off relevant pages as pdfs
Step 6 Who lived and worked here?Use a trade directory to find more about your locality in the 19th and early 20th centuries.Particularly useful is information aboutoccupations, land use, size of population and notable local people. Kelly’s Directory of the West Riding of Yorkshire 1881
Step 6 Who lived and worked here?Use a trade directory to find a list of people who lived and worked in your locality Extracts from Kelly’s Directory of the West Riding of Yorkshire 1881 • Use information from the trade directory to integrate ICT skills • Make a database of the occupations listed • Find out what were the most common jobs in 1881 and compare to today • What does the range of jobs tell you about Horsforth in 1881?
Step 6 – Who lived and worked here?Choose someone from the trade directory and look them up in the census – census information also offers opportunities for Maths and ICT work eg comparing average family sizes • 1881 Kelly’s Trade directory • 1891 Censusfromwww.ancestry.com or obtain copies from local archives or local history centre Station Masters House 1891 Name position age occupation where born John A Gott Head 43 Railway Master Horsforth Emily L Gott Wife 42 Otley Minnie G Gott Dau 17 Horsforth Herbert H Gott Son 15 Railway Booking Clerk Horsforth Arnold C Gott Son 13 Horsforth Emily M Gott Dau 8 Horsforth Clarence R Gott Son 7 Horsforth Mary A Pickard Sister-in-law 47 Otley
Step 7- What was this place all about, what makes it special?Identify a focus question for the next stage of the study Extract from White’s Directory of Leeds 1870 Enquiry Question Why did ‘gentlemen connected with trade in Leeds’ choose to build their villas in Horsforth? This question gives focus to a study of Horsforth and an opportunity to place Horsforth in the wider context of the industrial revolution and consequent movement of working people into towns and the middle classes away from them. Beech House, Scotland Road, Horsforth, built 1800 for William Craven a papermaker