Download

1 / 12
160 likes | 334 Views
Welcome to Audacity. What it is used for…. Lets get started!. Recording Audio Editing Audio Creating NEW Audio And a WHOLE lot more…. Install Audacity to your computer. You can Google search it, or you can go to our website (www.madisonvilleavclass.weebly.com) Click install.

E N D
Welcome to Audacity What it is used for… Lets get started! • Recording Audio • Editing Audio • Creating NEW Audio • And a WHOLE lot more…
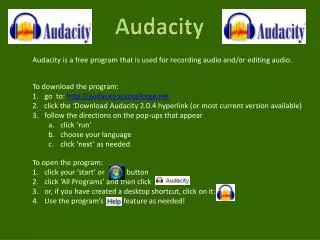
Install Audacity to your computer • You can Google search it, or you can go to our website (www.madisonvilleavclass.weebly.com) • Click install. • Follow the set-up guide. • It takes all of a minute or so and that’s it!
How to use it… • First, open the program. • Let’s take a look at some of the most basic features and how to navigate around the program…
This is the top of the screen in the program. Everything you need should be easily within reach. Let’s first learn how to open an existing audio file. Open up the file “bart.wav” from your computer. If it isn’t already on your computer, go to our website and download it to your desktop. Go to “File” and select “Import > Audio. Select the file “bart.wav” from your desktop. Your screen should now look like this…
You may have seen another box warning you about this type of file… ignore it and hit ok. (it’s fine, trust me) Now you have successfully imported an audio file into the program! Let’s learn how to navigate around now!
Take a look at what kind of cursor symbol you have… it should look like this ( I ). This cursor will allow you to highlight certain sections or the track for editing purposes. Your cursor options are shown in the middle of the toolbar on the top. If we wanted to physically move the audio so it started at a different time, we would select the cursor that looks like this… Now lets try and move the entire file around in time. Notice you have a timeline (displayed in seconds) right below your toolbars. Highlight the entire track by using the ( I ) cursor.
Now, select the cursor and hold and drag the entire file so it begins at 1.0 seconds… Your screen should now look like this.
Cool! Now let’s try some other stuff and have some fun with this! • Go back to your default cursor ( I ). • Playback the track and listen for when the teacher says the words “make up test.” • Now, place your cursor where you think that is in the track. • Look on the right hand side of your toolbar for the ZOOM button. Zoom in a few times until it looks something like this…
If you didn’t get the EXACT spot where the teacher starts the words “make up” adjust your cursor. This will take some practice, and zooming/un zooming a few times to get it just right. Now once you have found that spot, highlight only the words “make up.” You can check to see if you got all of it by hitting the space bar to play only the highlighted area.
Next, select the scissor tool (which happens to be conveniently RIGHT above our highlighted section!) • This will “cut” the selected portion out of the file. Now, the teacher says “ready for your TEST” instead of “make up test” • Now… let’s have some real fun! • Select the portion where Bart screams “Oooooh! my ovaries!” • When it’s highlighted, move your mouse to the “Effects” menu at the top of the screen. • Select the effect “Fade In” It should look like this now…
Now play around and explore what else you can do with this program!