Download
1 / 40
710 likes | 1.4k Views
PLANT PROPAGATION. James City County/Williamsburg Master Gardeners MG Training Class February 6, 2012. PLANT PROPAGATION. Why do we propagate plants?. 1. To increase the number of plants. 2. To perpetuate species or individual plant. What are the two ways we propagate plants?.

E N D
PLANT PROPAGATION James City County/WilliamsburgMaster Gardeners MG Training Class February 6, 2012
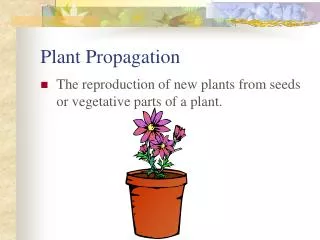
PLANT PROPAGATION Why do we propagate plants? 1. To increase the number of plants 2. To perpetuate species or individual plant What are the two ways we propagate plants? 1. By seed - Sexual 2. Vegetatively - Asexual Pollen + Egg (Floral) Uses part of plant New combination of genes Identical to original plant No exchange of genetic material Cheaper, quicker New varieties, hybrid vigor Easier, faster Perpetuate cultivars
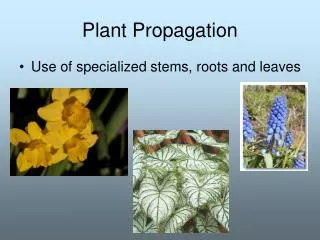
ASEXUAL OR VEGETATIVE PROPAGATION CUTTINGS Stem Leaf Root LAYERING Soil Air DIVISION & SEPARATION Stolens & Runners Offsets Bulbs & Corms Crown Divisions GRAFTING & BUDDING TISSUE CULTURE
STEM CUTTINGS Tip Medial Cane Single Eye Double Eye Heel
LEAF CUTTINGS Split Vein Leaf Section Whole Leaf w/ Petiole w/o Petiole ROOT CUTTINGS Plants with Small Roots Plants with Large Roots
LAYERING Tip Simple Compound Mound
DIVISION AND SEPARATION STOLENS & RUNNERS 0FFSETS BULBS CORMS CROWN DIVISION
GRAFTING AND BUDDING TISSUE CULTURE Joining of plant parts so they will grow as one plant Asceptically growing plant tissue such as cells, meristems, shoot tips, embryos, root or stem and leaf sections
SEXUAL OR SEED PROPAGATION Union of the pollen (male) with the egg (female) to produce a seed A plant in a box with its lunch A seed is made up of three parts: young plant before emerging from seed Embryo seed’s food reserve Endosperm Seed coat protects the seed A mature seed, put in a favorable environment, will germinate, or begin active growth
SEED ANATOMY 1. 2 cotyledons 2. microphyle(hole) 3. hilium (scar) 4. seed coat 6. plumule 7. radicle
ENVIRONMENTAL FACTORSTHAT AFFECT GERMINATION MOISTURE HEAT OXYGEN LIGHT
SEED STARTING REQUIREMENTS Soil Temperature Moisture Light Air Use clean seed starting mix w/o fertilizer Do NOT use garden soil Germination temperature refers to soil temperature as well as air temperature Seeds need constant moisture and soil that is not overly wet Some seeds need light to germinate All seeds need light upon germination Respiration rate increases during seed germination and as seedling grows
GROWING SEEDS INDOORS MATERIALS: CONTAINERS: pots, flats or containers. Clean & disinfect used pots. 1 part bleach to 10 parts water. SOIL: Bagged soilless seed starting mix (Potting soil) PLANT LABELS: Plastic INDELIBLE MARKER: Waterproof STIFF CLEAR PLASTIC OR PLASTIC BAGS: Greenhouse-like atmosphere for germination WATER: Use tepid water only to maintain soil temperature for seeding and until seedlings develop true leaves LIGHT: Florescent or high density plant light TIMER: 16 - 18 hours of light Heating Mat with Thermostat
Seed Starting Materials 1. seeder with rotating wheel 2. labels 3. dibbler 4. fine-point black waterproof marker 5. mini-transplanter 6. moisture meter 7. plant snips 8. seeder (tap or shake) 9. seeder (suction) 10. timer 11. plant light meter 12. indoor/outdoor min/max thermometer 13. magnifying glass with light 14. soil scoop 15. spray bottle 16 small plastic flats 17. small bulldog clips
STARTING YOUR SEEDS Prepare A Seed Starting Worksheet • Name of seed (species, cultivar) • Source of seed (Seed Company) • Catalog number • Seeds per packet and/or number of seeds sown • Weeks to last frost date or planting out date • Days for germination • Cover seed? • Date seeded • Date transplanted • Notes: Actual germination days, % Germination, Seed requirements, Crop failure, etc. TIME YOUR PLANTINGS RELATIVE TO LAST FROST DATE OR PLANTING OUT DATE USING INFORMATION ON CHARTS AND SEED PACKS
Seed Packet Information • Common, botanical and cultivar name • Maturity date in days. • Number of seeds in the package. • Date packaged. • Days to germinate. • Minimum germination percentage. • Cultural information including the following: • Germination temperature. • Planting depth. • Light required for germination. • Seed pretreatment: • Soaking • Scarification • Statification
STARTING YOUR SEEDS • Planting Your Seeds • Preparing planting medium • Filling containers • Sowing seeds following each seeds requirements • Covering seeds • Watering seeds • Providing humid environment • Providing proper soil temperature • Providing proper light
Preparing Planting Medium Loosen potting soil Dampen potting soil
Filling Containers With Soil Use pre-dampened potting mix Don't pack the potting mix into the container Fill to about 1/4” from the lip of the container Gently firm and level with a spoon or a small board.
Sowing Seeds in Containers Recheck seed requirements: pretreatment, light, sowing depth Sprinkle small seeds lightly on top of the potting mix. Larger seeds can be counted out and planted individually. Plant a few extras but do not overseed.
Covering Your Seeds Recheck seed covering requirements Many seeds need light for germination Some seeds need a light cover. Some seeds need 2 to 3 times their diameter cover Cover the seeds with the dampened potting mix and then gently firm again.
Watering Newly Planted Seeds Spray a little additional tepid water over the newly planted seed Moistens top layer of mix Ensures good contact between the seed the mix Spray bottle gives best control
Providing Humid Environment Create a Greenhouse Effect Contain both heat and moisture Plastic bags w/tie or ziploc bags Seed trays with clear plastic covers
SOIL TEMPERATURE REQUIREMENTS Warm, draft free spot Soil temperature between 70 and 80 degrees F Heating mats & Thermostats Tops of water heaters & refrigerators
LIGHT REQUIREMENTS Seeds and seedlings require 16-18 hours/day of light Two 48” 40watt fluorescent tubes placed 1” from soil of plants provide the necessary 1000 footcandles. Indirect window light yield ¼ as much. Automatic timer Plant lights should be 1” above the seeds or plants. Plants touching fluorescent lights will not be harmed.
MONITOR SEEDS DAILY • HUMIDITY moisture on bag or glass • LIGHT CONDITIONS 16-18 hours,1” above soil or seedlings • HEAT CONDITIONS soil temperature - 70o, 75o, 80o room temperature - ambient • FOR GERMINATION remove cover or bag as soon as you see germination
EMERGING SEEDLINGS Radical, hypocotyl, cotyledons Remove seed container from greenhouse environment Monitor: LIGHT – 16-18 hours, 1” above seedlings MOISTURE – use tepid water to bottom water if needed TEMPERATURE -air 55o – soil >70o for good root development FERTILIZATION - none needed at this point
GROWING TO TRANSPLANT SIZE True leaves, photosynthesis Fertilizing Thinning Monitor: • LIGHT – 16-18 hours, 1” above seedlings • WATERING AND FERTILIZING – bottom water with tepid dilute fertilizer solution • TEMPERATURE – warm soil, cool air • AIR CIRCULATION – disease, strength
TRANSPLANTING SEEDLINGS True leaves Seedlings are transplanted with soil up to their cotyledons Bottom water to settle seedlings in
CARING FOR TRANSPLANTS • LIGHT – 16-18 hours, fluorescent lights 2” or less above seedlings • WATERING AND FERTILIZING – only bottom water with a dilute fertilizer solution • TEMPERATURE – no need for heating mats and maintain air temperatures of 55o for sturdy compact plants • AIR CIRCULATION – use of a fan to control fungus
HARDENING OFF TRANSPLANTS Acclimating seedlings from indoor to outdoor conditions Takes 2-3 weeks Sunlight 3 hours all day Lath strips Partial shade Temperature Above 45 degrees Cover Bring indoors Wind
PREGERMINATION Germinating seeds before sowing
WHY START PLANTS FROM SEED ? • Starting plants from seed is less expensive • Unavailability of the plants you want locally: • Quantities • Varieties • Grow plant that are higher quality for planting • Having plants suitable for you planting schedule • Satisfaction of growing your own plants from seed • Plant sales
Jerry Babski • burgflem@yahoo.com • Deb Secrist • gardenhoe1@me.com