Download
1 / 25
290 likes | 541 Views
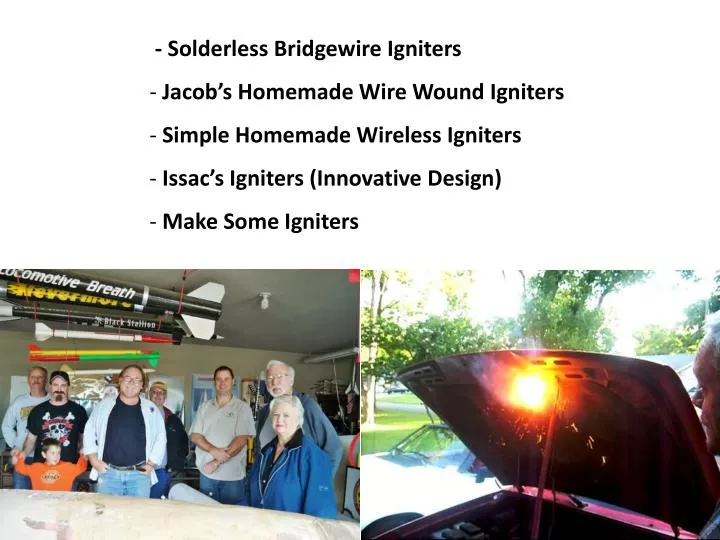
- Solderless Bridgewire Igniters Jacob’s Homemade Wire Wound Igniters Simple Homemade Wireless Igniters Issac’s Igniters (Innovative Design) Make Some Igniters. Rocketry Online Info Central Solderless Igniters http://www.info-central.org/?article=228.

E N D
- SolderlessBridgewire Igniters • Jacob’s Homemade Wire Wound Igniters • Simple Homemade Wireless Igniters • Issac’s Igniters (Innovative Design) • Make Some Igniters
Rocketry Online Info Central SolderlessIgniters http://www.info-central.org/?article=228
Get a wire wrap tool. Radio Shack has cheap ones. Electronics suppliers have better quality ones. Either will work. You will also need a small pair of needle nose pliers and a small pair of wire cutters. Cut your nichrome about 3" long.
Thread the nichrome through the side hole in the wire-wrap tool with about 1/4" sticking out the end. Place the center hole of the wire-wrap tool over the shorter lead conductor as if that lead were a wire-wrap post on a pc board. Hold the 1/4" nichrome (sticking out the end of the tool) against the igniter leads and give the wire-wrap tool about 8-10 turns.
Carefully pull the wire wrap tool off the lead wire. You should now have a very neatly wire-wrapped piece of nichrome secured to the copper lead.
Either trim off the extra copper wire beyond the end of the nichrome, or bend it over in a U against the nichrome coil. (I prefer to bend it and crimp it against the nichrome) Trim away the 1/4" of nichrome you held against the leads in the previous step.
Spiral the nichrome up the longer lead to the tip the required number of turns for your application (I prefer 4-5). You should have about ~1" of nichrome left.
Thread this short length back up the side hole in the wire wrap tool. Thread it in from the end of the tool, not the side slot as you did the first time. Carefully place the copper lead wire in the "post" hole of the wrap tool, being careful not to pull the nichrome out of the "wrap" hole. Be careful, it's easy to get both wires in the same hole on the tool--that won't work and will probably break your remaining nichrome off too short!
Give the wire-wrap tool 6-7 more turns until all the remaining nichrome is wrapped around the end conductor. Trim or bend as in the first one.
Voila! A solderless lead. Check your continuity & resistance to make certain that you have not changed the nominal resistance of the lead compared to your soldered leads. It actually takes longer to describe this process than it does to do it. With a little practice, you should be able to produce them as fast or faster than by the solder method without all the hassle and mess of setting up the solder station, etc.
Jacobs’ Rocketry Homemade Wire-Wound Igniters http://www.jacobsrocketry.com/aer/homemade_wire-wound_igniters.htm#mods_for_large_motors
The formula is six ping pong and eight ounces of acetone. Or three ping pong balls and four ounces of acetone, etc. Just put the acetone in a glass jar and cut up the ping pong balls into small enough pieces so when you put them in the acetone in the jar, the pieces are covered.
You can use any grade of commercial black powder and grind it in a mortar and pestle. 4F shown above left in can, lower left before grinding, lower right after grinding.
Lamp Cord Shooters Wire Lead Wire 4 Conductor Phone Wire
Bridge Wire If you want the cheapest and most readily available igniter wire for use with a 12V car battery, you can use strands from stranded lamp cord such as the 18 gage lamp cord shown above with the shooters wire. Cut the cord into 3" lengths and strip the insulation off. The best way is to strip about 3/4" off both ends and then bull a few strands out. Then you can pull the rest out. The wire in the picture has 33 strands and since it is two-conductor, one piece provides 66 igniter wires – way more than enough igniter wires for one batch. It measures out to be about 39 gage.
Left: Spread the two leads apart. Lay the igniter wire across the shorter lead wire as shown. Right: Grasp the igniter wire and lead wire between your thumb and index finger as shown with your left hand. Left: With your other hand, wrap three or four wraps of igniter wire around the bare end of the short wire. Right: Here is where you need a third hand. I have had this for years but I assume they are still made. You could probably just screw an alligator clip to a piece of upright 2X4 and it would work fine, too.
There is no specific ratio. Just put some black powder in the mixing container and add a little NC lacquer until it is slurry consistency and sticks to the igniter wire tip when dipped. You can thin it with more lacquer or thicken it with more black powder. If your lacquer is too thick, you can thin it with more acetone. An eye dropper or hypodermic syringe is good for adding small amounts of acetone.
Once you have the soldering done, you are home free. Coating the igniter with pyrogen is a piece of cake. Just dip the igniter wire into the pyrogen making sure to cover it past the bottom of the shorter lead, pull it out and set it aside to dry. If you need it thicker, just dip it again. You don't want to keep dipping it until you get a huge ball on because when it burns, it will basically explode the ball from the burning on the inside and it may not all ignite. There are other things we can do to make a more robust igniter out of the basic igniter. Here are three head sizes. The left and smallest would be appropriate for the smallest nozzle. At its widest point, it is only 0.075" in diameter. The center one is a more normal size igniter. The one on the right had an extra pyrogen dip and then while still wet, it was rolled in grain powder (granular black powder). This particular one is commercial 4x powder but it could be homemade powder also. The size of the head after dipping is just dependant on how thin the pyrogen mix is and how many times it is dipped.
When you are done with the igniter and ready to put it away, it is a good idea to strip the ends of the leads opposite the pyrogen and twist them together. I strip about 1/2" back. This is to make sure that the igniter cannot be fired accidentally until it is hooked and ready to be used. This is especially a good idea for the low current igniters to prevent static discharges from firing them. It is extremely unlikely this would occur but still shorting the leads like this is a good idea.
My Recipe • FFFFg Gunpowder 6 parts • Powered Aluminum 325 Mesh 2 parts • Ping Pong Ball Nitrocellulose As Req’d • Wire Wound Bridge Igniter • Cat V Cable (22ga) • Bridge Wire • Picture Hanging Wire or • Extension Cable Brass Wire
SIMPLE HOMEMADE BRIDGELESS IGNITORS Using tightly-twisted, solid-copper, 26-gauge wires about 12" to 18" long, strip about 3/16" of the ends. Move the ends parallel and about 1/64" to 1/32" apart. Put a small amount of powdered graphite, used to lube door locks, into a shot glass. Into the graphite, put a drop or two of clear model plane dope or clear nail polish and mix until it's a very thick syrup. Dip all the bared wires into this quickly, as many as you can. (It will dry fast!) Let these dry thoroughly hanging down, preferably overnight. Clean the jigger with acetone. When dry, this first dip should have a resistance of 3 to 7 ohms. For the next coating, you will need potassium perchlorate and powdered aluminum. Powder the "perc" very fine using the back of a spoon and a piece of wood. Mix the perc with half its amount of aluminum using a toothpick in the shot glass. Put drops of dope or nail polish in to form a runny syrup. Dip the igniter ends into it. Shape the ends by rolling them on paper so that they will fit into the rocket motor core. Let dry overnight.