Download
1 / 24
240 likes | 347 Views
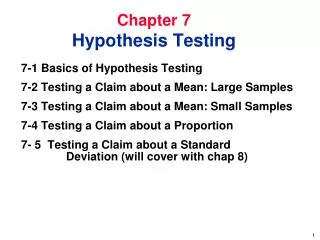
20: Testing. Testing. Generally the rate of error detection is proportional to the number of errors still remaining in the software. Consequently the number of errors presents declines exponentially over time. No. of errors.

E N D
Testing Generally the rate of error detection is proportional to the number of errors still remaining in the software. Consequently the number of errors presents declines exponentially over time. No. of errors Testing often continues until it becomes uneconomic. Hence often bugs remain in software. 0 Time
Testing – cont’d • Purpose – to test that every part of a program works correctly according to the program specification and to engender confidence in the correctness of the program • The task of ensuring that a program does what is expected is called verification. The aim is to verify that a program meets is specification. • The task of showing that the software solves the required problem is called validation. • Objective– to show the presence of errors in a program. A non-trivial program is unlikely to be 100% error free. Testing involves the design of test data, execution of the program with the test data and evaluation of the results obtained.
Techniques • Black box (functional): focuses on the range inputs and outputs of the program ignoring the actual construction of the code. • White box (structural): tests eachand every possible path through software according to the statements and logic of the code. • Reviews or walkthroughs: desk checking, ‘dry run’ • Stepping through code with debugger • Formal methods: program is specified mathematically and proved logically to meet specification – thus verification but not necessarily validation. Small programs comprising a single class are usually tested all at once. Larger programs are tested class by class, called unit testing, and then brought together to test the whole, called integration or system testing.
Interface design When software components or modules are to collaborate to fulfill a task, then the interface between them must be clear and well-defined. Here interface is understood to be that what is known about the class and hence may be relied on by other classes - it does not rely on how a particular class is implemented. If two modules are to be developed independently, possibly simultaneously, the interface must be defined before work can commence. Invariably this amounts to identifying that information that constitutes the class documentation. This clearly refers only to what is to be made public and hence there may be other methods and fields, declared private, which would not be referenced.
Documentation Class documentation usually comprises: • class name • description of the purpose of the class • any version number • author’s name • documentation for each constructor and method The constructor/method documentation includes: • method name • return type • parameter names and types • description of purpose and function of method • description of each parameter • description of the value returned
Understanding code Often a programmer will be tasked to correct or modify some existing code. Understanding another person’s code often proves challenging if it has not been written in a structured way. Understanding will be facilitated if the style used is consistent and adequate annotation has been included. Good style involves providing • Multi-line comment at start to indicate purpose of class together with author and version number • Each method preceded by comment indicating its purpose, parameters and return type • Consistent use of white space and indentation to indicate levels of nested blocks and control structures • Meaningful variable and method names • Additional comments as appropriate to aid interpretation
Manual walkthroughs Now that program compilation and running is performed at the click of a button, manual walkthroughs are rarely used; possibly considered ‘low-tech’. Even so they can prove very useful. Manual walkthroughs involve • Printing out the code of classes being tested • Moving away from the computer • Manually tracing the flow of control through the program and noting the values the variables assume in the process and how they interact with each other This amounts to a pencil and paper simulation of what happens when the program is run. Clearly as the number of lines of code increase, this approach may become unmanageable. Hence it tends to be used for small sections of code; often where the logic involved is quite intricate.
Verbal walkthroughs Again this is usually only feasible at a high level of abstraction or with a small section of code. The object is to find errors in a program in the course of one person explaining the action of the program, class or method to another. This may work in two ways: • The person receiving the explanation may spot an error • In course of giving the explanation, the speaker might realise what he might wish to claim is not in fact valid. The second of these possibilities is the more common and hence well worth attempting even if the audience is unfamiliar with the program components
Print statements This is probably the most common technique used to understand and debug programs. They can be used in most languages and easily introduced with any editor. The technique, however, appears to be becoming obsolete with the facilities offer by most IDE debuggers. Typically additional print statements are introduced into a program to provide the developer with information such as: • which methods have been called • the values of parameter • the order in which methods have been called • the values of local variables and fields at strategic points There are, however, a number of disadvantages that should be borne in mind: • It is not always practical to add print statements to every method of a class; hence only effective if right methods have been covered.
Print statements – cont’d • Too many print statements may lead to information overload. This offer happens when print statement is placed within a loop • Having served their usefulness it proves tedious to remove them • Once removed, there always a chance they may be needed again and they have to be re-inserted. This is overcome by inserting the statements permanently but with their execution governed by the state of some boolean variable. When the boolean variable is set to true the print statements are produced; otherwise they are not.
Test Plan comprises a set of test cases. Each test is identified, the purpose of the test is described, the data to be used is identified and the expected outcome noted. Once tests have been performed the results may be cross-referenced with the expected outcomes. Performing a test without any view of the expected outcome is not testing; simply experimenting! • Test data – needs to be sufficiently representative whilst at the same time being the minimum required to test the program adequately. • Error detection– results at variance with the expected results. Check expected result. If legitimate error, investigate cause, correct and retest program from the beginning of the test plan – referred to asRegression testing.
Black box testing • as do all techniques, requires a precise program specification. • focuses on the functional requirements of the software, i.e. it enables a set of input conditions to be constructed to exercise all functional requirements of the program. • attempts to find the following types of error • incorrect or missing functions • interface errors • errors in data structures • performance errors • initialization and termination errors
Black box test plan Construction of test plan involves: • Identify the inputs and outputs • Decide on all possible ranges of the inputs and outputs • Divide the ranges into suitable subranges – Equivalence partitioning • Describe each subrange and show the value of the input variable(s) immediately below and above the subrange boundary values. – Boundary value analysis • Assemble test cases by structuring combinations of inputs to produce required outputs at boundary points
Example Suppose a program must accept the price of an orange, the number of oranges requested and to generate the total cost. • The price of an orange will be less than £1.00 • The number of oranges will be in the range 1 to 20 inclusive. • A suitable error message should be displayed if either input entry in invalid.
Possible user interface Input:Enter the price of an orange: 0.30 Enter the number of oranges: 5 Output: The cost of 5 oranges at £0.30 eachis 1.50 Error messages: Warning: The price input is not in the range 0.1 to 0.99. Please click continueand re-enter. Warning: Number of requested oranges is outside allowed range. Please click continue and re-enter. Run
Test planning Identify the inputs and outputs Number orangesCost Price Error Message Decide on all possible ranges of the inputs and outputs The type and limits of the values input and output (as per specification or assumed) are: Number : Minimum integer Maximum integer 1 20 Price: Minimum float Maximum float 0.01 0.99 Cost : Minimum Maximum 0.01 19.80Error : message - number error, price error
E.g. cont’d Divide the ranges into significant subranges Number :| | | | | |IntMin 0 1 20 21 IntMax A B C DPrice: | | | | | |FloatMin 0.00 0.01 0.99 1.00 FloatMax E F G HCost | | | | 0.01 0.20 0.99 19.80 I J K LError : | |message number error price error M N
E.g. cont’d Describe each subrange and identify value of variable about the subrange limits. The test cases identified in the previous sub range diagrams are :
E.g. cont’d Produce test plan. The test plan must cover all cases identified in step 4.
Test Harness To test the method it is necessary to assemble test cases that represent possible inputs and the expected outcomes. The test harness is code that supplies the different test cases and checks that the output is as expected and then displays the result. E.g. To test billTotal requires a function testBill: Input parameters: price (Double), quantity (Integer), total (Double) Output: Boolean Test: Further the test function needs to setup the context in order to be able to perform the tests. Function testBill(ByVal price As Double, ByVal quantity As Integer, _ ByVal total As Double) As Boolean Dim aBill As Bill = New Bill(price, quantity) Return aBill.billTotal = total End Function
Test Harness - implementation Dim testCases(,) As Double = {{0, 0, -9999}, ….. , {0, 21, -9999}} Dim testComb() As String = {"AEMN", "AFM", "AGM", "AHMN", "BEN", _ "BFI", "BGK", "BHN", "CEN", "CFJ", "CGL", "CHN", "DEMN"} For i = 0 To 12 testId = testComb(i) If testBill(testCases(i, 0), testCases(i, 1), testCases(i, 2)) Then testId += vbTab & " Pass" Else testId += vbTab & " Fail " noOfFails += 1 End If lstResults.Items.Add("Test " & i & vbTab & testId & vbCrLf) Next lstResults.Items.Add("There were " & noOfFails & " failed tests." & vbCrLf) Run