Download
1 / 56
700 likes | 1.13k Views
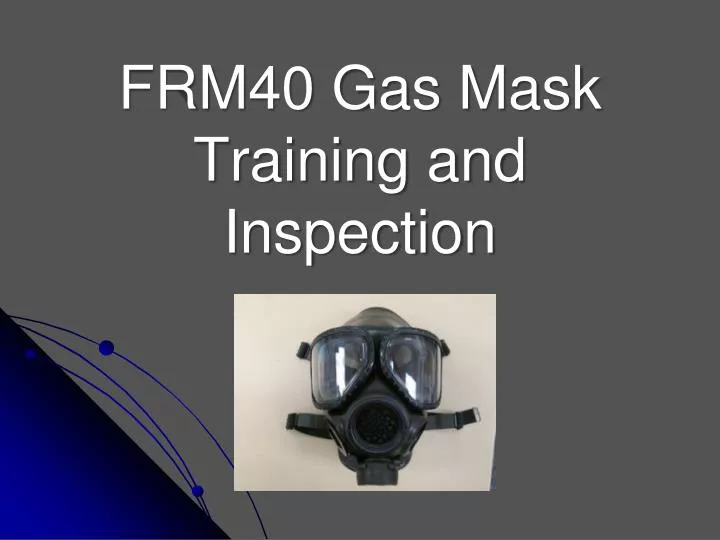
FRM40 Gas Mask Training and Inspection. Purpose.

E N D
Purpose Employees may be called to situations that require the proper use of a gas mask. Improper use can result in exposure, injury or death. The Occupational Safety and Health Administration mandates annual training and fit testing on required respirators. (OSHA 1910.134 )
Performance Objectives At the conclusion of instruction, students will successfully: Complete the OSHA respirator Medical Evaluation questionnaire (DPS802-07176) Inspect their issued FR-M40 Gas Mask and record findings on the inspection form. Properly don and doff the FR-M40 gas mask. Be able to identify at least 3 examples of when it is appropriate and when it is not appropriate to use the FR-M40 Gas Mask. Complete a quantitative fit test using their issued FR-M40 gas mask.
Required Inspections • All respirators for use in emergency situations shall be inspected at least monthly and in accordance with the manufacturer’s recommendations, and shall be checked for proper function before and after each use. ( OSHA 1919.134 h 3 i B )
Medical Evaluation All personnel shall complete the required form or have an annual physical exam. (Annual physicals are generally for SWAT, EOD or Hazmat members.) This information is protected under HIPA and will only be reviewed by a medical care professional. If you wish to speak to a licensed medical health care professional, contact Safety and Loss to set up an appointment.
Mask Inspection Locate your Gas Mask Inspection Sheet. Write the size that the mask indicates next to where it says, “Size FR-M40” on the sheet. Complete: Your name, badge number location code. Put a check mark next to “Med. Supp.” This was filled out at the beginning of this training. If you are in SWAT, EOD or Hazmat and have completed your “annual physical”, check the box. Place a check next to FR-M40 as you will be tested on your own mask. During inspection, mark the appropriate box next to the inspection procedure as necessary for serviceable or non serviceable. At anytime, if you discover a damaged part of your mask, you shall contact any Department Hazmat Technician for repair or replacement.
Unserviceable Mask Conditions If any of the following items are found to be unserviceable stop the inspection as the mask must be replaced. Item # 5 Voicemitter Item # 6 External Drink Tube (Rubber Hose) Item # 7 Facepiece Seal Item # 9 Nose Cup During the inspection phase the unserviceable conditions will be explained further. If any items other than the above are found unserviceable you should continue your inspection. For replacement parts or repair contact Haz Mat Response Unit.
Lenses and Eye Pieces There are two lenses, an outer and an inner. Look for gouges, cracks, pitting or anything blocking your sight. You should be able to read and see the sights on your duty weapon. Inspect tabs around outer lens ensuring there is no damage.
Exhalation Valve Remove the drink tube from its holder. Tube stays connected at base of mask. Rock the rubber cover back exposing the blue valve. Check for damage or obstructions on or under the valve. Valve will lye flat and turn freely when installed correctly.
Exhalation Valve Everything exits the mask through this valve. This area must remain clean. If debris is found on or around valve area: Clean or wipe with a NON-alcoholic baby wipe. If satisfactory, replace the rubber boot but leave the drink tube out.
Inhalation Valve Gasket Ensure the valve/gasket is present. Remove the valve and inspect. The white wafer may be wavy but should not be damaged. If satisfied, reinstall the valve/ gasket with the white wafer facing the inside of the mask. Turn mask over and shake the mask. If not properly installed, the valve will fall back out. Valve will turn freely when installed correctly.
Head Straps Ensure the straps are to the rear of the mask. Check for elasticity Check for fraying No cuts or tears Metal tabs at the ends should be present
Voicemitter Check the exterior for dents, gouges or breaks. Hold the mask up towards a light source. Looking from the inside, rotate the mask around observing the light through the voicemitter. The light should be a yellow/green color. If a white light is observed, the mask is damaged. Contact the Haz Mat Response Unit for immediate replacement.
External Drink Tube Ensure the tube is securely attached. Check tubing for cracks or cuts. If cracks or cuts are found, stop mask inspection and contact Haz Mat Unit for a replacement.
External Drink Tube Check the spring tension of the plunger inside the metal adaptor. Without harming the plunger press in and let it release. The end of a pen works well for this procedure. There should be tension both in and out.
Internal Drink Tube Inspect the internal drink tube. Ensure it’s firmly attached to the inside of the mask.
Facepiece Seal • Respirator shall not be worn by employees who have: • Facial hair that comes between the sealing surface of the facepiece and the face, or that interferes with the valve functions. (OSHA 1910.134 g 1 i A) • Any condition that interferes with the face-to-facepiece seal or valve function. (OSHA 1910.134 g 1 i B)
Face Seal The facepiece seal is the part that mates up to the skin to provide respiratory protection. Ensure the seal is clean. Check for tears, breaks or disfiguration To clean, wipe with a NON-alcoholic baby wipe. If disinfecting or decontamination is required or desired, contact the Hazardous Materials Unit for proper procedures.
The chin cup portion of the facepiece seal shall be on top of the chin cup portion of the nose cup. The mask must be in this configuration for it to seal properly. If the facepiece seal is unserviceable stop inspection and contact Hazardous Materials Unit for replacement mask. Face Seal
Butyl Rubber Second Skin The black butyl rubber is extra protection for the mask. Check for anything in between the rubber and the mask itself. Look for tears in the second skin.
Nose Cup and Valves Nose Cup is NOT removable. Ensure nose cup is securely attached to the inside of the mask. The nose cup is attached inside the mask by the voicemitter housing. Carefully inspect the attachment. If the nose cup is detached from the voicemitter housing, the mask is unserviceable. Stop inspection and obtain replacement mask.
Nose Cup and Valves Locate plastic ring directly below voicemitter inside nose cup. Ensure the nose cup is under the flange of the plastic piece by running a finger around the circumference. This keeps eyepieces from fogging up and sweat from pooling in the bottom of the mask.
Nose Cup and Valves Nose Cup Valves Ensure the two black valves in the nose cup are present and flexible. The valves are for anti fogging purposes. However, the failure of this valve will not affect the seal of the mask.
Metal Parts Ensure the metal face blank opposite of the filter threads is present and tight. Inspect strap buckles for damage. Inspect tabs around outer lens ensuring there is no damage.
Eyeglass Insert Glasses are NOT permitted for use with gas mask. Eyeglass inserts ARE permitted and provided for those who require glasses to perform their duties. If installed, ensure they are clean and in good working order.
3MFR-15-CBRN Canister The 3M FR-15-CBRN canister is used with the FR-M40 gas mask. This canister has two main components to it. Particulate filter Activated Charcoal
3MFR-15-CBRN Canister • Particulate Filter. • The first layer of protection provided by this canister is particulate filtration. • The particulate filter is designed to filter out particles as small as 4 microns. • The particulate filter works much like a car’s air filter. • As it gets clogged with particles, it is increasingly more difficult to pass air through the filter.
3MFR-15-CBRN Canister • Activated charcoal. • The second layer of protection provided by this canister is chemical filtration. • The activated charcoal filter is designed to filter out chemicals from the air. • This is accomplished by the charcoal absorbing the chemical upon contact and preventing it from passing through. • Canister is designed as a onetime only use, for eight hours. Moisture such as rain or high humidity degrades the effectiveness of the canister by approximately ½.
3MFR-15-CBRN Canister Check the expiration date and model. Write down the expiration date in the comments section of line 12 on the inspection sheet. The canister should be in the foil.
3MFR-15-CBRN Canister • Keep canister sealed prior to use. • If canister is out of foil and caps have not been removed, then the canister is good until expiration date printed in ink or etched into the bottom side of the canister. • Exposure to air begins to degrade the canister’s ability to filter out contaminants. • If the caps have been removed from the canister it must be replaced after its use. • Moisture such as rain or high humidity degrades the effectiveness of the canister by approximately ½. • Canister is designed for onetime only use, for eight hours.
3MFR-15-CBRN Canister • Replacement canisters are available by contacting the Hazardous Materials Response Unit. • Filters will also be made available during fit testing sessions.
Sign and Date the bottom of the form. Remember, bring BOTH forms with you to the fit test phase of the training.
Donning During this Training / Mask Inspection, it is extremely important to use only your training filter to attach to the mask during the positive and negative pressure tests. If you do not have a training filter…..do not open a current sealed filter in order to complete the task. If you need a training filter contact the Haz Mat Response Unit.
Donning Unpack and inspect your mask. Move the head straps to the front of the mask. Open canister Verify canister type and expiration date. Verify inhalation valve/gasket is present. Thread canister into mask.
Donning Take your mask in one hand Settle your chin in the chin cup and place mask against your face. Pull the head straps over your head with the other hand. Ensure the pad in the center of the head straps is positioned with the bottom of the pad at the bump at the base of your skull, and it is in the center of the back of your head.
Donning With the head straps over your head, tighten the straps beginning with the lower ones. Tighten the straps working from bottom to top. This ensures the mask is pulled evenly onto your face for a proper seal.
Donning Once the mask has been donned, it needs to go through checks. First you must clear the mask (positive pressure check). Place at least two fingers under the rubber housing containing the exhalation valve and push up to block the exhalation valve and give a sharp exhale. If you do not have a training filter on the mask, ensure the inhalation valve/gasket is not blown from its seat on the side of the mask. This will expel any contaminants in the mask or facepiece seal area.
Donning After clearing the mask, a negative pressure test shall be conducted. Place the base of your palm over the inlet of the filter. If you do not have a filter, cover the inlet with the palm of your hand. Inhale to create a vacuum effect of the mask collapsing against your face slightly.
Donning • The vacuum should be held for ten seconds. • If the vacuum releases, re-don the mask and try again. • If a ten second seal can not be maintained, continue with the training but DO NOT USE THE MASK. • Notify your supervisor immediately and contact the Hazardous Materials Unit for diagnosis.
Doffing DO NOT use the old catcher style. This could result in further contaminating yourself or others. If you are wearing personal protective equipment, the mask and inner gloves will be the last items to be removed.
Doffing To take the mask off, bend at the waist. Using only your finger tips, flick the bottom buckles until the mask loosens. Leave the middle and top straps set for faster donning. When the mask loosens, grab the canister and the front of the mask. To remove, pull down and push away from face.
Storage of Mask For long term storage, (days or months) storage in the 3M bag is preferred. Keep face form in mask to preserve shape. A rolled up towel can be used if form is lost or damaged. Keep in plastic bag to protect from dust. Store in a dry location.
Storage of Mask Day to day storage – long term storage Always store mask and canister in a dry location. Keep face mold in place with head straps loose. If face mold is broken or lost use rolled up towel.
Storage of Mask • Some officers were only issued the tactical leg bag or are unable to locate the 3M storage bag, for those officers it is acceptable: • To store the mask utilizing a face form or rolled up towel, in a plastic bag. • The mask may then be stored in a duffel bag or helmet bag for protection. • Please ensure the mask is stored in a location in the vehicle so it is not crushed by heavy gear stacked on top of it.
Storage of Mask • Tactical carry – short term storage (hours) • This would be in an event such as a mobile field force deployment or tactical operations. • Remove plastic face mold, store in vehicle. • Position head straps to the front of the mask. • Open canister and thread into mask. • Place in “tactical leg carry” bag. • Place mask in configuration that ensures fastest donning procedures.
Oxygen Deficient Environment This mask is an air purifying respirator and has limitations. This mask is only to be worn in environments with sufficient oxygen concentration. (19.5% to 23% oxygen) Hazardous materials technicians, both fire and law enforcement, may conduct air monitoring to ensure sufficient oxygen is present. Self-Contained Breathing Apparatus (SCBA) is to be used by trained and qualified personnel when insufficient oxygen levels are present.
Hazardous Materials Incidents OSHA prohibits involvement in Hazardous Materials Incidents unless the employee is trained at least to Operations Level Hazmat response (OSHA 1910.120.q.6.ii). Highway Patrolmen are trained only to the awareness level in the academy (OSHA 1910.120.q.6.i). Do not wear this mask to try and mitigate a hazardous materials incident.
Hazardous Materials Incidents The FR-M40 gas mask can provide the wearer with a false sense of security. This mask is not to be used on any incident until: A Hazard Assessment is conducted by a qualified Hazardous Materials Technician or Specialist. DPS Hazardous Materials Technicians are available statewide by callout through the DPS Duty Office or OPCOM. Air quality must be constantly monitored.