Download

1 / 12
230 likes | 874 Views
Gel Electrophoresis of DNA. Created by Christina A. Fox With special thanks to The Reed College Software Development Lab. Analysis of DNA by Gel Electrophoresis. DNA may be analyzed by gel electrophoresis. In this process DNA molecules migrate to the + pole as current passes through the gel.

E N D
Gel Electrophoresisof DNA Created by Christina A. Fox With special thanks to The Reed College Software Development Lab
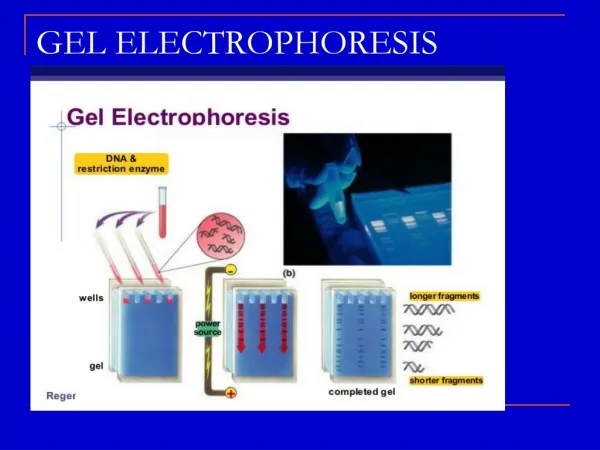
Analysis of DNA by Gel Electrophoresis DNA may be analyzed by gel electrophoresis. In this process DNA molecules migrate to the + pole as current passes through the gel.
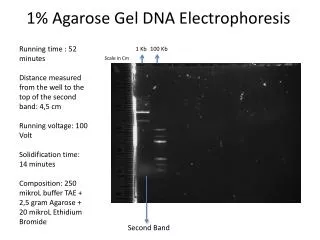
Step 1: Making the Gel A common material used for gel electrophoresis of DNA is agarose. Agarose gels are made by first boiling a mixture of powdered agarose and buffer. When the mixture is cooled to about 65C, the solution is poured into a gel mold. When further cooled to room temperature, the agarose solidifies to produce the gel with indentations called wells.
Step 2: Setting up the Apparatus The agarose gel is placed in an electrophoresis apparatus and buffer is added to cover the gel.
Step 3: Loading DNA into the Gel DNA is loaded into the wells using a micropipettor. Each DNA sample has tracking dyes added to it (usually blue) and either sucrose or glycerol to make the solution dense and "sink" into the well.
Step 4: Movement of DNA Fragments After the wells are filled, the power supply is turned on and the DNA moves towards the + pole. At this stage the DNA band(s) cannot be seen, but the tracking dye (dark blue) allows the progress of the electrophoresis to be followed. The smallest DNA fragments typically follow the blue dye down the gel.
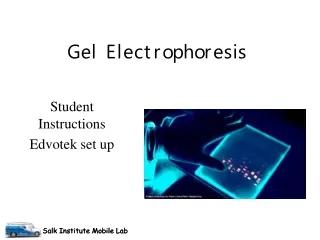
Step 5: Staining the DNA Bands The DNA is visualized by staining, for example with ethidium bromide (EtBr), and then destaining in water. The EtBr binds to the DNA and makes it fluoresce orange under UV light.
Step 6: Photographing the Results A photograph of the results is taken and used for analysis and for a permanent record of the experiment.
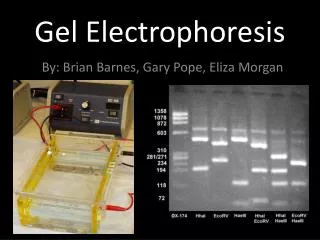
Reasons to Analyze DNA by Gel Electrophoresis There are many reasons for analyzing DNA by gel electrophoresis. For example, it might be necessary to determine DNA fragment sizes after cutting the DNA with restriction enzymes (below, left), or it might be necessary to check DNA that has been isolated and purified (below, right).
Analysis of DNA Fragments using Gel Electrophoresis It is often important to determine the sizes of DNA bands on gels after electrophoresis. This may be done if a marker DNA sample, containing a number of DNA molecules each with a known molecular size, is run alongside the experimental samples on the gel.
Constructing a Calibration Curve To determine sizes of unknown DNA fragments, a calibration curve is first made of the marker DNA data; i.e., log(bp) on the y axis and migration distance (mm) on the x axis. The exact migration distances of marker DNA fragments vary from experiment to experiment.
Determining DNA Lengths From Migration Distances Next, the migration distances for the unknown DNA bands are measured and the sizes of the DNA is read from the calibration curve, as illustrated here: