Download
1 / 84
840 likes | 862 Views
Learn the basics of HTML: titles, headings, paragraphs, line breaks, and more to design your own web pages effectively.

E N D
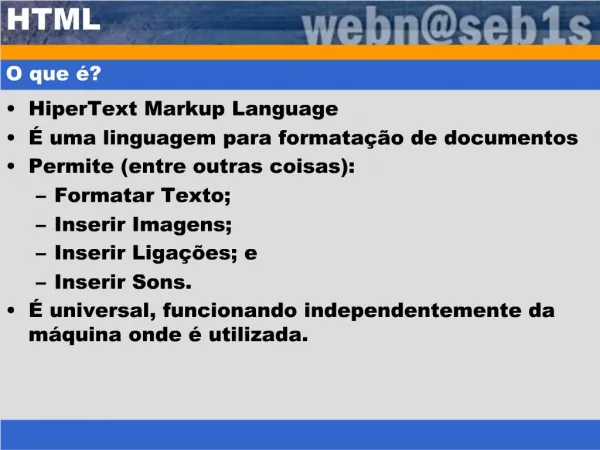
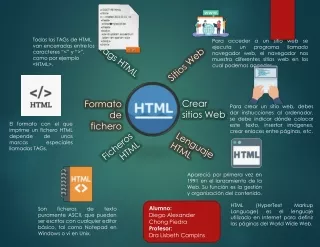
Definitions • W W W – World Wide Web. • HTML – HyperText Markup Language – The Language of Web Pages on the World Wide Web. HTML is a text formatting language. • URL – Uniform Resource Locator. • Browser – A software program which is used to show web pages. • “Normal text” surrounded by bracketed tags(< >) that tell browsers how to display web pages • Pages end with “.htm” or “.html” • Codes enclosed in brackets • Usually paired tags <TITLE>My Web Page</TITLE> • Not case sensitive <TITLE> = <title> = <TITLE>
Table Data and Table Header Attributes <Table border=1 cellpadding =2> <tr> <th> Column 1 Header</th> <th> Column 2 Header</th> </tr> <tr> <td colspan=2> Row 1 Col 1</td> </tr> <tr> <td rowspan=2>Row 2 Col 1</td> <td> Row 2 Col2</td> </tr> <tr> <td> Row 3 Col2</td> </tr> </table>
Creating a Basic Starting Document <HTML> <HEAD> <TITLE>Infiniti software solutions</TITLE> </HEAD> <BODY> This is what is displayed. </BODY> </HTML>
Headings, <Hx> </Hx> • Inside the BODY element, heading elements H1 through H6 are generally used for major divisions of the document. H1: should be used as the highest level of heading, H2 as the next highest, and so forth. Syntax <Hx>content<Hx>
Heading 1 Heading 2 Heading 3 Heading 4 Heading 5 Heading 6 Headings, <Hx> </Hx> <HTML> <HEAD> <TITLE> Example Page</TITLE> </HEAD> <BODY> <H1> Heading 1 </H1> <H2> Heading 2 </H2> <H3> Heading 3 </H3> <H4> Heading 4 </H4> <H5> Heading 5 </H5> <H6> Heading 6 </H6> </BODY> </HTML>
Paragraphs, <P> </P> • The paragraph tags are used to define a block of text as a paragraph. This HTML element is one of the basic HTML tags you should learn to use properly. • Example:- <p>The contents of the paragraph.</p>
Break, <BR> • Line breaks allow you to decide where the text will break on a line or continue to the end of the window. • A <BR> is an empty Element, meaning that it may contain attributes but it does not contain content. • The <BR> element does not have a closing tag.
Heading 1 Paragraph 1,…. Line 2 Line 3 …. Break, <BR> <HTML> <HEAD> <TITLE> Example Page</TITLE> </HEAD> <BODY> <H1> Heading 1 </H1> <P>Paragraph 1, <BR> Line 2 <BR> Line 3 <BR>…. </P> </BODY> </HTML>
Horizontal Rule, <HR> • The <HR> element causes the browser to display a horizontal line (rule) in your document. • <HR> does not use a closing tag, </HR>.
Horizontal Rule, <HR> <HTML> <HEAD> <TITLE> Example Page</TITLE> </HEAD> <BODY> <H1> Heading 1 </H1> <P>Paragraph 1, <BR> Line 2 <BR> <HR>Line 3 <BR> </P> </BODY> </HTML> Heading 1 Paragraph 1,…. Line 2 _________________ Line 3
Bold, Italic and other Character Formatting Elements • <FONT SIZE=“+2”> Two sizes bigger</FONT> • The size attribute can be set as an absolute value from 1 to 7 or as a relative value using the “+” or “-” sign. Normal text size is 3 (from -2 to +4). • <B> Bold </B> • <I> Italic </I> • <U> Underline </U> • Color = “#RRGGBB” The COLOR attribute of the FONT element. E.g.,<FONT COLOR=“#RRGGBB”>this text has color</FONT> • <PRE> Preformatted </PRE>Text enclosed by PRE tags is displayed in a mono-spaced font. Spaces and line breaks are supported without additional elements or special characters.
Bold, Italic and other Character Formatting Elements <P> <FONT SIZE=“+1”> One Size Larger </FONT> - Normal – <FONT SIZE=“-1”> One Size Smaller </FONT> <BR> <B> Bold</B> - <I> italics</I> - <U> Underlined </U> - <FONT COLOR=“#FF0000”> Colored </FONT> <BR> <EM> Emphasized</EM> - <STRONG> Strong </STRONG> <BR> <pre> Text in a pre element is displayed in a fixed-width font, and it preserves both spaces and line breaks </pre> One Size Larger - Normal – One Size Smaller Bold - italics – Underlined Colored Emphasized - Strong Text in a pre element is displayed in a fixed-width font, and it preserves both spaces and line breaks
Alignment • Some elements have attributes for alignment (ALIGN) e.g. Headings, Paragraphs and Horizontal Rules. • The Three alignment values are : LEFT, RIGHT, CENTER. • <CENTER></CENTER> Will center elements.
List Elements • HTML supplies several list elements. Most list elements are composed of one or more <LI> (List Item) elements. • UL : Unordered List. Items in this list start with a list mark such as a bullet. Browsers will usually change the list mark in nested lists. <UL> <LI> List item1 …</LI> <LI> List item2 …</LI> </UL> • List item2 … • List item1 …
List Elements • You have the choice of three bullet types: disc(default), circle, square. • These are controlled in Netscape Navigator by the “TYPE” attribute for the <UL> element. • <UL TYPE=“square”> • <LI> List item …</LI> • <LI> List item …</LI> • <LI> List item …</LI> • </UL> • List item … • List item … • List item …
List Elements • OL: Ordered List. Items in this list are numbered automatically by the browser. <OL> <LI> List item …</LI> <LI> List item …</LI> <LI> List item …</LI> </OL> • List item … • List item … • List item • You have the choice of setting the TYPE Attribute to one of five numbering styles.
List Elements • You can specify a starting number for an ordered list. <OL TYPE =“i”> <LI> List item …</LI> <LI> List item …</LI> </OL> • List item ... • List item …
Images • <IMG>This element defines a graphic image on the page. • Image File (SRC:source):This value will be a URL (location of the image) E.g. http://www.domain.com/dir/file.ext or /dir/file.txt. • Alternate Text (ALT):This is a text field that describes an image or acts as a label. It is displayed when they position the cursor over a graphic image. • Alignment (ALIGN):This allows you to align the image on your page.
Images • Width (WIDTH): is the width of the image in pixels. • Height (HEIGHT):is the height of the image in pixels. • Border (BORDER):is for a border around the image, specified in pixels. • HSPACE: is for Horizontal Space on both sides of the image specified in pixels. A setting of 5 will put 5 pixels of invisible space on both sides of the image. • VSPACE: is for Vertical Space on top and bottom of the image specified in pixels. A setting of 5 will put 5 pixels of invisible space above and bellow the image.
Some Examples on images 1) <IMG SRC=“jordan.gif“ border=4> 2) <IMG SRC=" jordan.gif" width="60" height="60"> 3) <IMG SRC=“jordan.gif" ALT="This is a text that goes with the image"> 4) <IMG SRC=" jordan.gif “ Hspace="30" Vspace="10" border=20> 5) < IMG SRC =" jordan.gif“ align="left"> blast blast blast blast blast
HOW TO MAKE A LINK 1) The tags used to produce links are the <A> and </A>. The <A> tells where the link should start and the </A> indicates where the link ends. Everything between these two will work as a link. 2) The example below s hows how to make the word Here work as a link to yahoo. Click <A HREF="http://www.yahoo.com">here</A> to go to yahoo.
Tables • The <TABLE></TABLE> element has four sub-elements: • Table Row<TR></TR>. • Table Header <TH></TH>. • Table Data <TD></TD>. • Caption <CAPTION></CAPTION>. • The table row elements usually contain table header elements or table data elements.
Tables <table border=“1”> <tr> <th> Column 1 header </th> <th> Column 2 header </th> </tr> <tr> <td> Row1, Col1 </td> <td> Row1, Col2 </td> </tr> <tr> <td> Row2, Col1 </td> <td> Row2, Col2 </td> </tr> </table>
Tables Attributes • BGColor: background colors in a table. • Width: you can specify the table width as an absolute number of pixels or a percentage of the document width. You can set the width for the table cells as well. • Border: You can choose a numerical value for the border width, which specifies the border in pixels. • CellSpacing: Cell Spacing represents the space between cells and is specified in pixels. • CellPadding: Cell Padding is the space between the cell border and the cell contents and is specified in pixels. • Align: tables can have left, right, or center alignment.
Table Caption • A table caption allows you to specify a line of text that will appear centered above or bellow the table. <TABLE BORDER=1 CELLPADDING=2> <CAPTION ALIGN=“BOTTOM”> Label For My Table </CAPTION> • The Caption element has one attribute ALIGN that can be either TOP (Above the table) or BOTTOM (below the table).
Table Header • Table Data cells are represented by the TD element. Cells can also be TH (Table Header) elements which results in the contents of the table header cells appearing centered and in bold text.
Table Data and Table Header Attributes • Colspan: Specifies how many cell columns of the table this cell should span. • Rowspan: Specifies how many cell rows of the table this cell should span. • Align: cell data can have left, right, or center alignment. • Valign: cell data can have top, middle, or bottom alignment. • Width: you can specify the width as an absolute number of pixels or a percentage of the document width. • Height: You can specify the height as an absolute number of pixels or a percentage of the document height.
Basic Table Code <TABLE BORDER=1 width=50%> <CAPTION> <h1>Spare Parts <h1> </Caption> <TR><TH>Stock Number</TH><TH>Description</TH><TH>List Price</TH></TR> <TR><TD bgcolor=red>3476-AB</TD><TD>76mm Socket</TD><TD>45.00</TD></TR> <TR><TD >3478-AB</TD><TD><font color=blue>78mm Socket</font> </TD><TD>47.50</TD></TR> <TR><TD>3480-AB</TD><TD>80mm Socket</TD><TD>50.00</TD></TR> </TABLE>
What will be the output? <TABLE BORDER width=“750”> <TR> <TD colspan=“4” align=“center”>Page Banner</TD></TR> <TR> <TD rowspan=“2” width=“25%”>Nav Links</TD><TDcolspan=“2”>FeatureArticle</TD> <TD rowspan=“2” width=“25%”>Linked Ads</TD></TR> <TR><TD width=“25%”>News Column 1 </TD> <TD width=“25%”><News Column 2 </TD></TR> </TABLE>
Block Elements • The block elements are div and span. • Div- Defines a section in a document (block-level). • Span- Defines a section in a document (inline). • The difference between span and div is that a span element is in-line and usually used for a small chunk of HTML inside a line (such as inside a paragraph) whereas a div (division) element is block-line (which is basically equivalent to having a line-break before and after it) and used to group larger chunks of code. Examples:- <div id="scissors"> <p>This is <span class="paper">crazy</span></p> </div>
Forms To insert a form we use the <FORM></FORM> tags. The rest of the form elements must be inserted in between the form tags. <HTML> <HEAD> <TITLE> Sample Form</TITLE> </HEAD> <BODY BGCOLOR=“FFFFFF”> <FORM ACTION =”www.atyourprice.in/index.php”> <P> First Name: <INPUT TYPE=“TEXT” NAME=“fname” MAXLENGTH=“50”> </P> <P> <INPUT TYPE=“SUBMIT” NAME=“fsubmit1” VALUE=“Send Info”> </P> </FORM> </BODY> </HTML>
<FORM> element attributes • ACTION: is the URL of the program that is going to accept the data from the form, process it, and send a response back to the browser. • METHOD:GET (default) or POST specifies which HTTP method will be used to send the form’s contents to the web server. The CGI application should be written to accept the data from either method. • NAME: is a form name used by JavaScripts. • TARGET: is the target frame where the response page will show up.
Form Elements • Form elements have properties: Textboxes, Password boxes, Checkboxes, Option(Radio) buttons, Submit, Reset, File, Hidden and Image. • The properties are specified in the TYPE Attribute of the HTML element<INPUT></INPUT>.
Sami Ali Al al-Bayt Univrsty
Text Box • Text boxes: Used to provide input fields for text, phone numbers, dates, etc. <INPUT TYPE= " TEXT " > Browser will display Textboxes use the following attributes: • TYPE: text. • SIZE: determines the size of the textbox in characters. Default=20 characters. • MAXLENGHT : determines the maximum number of characters that the field will accept. • NAME: is the name of the text box • VALUE: will display its contents as the default value.
Example on Text Box <TITLE>Form_Text_Type</TITLE> </HEAD> <BODY> <h1> <font color=blue>Please enter the following bioData</font></h1> <FORM name="fome1" Method= " get " Action= " URL " > First Name: <INPUT TYPE="TEXT" NAME="FName" SIZE="15" MAXLENGTH="25"><BR> Last Name: <INPUT TYPE="TEXT" NAME="LName" SIZE="15" MAXLENGTH="25"><BR> Nationality: <INPUT TYPE="TEXT" NAME="Country" SIZE="25" MAXLENGTH="25"><BR> The Phone Number: <INPUT TYPE="TEXT" NAME="Phone" SIZE="15" MAXLENGTH="12"><BR> </FORM> </BODY> </HTML>
Password • Password: Used to allow entry of passwords. <INPUT TYPE= " PASSWORD " > Browser will display Text typed in a password box is starred out in the browser display. Password boxes use the following attributes: • TYPE: password. • SIZE: determines the size of the textbox in characters. • MAXLENGHT: determines the maximum size of the password in characters. • NAME: is the name of the variable • VALUE: is usually blank.
Example on Password Box <HTML><HEAD> <TITLE>Form_Password_Type</TITLE></HEAD> <BODY> <h1> <font color=red>To Access, Please enter:</font></h1> <FORM name="fome2" Action="url" method="get"> User Name: <INPUT TYPE="TEXT" Name="FName" SIZE="15" MAXLENGTH="25"><BR> Password: <INPUT TYPE="PASSWORD" NAME="PWord" value="" SIZE="15” MAXLENGTH="25"><BR> </FORM></BODY> </HTML>
Hidden • Hidden: Used to send data to the CGI application that you don’t want the web surfer to see, change or have to enter but is necessary for the application to process the form correctly. <INPUT TYPE=“HIDDEN”> Nothing is displayed in the browser. Hidden inputs have the following attributes: • TYPE: hidden. • NAME: is the name of hidden input • VALUE: is usually set a value .
Check Box • Check Box: Check boxes allow the users to select more than one option. <INPUT TYPE=“CHECKBOX”> Browser will display Checkboxes have the following attributes: • TYPE: checkbox. • CHECKED: is blank or CHECKED as the initial status. • NAME: is the name of the variable to be sent to the CGI application. • VALUE: is usually set to a value.
<HTML> <HEAD><TITLE>CheckBoxType</TITLE> </HEAD> <BODY> <h1> <font color=green>Please check one of the following</font></h1> <FORM name="fome3" Action="url" method="get"> <font color=red> Select Country: </font><BR> jordan:<INPUT TYPE="CheckBox" Name="country" CHECKED><BR> Yemen<INPUT TYPE="CheckBox" Name="country"><BR> Qatar:<INPUT TYPE="CheckBox" Name="country"><BR> <BR> <font color=blue>Select Language:</font><BR> Arabic:<INPUT TYPE="CheckBox" Name="language" CHECKED><BR> English:<INPUT TYPE="CheckBox" Name="language"><BR> French:<INPUT TYPE="CheckBox" Name="language"><BR></FORM> </BODY></HTML>