Download
1 / 15
150 likes | 308 Views
Creating a New Project and Connecting it to the DB2 Sample Database and WAS 6.1. Create New Dynamic Web Project. From the File menu, select: New > Project… From the new project wizard, select Dynamic Web Project Specify (carefully) Project Name: Target Runtime

E N D
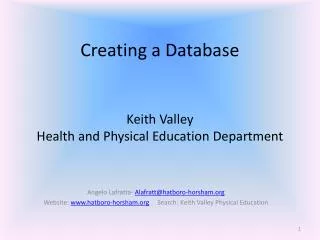
Creating a New Project and Connecting it to the DB2 Sample Database and WAS 6.1
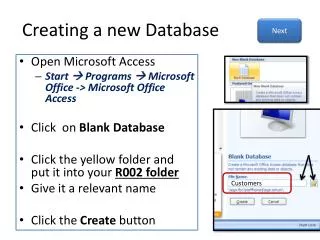
Create New Dynamic Web Project • From the File menu, select: New > Project… • From the new project wizard, select Dynamic Web Project • Specify (carefully) • Project Name: • Target Runtime • Configurations • Add project to EAR file • Note that several of these options will be pre-selected • Click Next >
Specify Project Facets • From Project Facets, check the following options for your new project: • Default style sheet • Both of the EGL options • Both of the WebSphere Web options • No other options! • Click Next >
Add EGL Settings • Click Next > past the next setup menu • (Accept defaults for folder names) • From EGL Setting, carefully enter the JNDI name to connect to your database: jdbc/sample • Click Finish • Click Yes to Open the Associated Web Perspective • Close the Web Diagram tool, open by default in the Content Area
Create a Connection From your EAR File to DB2 • This is a multi-step lab, where you will create, modify or connect all of the system files and DB2 properties discussed in this Appendix. Take your time – and triple-check your work. Once you’ve mastered these steps and concepts you will be able to connect to your own company’s data sources. Here’s what you’ll be doing: (One-time step) Customize your project’s EAR file entries: • Add a new JAAS Authentication Alias – so your pages can login and access DB2 data • Add a new JDBC Provider to DB2 – specify a logical name that points to your DB2 client/connectivity software • Add a new JNDI name – a logical name (like a JCL //DD card) for your database. When creating this logical name, you will specify necessary database connection properties: • Database Name, serverName (logical I/P name or address), port # Create a new web page 4. Create a list page that uses the employeeDeptJoin record Read the Notes of this slide before you begin!
*** REVIEW *** Specifying Connection Info to Databases Your EGL/JSF Web Page • For Web Applications (J2EE) • JNDI Name in build descriptor • JNDI reference in web.xml • Project EAR File • Application Deployment Descriptor Step 5 Steps 6, 7 Step 4 Steps 1, 2 3 *** Note that you will have a new JNDI Name for your DB2 access in this lab – these screen captures show the JNDI Name from our Training database
1. Add a new JAAS Authentication Entry From Project Explorer: • Expand <ProjectName>EAR • Open the Deployment tab • Scroll down and Add a new JAAS Authentication Entry – specifying your DB2 • User ID • Password
2 Create a new JDBC Provider Continuing on the Deployment tab… • Scroll up and from Data Sources, add a new JDBC Provider • Under JDBC Provider List, click Add • Select: • Database type: • IBM DB2 • JDBC provider type: • DB2 Universal JDBC Driver Provider • From Create JDBC Provider • Select and Remove the existing Class path external JARs • Click Add External JARs – and from your DB2 installation directory, browse to the \java\ subdirectory and select the three JAR files shown below • Click Finish
3. Create a new JNDI Name for your DB2 Database – 1 of 2 Continuing on the Deployment tab - Select your new JDBC… • From Data source defined in the JDBC provider selected above, click: Add • From Create Data Source, select: • DB2 Universal JDBC Provider • Click Next > • From Create Data Source • Add these entries • Name • JNDI Name (lower-case) • Use the combo-box to select DB2Auth for the Component and Container managed authentication alias • Click Next
3. Create a new JNDI Name for your DB2 Database – 2 of 2 • From Create Resource Properties, specify the following three property values: • databaseName Enter: SAMPLE - if you are using the Sample DB2 database on your PC • Enter your actual DB2 database name • If you are accessing a remote DB2 database • Example: REDBK1 2. serverName Enter: localhost If you are using DB2 on your PC • Enter the IP Address of your DB2 Server If you are accessing Remote DB2 • Ex. carmvs1.pok.ibm 3. portNumber - which defaults to 50000 for localhost DB2 - you will need the actual port# for your system – if you are accessing remote DB2 • Click Finish • Close your Application Deployment Descriptor • Save the changes to your EAR file
Configure a Connection for DB2 • From Window > Preferences > EGL > SQL Database Connection Create a new connection, and specify parameters for DB2 Note that, if you have DB2 installed locally on your machine, you may use DB2 UDB (You will have to select the proper version) If you wish to use DB2 mainframe (either iSeries or System z), you will need to read through the documentation described on the previous slide (Available Materials) for additional steps and assistance. Press Test Connection to test your settings. Click Finish
6. Create a new Page – 1 of 3 From Project Explorer, Right-click over \WebContents\ and create a new Web Page, named: testDB2Page.jsp • Create it using a template from the MyTemplates folder • Modify the default page title text • Right-click over the page in the content area • Select Edit Page Code • Select all of the existing JSFHandler boiler-plate statements and replace them with the code in the Notes section of this slide • Save (Ctrl/S) your code • There shouldn’t be anything new in this code that you haven’t seen before in other sections of this course. …we hope
Use the Connection to SQLRetrieve Schema into an EGL Record • Scroll to the bottom of the Pagehandler, and enter the following record statement: • With your cursor inside the statement, Right-Click and select: SQL Record > Retrieve SQL • Press Ctrl/S (Save) Read slide Notes*** SAMPLE Database Catalog • You will need to enter YOUR schema name – not jsayles
6. Create a new Page – 2 of 3 From Page Designer, from the Page Data area • Select empArray – drag and drop it onto the page • From Configure Data controls, select: Displaying an existing record (read/only) • Select just the seven fields shown below • With the control selected, access the Properties tab • Specify Border 1
(Optional) 6. Create a new Page – 3 of 3 From Page Designer, with the entire dataTable selected (see Notes***) – from Properties • Select the – Display options sub-tab • Delete the existing Column classes: value • Click Add column to categorize table rows This will add a new column to the left side of the dataTable for data grouping With your new column selected • From the new columns Value: Click the browse button • Expand empArray and select DEPTNAME This specifies that the dataTable rows should be aggregated (grouped by) DEPTNAME