Download
1 / 23
240 likes | 306 Views
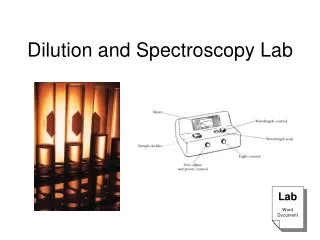
Laboratory Techniques I: Dilution. Go to browse and set to full screen. waste beaker. 100 mL beaker (40 mL of pipetting solution). 10.00 mL volumetric pipet. parafilm. 50 mL beaker. pipet bulb. 50 mL Erlenmeyer flask. Exercises I: Pipetting.

E N D
Laboratory Techniques I: Dilution Go to browse and set to full screen.
waste beaker 100 mL beaker (40 mL of pipetting solution) 10.00 mL volumetric pipet parafilm 50 mL beaker pipet bulb 50 mL Erlenmeyer flask Exercises I: Pipetting
Measure and record the mass of a clean, dry stoppered 50 mL Erlenmeyer flask on the analytical balance. Pour about 20 mL of pipetting solution into the 50 mL beaker.
Place the pipet bulb on the end of the pipet. Squeeze the bulb to empty out the air.
Place the pipet into the solution, slowly releasing the pressure on the bulb.With a pipet bulb withdraw small quantities of the pipetting solution. Watch the solution rise in the pipet, do not let any solution get into the bulb.
Make sure to use your index finger to handle the pipet. Once a small quantity of the pipetting solution is in the pipet, quickly remove the bulb and press down on the end of the pipet with your index finger.
Invert the pipet to a horizontal position. Turn and rotate the pipet so all inside surfaces have come into contact with the solution.
Drain and discard this solution into the waste beaker. Rinse the 10.00 mL volumetric pipet three times with small quantities of the pipetting solution.
Discard the remaining solution from the 50 mL beaker into the waste beaker and pour the 20 mL of fresh pipetting solution. Place the pipet into the pipetting solution and once the solution is above the calibration mark on the pipet, remove the bulb and press down on the end of the pipet with your index finger.
To obtain an accurate reading, you should have the calibration mark (meniscus) at eye level, i.e., your line of sight should be parallel with the mark.
Release pressure from your finger very slightly so that the liquid level slowly drops (this may take some practice). Once the bottom of the meniscus has reached the calibration mark on the pipet, press down firmly with your finger.
Transfer the pipet to the Erlenmeyer flask and remove your finger from the pipet. Touch the tip of the pipet against the wall of the Erlenmeyer flask and allow the solution to drain. Do not force out the remaining solution. The pipet has been calibrated with the last drop left inside.
Obtain the mass of the Erlenmeyer flask and its contents. Calculate the mass of 10.00 mL of the sample.
Exercise II: Preparing Dilutions Distilled water bottle Two 100 mL Volumetric flasks eyedropper
Pipet 15.00 mL of the sample into the clean 100.0 mL volumetric flask.
Add the distilled water and dilute to the calibration mark (meniscus).
Have the calibration mark of the volumetric flask at eye level when you adjust the meniscus.
Stopper the volumetric flask. Turn the flask upside down, holding the stopper to prevent any spillage. Shake the flask and turn it back upright. (Repeat this procedure 7-10 times)
Carry out the second dilution by pipetting 10.00 mL of this solution into the second volumetric flask.
Lift plunger carefully Press down slowly In the fume hood add concentrated ammonia solution into the second volumetric flask.
Mix thoroughly, this second dilution and submit it to the instructor for analysis.