Download
1 / 52
520 likes | 719 Views
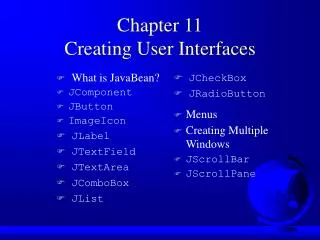
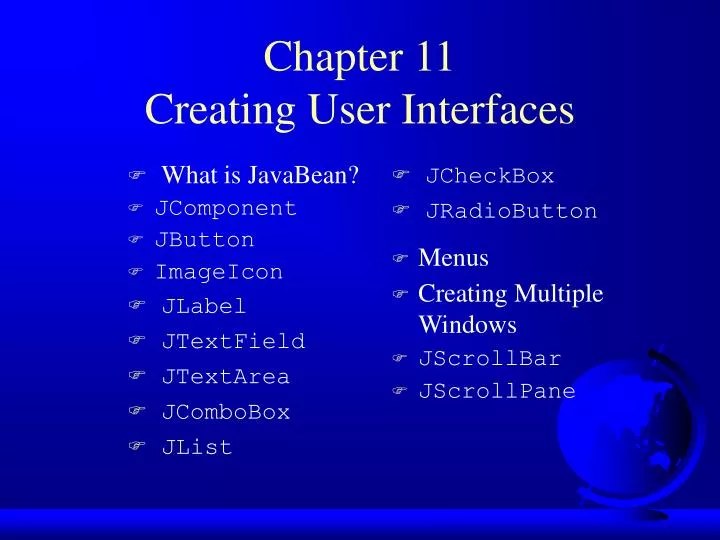
Chapter 11 Creating User Interfaces. What is JavaBean? JComponent JButton ImageIcon JLabel JTextField JTextArea JComboBox JList. JCheckBox JRadioButton Menus Creating Multiple Windows JScrollBar JScrollPane. JComponent Properties. toolTipText font background foreground

E N D
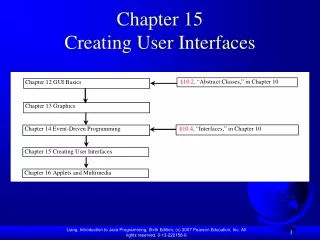
Chapter 11Creating User Interfaces • What is JavaBean? • JComponent • JButton • ImageIcon • JLabel • JTextField • JTextArea • JComboBox • JList • JCheckBox • JRadioButton • Menus • Creating Multiple Windows • JScrollBar • JScrollPane
JComponent Properties • toolTipText • font • background • foreground • doubleBuffered • border • preferredSize • minimumSize • maximumSize
JButton A button is a component that triggers an action event when clicked. The following are JButton non-default constructors: JButton(String text) JButton(String text, Icon icon) JButton(Icon icon) Example 11.1: Using Buttons ButtonDemo Run
JButton Properties • text • icon • mnemonic • horizontalAlignment • verticalAlignment • horizontalTextPosition • verticalTextPosition
Responding to JButton Events public void actionPerformed(ActionEvent e) { // Get the button label String actionCommand = e.getActionCommand(); // Make sure the event source is a button if (e.getSource() instanceof JButton) // Make sure it is the right button if ("My Button".equals(actionCommand) System.out.println ("Button pressed!"); }
JLabel A label is a display area for a short text, an image, or both. The non-default constructors for labels are as follows: JLabel(String text, int horizontalAlignment) JLabel(String text) JLabel(Icon icon) JLabel(Icon icon, int horizontalAlignment) Example 11.2: Using Labels LabelDemo Run
JLabel Properties • text • icon • horizontalAlignment • verticalAlignment
JTextField A text field is an input area where the usercan type in characters. Text fields are usefulin that they enable the user to enter in variable data (such as a name or a description). Example 11.3: Using Text Fields TextFieldDemo Run
JTextField Constructors • JTextField(int columns) Creates an empty text field with the specified number of columns. • JTextField(String text) Creates a text field initialized with the specified text. • JTextField(String text, int columns) Creates a text field initialized with thespecified text and the column size.
JTextField Properties • text • horizontalAlignment • editable • columns
JTextField Methods • getText() Returns the string from the text field. • setText(String text) Puts the given string in the text field. • setEditable(boolean editable) Enables or disables the text field to be edited. By default, editable is true. • setColumns(int) Sets the number of columns in this text field.The length of the text field is changeable.
JTextArea If you want to let the user enter multiple lines of text, you cannot use text fields unless you create several of them. The solution is to use JTextArea, which enables the user to enter multiple lines of text.
JTextArea Constructors • JTextArea(int rows, int columns) Creates a text area with the specified number of rows and columns. • JTextArea(String s, int rows, int columns) Creates a text area with the initial text andthe number of rows and columns specified.
JTextArea Properties • text • editable • columns • lineWrap • wrapStyleWord • rows • lineCount • tabSize
Example 11.4 Using Text Areas • This example gives a program that displays an image in a label, a title in a label, and a text in a text area. TextAreaDemo Run
JComboBox A combo box is a simple list of items from which the user can choose. It performs basically the same function as a list, but can get only one value. To create a choice, use its default constructor: JComboBox() Example 11.5: Using Combo Boxes ComboBoxDemo Run
JComboBox Methods To add an item to a JComboBox jcbo, use jcbo.addItem(Object item) To get an item from JComboBox jcbo, use jcbo.getItem()
Using theitemStateChanged Handler public void itemStateChanged(ItemEvent e) { // Make sure the source is a combo box if (e.getSource() instanceof JComboBox) String s = (String)e.getItem(); } When a choice is checked or unchecked, itemStateChanged() for ItemEvent is invoked as well as the actionPerformed() handler for ActionEvent.
JList A list is a component that performs basically the same function as a combo box, but it enables the user to choose a single value or multiple values. Example 11.6: Using Lists ListDemo Run
JList Constructors • JList() Creates an empty list. • JList(Object[] stringItems) Creates a new list initialized with items.
JList Properties • selectedIndexd • selectedIndices • selectedValue • selectedValues • selectionMode • visibleRowCount
JCheckBox A check box is a component that enables the user to toggle a choice on or off, like a light switch. Example 11.7: Using Check Boxes CheckBoxDemo Run
JCheckBox Constructors • JCheckBox() • JCheckBox(String text) • JCheckBox(String text, boolean selected) • JCheckBox(Icon icon) • JCheckBox(String text, Icon icon) • JCheckBox(String text, Icon icon, boolean selected)
JCheckBox Properties JCheckBox has all the properties in JButton. Additionally, JButton has the following property: selected
JRadioButton Radio buttons are variations of check boxes. They are often used in the group, where only one button is checked at a time. Example 11.8: Using Radio Buttons RadioButtonDemo Run
JRadioButton Constructors • JRadioButton() • JRadioButton(String text) • JRadioButton(String text, boolean selected) • JRadioButton(Icon icon) • JRadioButton(String text, Icon icon) • JRadioButton(String text, Icon icon, boolean selected)
JRadioButton Properties JRadioButton has all the properties in JButton. Additionally, JButton has the following property: selected
Grouping Radio Buttons ButtonGroup btg = new ButtonGroup(); btg.add(jrb1); btg.add(jrb2);
Borders You can set a border on any object of the JComponent class, but often it is useful to set a titled border on a JPanel that groups a set of related user interface components. Example 11.9: Using Borders BorderDemo Run
Static Method for Creating Borders • createTitledBorder(String title) • createLoweredBevelBorder() • createRaisedBevelBorder() • createLineBorder(Color color) • createLineBorder(Color color, int thickness) • createEtchedBorder() • createEtchedBorder(Color highlight, Color shadow, boolean selected) • createEmptyBorder() • createMatteBorder(int top, int left, int bottom, int right, Icon tileIcon) • createCompoundBorder(Border outsideBorder, Border insideBorder)
Message Dialogs • A dialog is normally used as a temporary window to receive additional information from the user, or to provide notification that some event has occurred.
Creating Message Dialogs Use static method in JOptionPane class. showMessageDialog(Component parentComponent, Object message, String title, int messageType) showMessageDialog(Component parentComponent, Object message, String title, int messageType, Icon icon)
Example 11.10: Using Message Dialogs • Objective: Display student exam scores. The program prompts the user to enter the user’s last name and the password in a dialog box. Upon receiving the correct user name and password, the program displays the student’s full name and the exam score. DialogDemo Run
Menus • Java provides several classes—JMenuBar, JMenu, JMenuItem, JCheckBoxMenuItem, and JRadioButtonMenuItem —to implement menus in a frame. • A JFrame or JApplet can hold a menu bar to which the pull-down menus are attached. Menus consist of menu items that the user can select (or toggle on or off). Menu bars can be viewed as a structure to support menus.
The JMenuBar Class A menu bar holds menus; the menu bar can only be added to a frame. Following is the code to create and add a JMenuBar to a frame: JFrame f = new JFrame(); f.setSize(300, 200); f.setVisible(true); JMenuBar mb = new JMenuBar(); f.setJMenuBar(mb);
The Menu Class You attach menus onto a JMenuBar. The following code creates two menus, File and Help, and adds them to the JMenuBar mb: JMenu fileMenu = new JMenu("File", false); JMenu helpMenu = new JMenu("Help", true); mb.add(fileMenu); mb.add(helpMenu);
The JMenuItem Class You add menu items on a menu. The following code adds menu items and item separators inmenu fileMenu: fileMenu.add(new JMenuItem("new")); fileMenu.add(new JMenuItem("open")); fileMenu.add(new JMenuItem("-")); fileMenu.add(new JMenuItem("print")); fileMenu.add(new JMenuItem("exit")); fileMenu.add(new JMenuItem("-"));
Submenus You can add submenus into menu items. The following code adds the submenus “Unix,” “NT,” and “Win95” into the menu item “Software.” JMenu softwareHelpSubMenu = new JMenu("Software"); JMenu hardwareHelpSubMenu = new JMenu("Hardware"); helpMenu.add(softwareHelpSubMenu); helpMenu.add(hardwareHelpSubMenu); softwareHelpSubMenu.add(new JMenuItem("Unix")); softwareHelpSubMenu.add(new JMenuItem("NT")); softwareHelpSubMenu.add(new JMenuItem("Win95"));
Example 11.11: Using Menus • Objective: Create a user interface that performs arithmetic. The interface contains labels and text fields for Number 1, Number 2, and Result. The Result box displays the result of the arithmetic operation between Number 1 and Number 2. MenuDemo Run
Creating Multiple Windows The following slides show step-by-step how to create an additional window from an application or applet.
Creating Additional Windows, Step 1 Step 1: Create a subclass of JFrame (called a SubFrame) that tells the new window whatto do. For example, all the GUI application programs extend JFrame and are subclassesof JFrame.
Creating Additional Windows, Step 2 Step 2: Create an instance of SubFrame in the application or applet. Example: SubFrame subFrame = new SubFrame("SubFrame Title");
Creating Additional Windows, Step 3 Step 3: Create a JButton for activating the subFrame. add(new JButton("Activate SubFrame"));
Creating Additional Windows, Step 4 Step 4: Override the actionPerformed()method as follows: public actionPerformed(ActionEvent e) { String actionCommand = e.getActionCommand(); if (e.target instanceof Button) { if ("Activate SubFrame".equals(actionCommand)) { subFrame.setVisible(true); } } }
Example 11.12 Creating Multiple Windows • This example creates a main window with a text area in the scroll pane, and a button named "Show Histogram." When the user clicks the button, a new window appears that displays a histogram to show the occurrence of the letters in the text area. MultipleWindowsDemo Run Histogram
JScrollBar • A scroll bar is a control that enables the user to select from a range of values. The scrollbar appears in two styles: horizontal and vertical. Example 11.13: Using Scrollbars ScrollBarDemo Run
JScrollPane • A scroll pane is a component that supports automatically scrolling without coding. Example 11.14: Using Scroll Panes ScrollPaneDemo Run