Download
1 / 28
280 likes | 351 Views
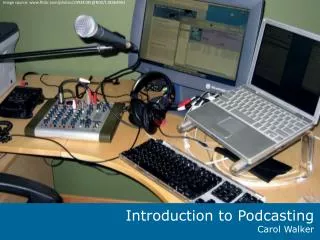
Introduction to Podcasting. Podcasting Using Garage Band .

E N D
Podcasting Using Garage Band Podcasts are digital recordings made for others to listen on a computer or MP3 device. Creating a podcast 1. Plan: Storyboard and write the script. This is the most important and sometimes the most time consuming part of the process. 2. Produce: Record the audio using the software. You may also include images to enhance the podcast. 3. Edit: Trim the audio, add music in the beginning and the end 4. Publish: Export the GarageBand file to iTunes. From iTunes or disc. Upload to a website or put on MP3 player.
Planning 1. Write a script. If students can’t read, have them practice what they are going to say. This will save you time as you will have less editing to do. 2. If you are planning to use pictures, decide what pictures will go over what audio. 3. If you are going to do a number of the same types of broadcasts, set up a template with your beginning and ending music.
Planning Possible Outline for a show - Your Table of Contents1. Intro music jingle (repeat for each show so listeners identify the jingle with your show): 30-60 seconds2. Show intro monologue (who you are, what you're going to talk about): 30-60 seconds3. Topic(s)4. Closing remarks (thank audience, thank guests, talk about the next show): 2 minutes5. Closing music jingle (suggest same as Intro music jingle): 30 – 60 seconds
Opening Garage Band Open Garage band – found in your applications folder. Click on Create new podcast episode Name your podcast Choose where you want to save and hit create. Follow consistent naming conventions and teach students to do the same. Example: Date – Year – name of project - initials NOTE: If a project opens and you do not want to continue on that project, go under the file menu, choose close. You will have the option of creating a new episode.
Setting up your computer Setting up your computer to record Before you can record your podcast, you need to make sure Garageband is using the correct microphone. 1. Select Apple > System Preferences, then click on the Audio button. In the Input tab, make sure your microphone or headset is selected and adjust the volume level using the slider. 2. Select Garageband > Preferences. In the Audio/Midi tab, make sure your microphone or headset is selected in the Audio Input menu. (If you get a message asking if you want to save your audio driver, click yes.) You can use internal microphone, snowball mic, or other usbmic, or mic/instrument with audio interface.
Podcast track – video or pictures Male Voice – optimized for a male voice Female Voice – optimized for female Jingles Make sure your track is record Enabled. Only one track can be record enabled at a time. Can add other tracks as well. The Interface Note – if you record in the male track and you are a female, it won’t come out sounding like a male!
To duplicate a track: 1. Click on the Male Voice or Female Voice track created by Garageband to select it. 2. Choose Track > Duplicate Track. To delete a track : Click on it once to select it. Press Command & Delete or select Track Menu > Delete Track. To create a new track: 1. Select Track Menu > New Track. 2. Choose Real Instrument. The Track Info pane will open on the right side of the Garageband window. 3. Select Podcasting from the list on the left of the Track Info pane. 4. Select one of the presets on the right side of the (note you can change this.) Podcast track – video or pictures Male Voice – optimized for a male voice Female Voice – optimized for female Jingles Can add other tracks as well. Make sure your track is record Enabled. Only one track can be record enabled at a time. Adding/Deleting Tracks
Recording 1. Select one of the vocal tracks by clicking on it once. 2. Click on the Record button below the timeline or press the letter R on your keyboard to start recording. 3. When you’re finished recording, click on the Record button again, or press the letter R on your keyboard. Click on the Play button or press the Space Bar on your keyboard to stop the play head. Press spacebar. To stop recording and the playhead at the same time. Note: if you record in the same track again, all of your previous recording will be erased. Looping a region - click on the looping icon in the controls. Adjust where the looping begins and how long it lasts by moving the yellow bar or adjusting its length.
Previewing your recording 1. To play your recording: 2. Rewind to the beginning. 3. Then press spacebar or click on play button.
The Track Header Type of track Ducking Pan Audio meters Track Volume Record Mute Solo Lock Disclosure Triangle Enable
1. To adjust the volume on an entire track use the volume slider. 2. To fade a track or a part of a track: 3. Click the disclosure triangle in the track’s header. 4. Add control points to volume curve and fade as needed. 5. Move the control points to adjust the length and intensity of the fade-in or fade-out. Adjusting volume and automation
1. Tracks can be set up to Duck, which means, the volume on one track lowers when a second track has sound. 2. Opening music should duck as the narrator begins to speak. 3. To set up a track to duck, click on the lower arrow in the ducking control. (Note if the ducking control is not visible, go under the control menu and choose ducking.) An upward arrow means it is a lead track and will not duck. Ducking
Editing your tracks – removing audio Method 1: 1. Select the region you want to edit by clicking on it once. 2. Click on the Track Editor button. 3. When the Track Editor opens, position your pointer somewhere in the lower part of the waveform (until it turns into crosshairs) and drag to make a selection. 4. Select Edit > Cut This will split the region and create a gap in your recording. 5. To close the gap, drag the region to the right of the gap in the timeline until it is next to the previous region. Be careful to not drag regions over each other as this will cause one region to overwrite the contents of the one below it. Method 2: Select a track. Place the play head where you want to make your first cut Under the edit menu choose split. Move the play head to the place where you want your second cut Under the edit menu choose split. Deselect the track by clicking somewhere else Click on the piece of the region you want to delete and choose delete Move the two pieces of audio together.
1. Make sure your loop browser is open (click on the eye in the lower right of your screen. • 2. Click on the Podcast Sounds View button. • 3. Click the category of sounds you want to use. • 4. Click a loop to preview it. • 5. Drag a loop to a track or to a blank area of the timeline which will create a track. To add music, jingles, sound effects etc.
1. Make sure your loop browser is open (click on the eye in the lower right of your screen. • 2. Choose the musical notes. • 3. Choose an instrument, audition loops and add to your project. • 4. Adjust volume, etc. the same way as for all other tracks. To add loops and create your own music
Click on media browser if you want to use a pre recorded song Find the song in your library. 2. Drag the loop you want to use into the workspace and it will create it’s own track.
To Loop a region: • 1. Place the pointer over the upper-right edge of a region. • 2. Drag the right edge to lengthen the region. • Change the length of a region: • 1. Move the pointer over the lower-right edge of the region. • 2. When the resize pointer appears, drag the lower-right edge of the region to shorten or lengthen it. Looping a region, shortening a region
Editing your tracks – effects • Select a track • Click on the i in the lower right • Click on Browse and change the type of track • By clicking on a different type
Editing your tracks – effects Make sure the i is chosen. Clic on Edit to add an effect. Click on one of the empty effect slot and add a new effect. Turn effects on or off by clicking on the rectangular LED next to it. NOTE: The order of effects matter. You can change them by dragging them up or down in the Effects area.
Editing your tracks – EQ Make sure the i is chosen. Select a track. Click on EQ Add a pre set or adjust manually.
Adding Photos and Movies Double click on your podcast track to open the editor or click on the View track editor button. Go through your podcast by dragging the play head or by playing the podcast. At points where you want to add photos, click add a marker or press P. NOTE: you can reposition the marker by moving it where you want it to be and by shortening it. Open your media browser. Drag the photo (or movie) you want to use to the marker in the artwork editor, or to the beginning of the marker in the timeline. You can also add photos directly from the desktop. NOTE: You can either have movies or photos, but not both. If you are using a lot of video consider IMovie. You can also drag photos directly to the podcast track. But you must shorten them and readjust where they go.
Edit Artwork Double-click artwork in either the Episode Artwork well or the marker list. In the Artwork Editor use the resize slider to size the artwork. Drag the artwork so that the part you want to display is within the borders of the square. When you are finished, click Set. Preview – double click on the preview in the podcast track and a small window will appear that will let you see your podcast.
Share (Export) Before sharing, you might want to choose artwork to represent you Podcast. When you are done, under the Share Menu, send your podcast to Itunes or to disc. Set the compressor If you send to disc, make sure you know where it’s going! To export projects at the optimum volume level: Choose GarageBand > Preferences, Click Advanced. Select the Auto Normalize checkbox.