Download
1 / 27
270 likes | 390 Views
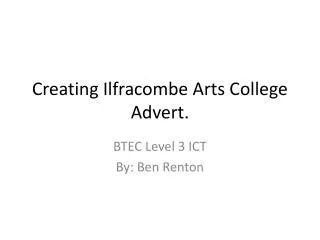
Re-Designing Ilfracombe Arts College Logo. By: Ben Renton. Preparation.

E N D
Re-Designing Ilfracombe Arts College Logo By: Ben Renton
Preparation To start off re-designing the logo I sketched some creative ideas on a piece of paper. After I had decided which one suited best I developed and analysed it. Once the designed had been analysed it included information like the font sizes, colour etc. This allowed another person to be able to re create the developed logo. To display how I recreated the logo I have use PowerPoint. To start off I needed to get the tools which would help me to create the logo on a program. I chose Photoshop to create the logo, this is because it has many features which will be needed and also I have used Photoshop in the past so I was used to working with it. Photoshop however didn't have all the tools I would need to create the logo therefore I had to download some more paint brush effects this is mainly due to the logo being made from paint splashes in the background. I downloaded the file from (http://naldzgraphics.net/freebies/free-downloadsplatter-paint-photoshop-brushes/) This allowed me to use more paint brush effects which would help me recreate the logo on Photoshop .
Step 1 – To start creating the logo I needed to generate a blank canvas on Photoshop to do this I opened Photoshop and click file then New. I named the canvas Ilfracombe Arts College Logo and chose suitable logo dimensions which was 600 pixels by 600 pixels this was a standard logo size for Photoshop. This also mean when the logo is shrunk to size the quality will be much better.
Step 2- To load up my downloaded paint brush effects I needed to click on the paint brush tool on the side panel then into size and settings to finally click load Brushes.
Step 2 (Continued) – Once these steps where followed a box will pop up asking where the directory is of the file. To make things simple when I downloaded the file I saved it to my desktop so I could easily find it when I came to this step. The screenshots shows what I did. Now the paint brush effects are an option from the list.
Step 3 – I Now had to create new layer for each paint splatter so i would be able to rotate them and transform them after. I created a new layer by going to the bottom right corner and clicking the create new layer icon. This now created a new transparent layer. I now selected the paint tool on the side panel and decided the size of the splatter which was just above 400 pixels. I then selected which splat I was going to use which was 1450.
Step 4 – I now selected the colour of the splatter which was light blue I did this by using the top right corner colour panel. After selecting the colour I positioned the splatter with the mouse and left clicked to create it. I know wanted to rotate the splatter. To do this I used free transform (Ctrl+T). This allowed me to rotate the splatter and resize it.
Step 5- After the transformation of the other splatter I now added another splat effect on the same layer. This meant the two splat effects acted as one. I followed the same steps as previously to create the second splatter.
Step 6- I now created another layer for a separate splatter. After the second layer was created I reselected the brush tool and a different splatter effect. After this I changed the colour with the colour panel to red. Lastly I positioned the splatter effect and left clicked to create it.
Step 7- I now have added several paint splatter effects by creating separate layers for each. After using free transform on each splatter I positioned the splatters In the correct place for the text to slot into.
Step 8 – I now have added small details to each separate splatter. I added more detail by putting more of the same coloured pixels around each splatter. This made the splat look more realistic for the final logo.
Step 9 – It was now time to add the text to do this I selected the text tool and selected the text style I wanted. I also selected the sized text I wanted and colour.
Step 9- I have now typed in the text I wanted and positioned it.
Step 9 (Continued) – I have now typed in the second part of text needed which is separate to the other text.
Step 10 – To make the text stand out more against the colours I needed to go into blending options. To do this I just right clicked the layer and then clicked on Blending Options. Here I Have now gone into blending options and added a Shadow and stroke effect which allowed the text to stand out much better.
Step 10 (Continued) – I have now went into the other texts blending options and added a different stroke effect to allow the text to also stand out.
Step 11- I know had to create a final border for the logo. To do this I selected the shape tool and then selected a rectangle as my shape. I selected the colour as black and then dragged with the mouse to position it.
Step 12 – The final step was to save the image for web use so I chose PNG. To start off I clicked file save for web. I then selected the type of file I wanted to save it as which was PNG-8. And then finally chose the directory I wanted to save it too.
Step 13- The logo was then uploaded to: www.surveymoney.com. Where I was able to collect feedback on the logo when users filled in a questionnaire. This would enable me to collect the feedback and finally manipulate the logo.
Questionnaire Results After the logo was created I uploaded the PNG file onto www.surveymonkey.com. This allowed me to ask a set of different questions to users. I ask 9 different questions which would give me an idea of what peoples general thought on the logo was and what improvement is needed to be made. 6 Different people took part in the survey which gave me a nice amount of results at the end. The following questions where asked with there results next to them: • Do you find the logo simple? 5/6=Yes • Does the logo appeal to you? 4/6=Yes • Would you recognize this logo again? 5/6=Yes • Is all the text clear to you? 2/6=Yes • Do you find the logo relevant to the school? 6/6=Yes • Do you find the colours used appealing? 5/6=Yes • What is the most appealing part to you? 4/6= Paint Splat, 2/6=Arty Style • What part would you improve? 4/6 = No Improvement, 2/6=Text Style • What would your overall rating be? Average = 8
Work Needed After the results It should that the text was not clear enough to the users. The overall improvement was also to improve the text style used. To start with the improvements I first observed the logo. The excellence for all is not a clear as the Ilfracombe arts college. The Ilfracombe Arts College text needs to have a brighter colour to be relevant to its surroundings and house style.
Step 14 (Improvement)- To improve the text style and colour I first selected the text I wanted to edit with the text tool. I then highlighted the text and chose a lighter blue which was more relevant to the school. To do this I clicked on the colour option top middle of the screen. I also selected the new text style in the top right. After this the text did not stand out a lot. To fix this I added a larger stroke effect. The result is on the next slide
Step 14- The Ilfracombe Arts College text stands out a lot more and the colour of the text is much more relevant to the school. This is because the school is painted light blue and the main House style is light blue. The next steps to improve the excellence for all will be on the next slide.
Step 14 (Continued) – The next step was to change the Excellence for All text so it is more noticeable. To do this I again selected the text tool and highlighted the text I needed to change. I Then made the text style the same as the other text and then changed the colour to a bright yellow to make it easier to read and notice. I also enlarged the text to have the same effect.
Now after the improvements have been made the text on the logo is much better. The colours used on the text is also much more relevant to the school and its surroundings. After the improvements had been made I then asked the same people if the improvements now meet there standards. 6/6 People answered Yes which is a big improvement in the schools logo. Before After
I finally then resaved the logo as a PNG file for internet use. V1 V2